How To Build A Colorful Garden Bench Using Pallets
When trying to make the nearly of your outdoor space, seating is a must on that listing. Nearly outdoor seating options can be costly, or difficult to find exactly what you are looking for. I am going to bear witness you a way to make a bench using woods pallets.
 View in gallery
 View in gallery
 The get-go step is to take autonomously the forest pallet. This was a pallet with some really strong and sturdy pieces of forest.
 View in gallery
 Using a saw zall (a electrical, power saw), and severing any pieces of the pallet that tin come apart. Most of this can be torn apart but just sawing where the screws are. If you do not have a saw zall, using a tool t pull apart the pallets is useful likewise. Annihilation to become the task done of pulling it all apart.
 View in gallery
 Taking on of the longer pieces of pallet wood and cut it in half, down the middle.
 View in gallery
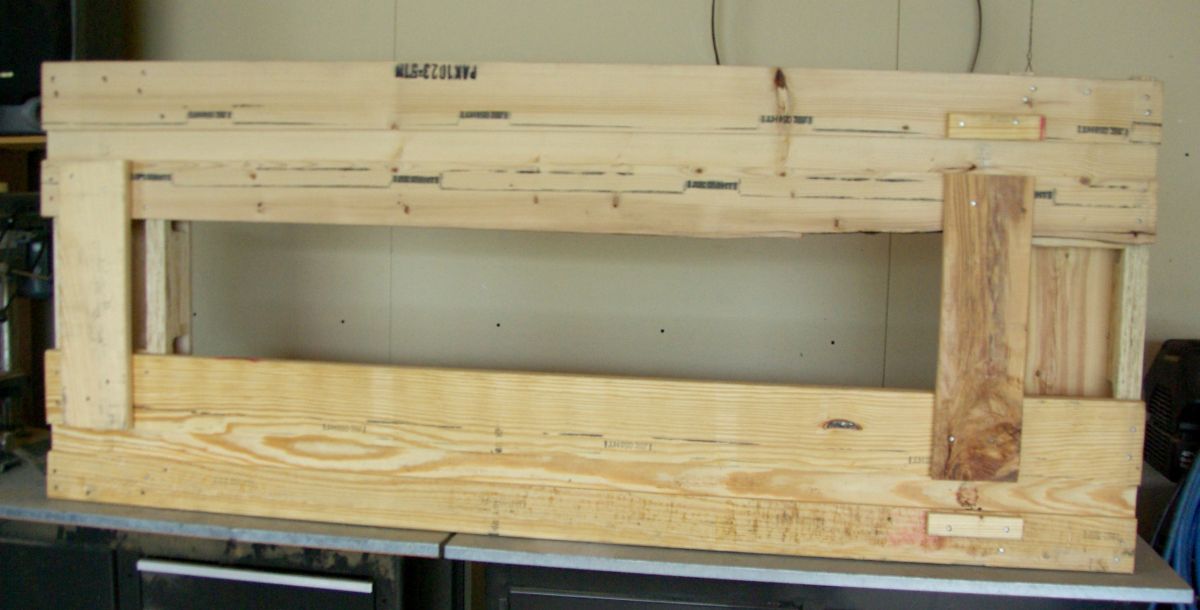
 This volition go the frame for the seat itself on the bench. Cut two long, and two smaller. This created the forepart, dorsum and sides to the bench. My bench is measuring 77 inches long, 21 inches wide and 18 inches tall for the legs. I chose this size bench mainly because it was the length of the longer wood from the pallet. In that location was no guessing with sizes. I likewise had a large place I was going to put it, then this could exist a picayune over sized and fit nicely.
 View in gallery
 One time the 4 pieces were cut, set them in a rectangle shape. With ends touching and creating the corners.
 View in gallery
 Using long screws and a automatic drill and screwing ii into each corner. The longer ones were needed to get through the wood.
 View in gallery
 With the frame made, it is fourth dimension to put in the pallets for the seat itself. I had another pallet, which I took apart. Lining upwardly the pallet planks to the length of the bench frame.
 View in gallery
 Set up the bench frame on the pallet planks. To come across how things line up.
 View in gallery
  View in gallery
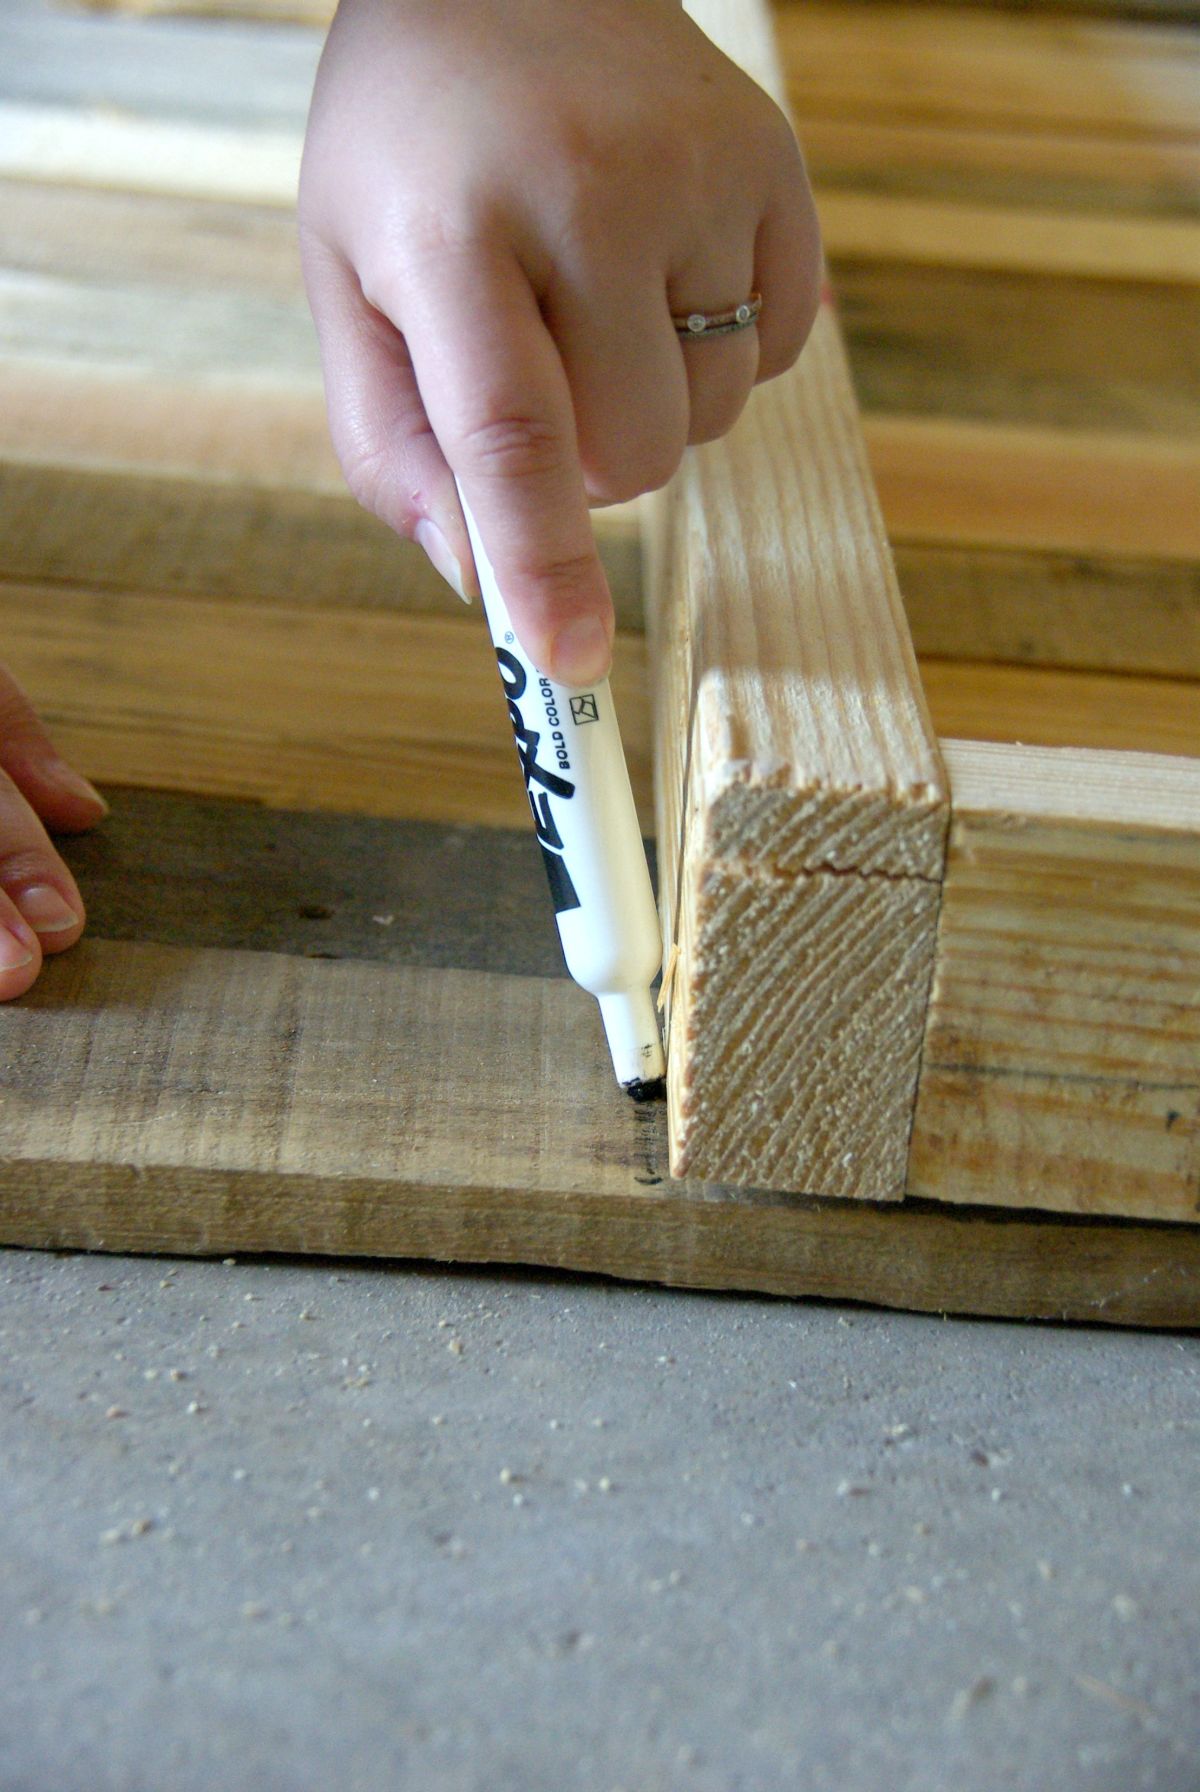
 Using a marker and tracing around the frame onto the pallet planks. This will show where the cutting needs to happen for each pallet plank to fit on the bench.
 View in gallery
  View in gallery
 One time all were marked properly. Cut, using a tabular array saw along the line on each of terminate of the pallet planks. Going 1 plank at a time.
 View in gallery
 Line them all upwardly to confirm that no boosted cuts need to be made.
 View in gallery
 If all fits and information technology the right length, nail into place.
 View in gallery
 Here is where using pallets can be a little daunting. Because they are pallets, the surface of them are rough. At that place is a lot of prep that needs to become into making them not be painful and too rough when sitting on them. The commencement step for us was softening the edge of the superlative with a router.
 View in gallery
  View in gallery
 Using a rounded bit for the superlative of the router. Running information technology forth the side edge of the bench top. This will give the feeling and appearance of a rounded edge.
 View in gallery
 This can be done with but sanding information technology as well if you exercise not accept a router tool. One time all 4 sides have been routered, it is time to sand the top. I should note that the routered edge appears uneven in places. Because I used pallet wood for this, not all widths, thickness of wood, and heights was the aforementioned. Having a somewhat imperfect border works really well for this and does not demand to be stressed as well much.
 View in gallery
 Sanding the acme of the bench is needed besides. This will permit people to sit on it with shorts or a sun dress without getting cuts from the wood.
 View in gallery
 I used a automatic sander for this, to move the task along. This can be washed with a regular piece of sand paper and just scrubbing abroad as well.
 View in gallery
 I but sanded off enough to give the surface a smooth finish when running my manus along it.
 View in gallery
 There are a few options for finishing off the expect of this bench. I am choosing to make this be super bright and cheery with a lot of dissimilar paints. Setting the bench top down. I purchased a number of bright paints. I just purchased sample sizes, since I would not need a lot of paint of each color.
 View in gallery
 Set them on each plank. There was going to have to exist a few repeats in color's for some planks. I was very mindful of making certain in that location was colour spread out. For example, no green right next to another greenish. Making the whole demote of unlike colors on information technology.
 View in gallery
 Using a paint castor and painting forth the wood grain. In this case it was painting in a up and down motion on each plank.
 View in gallery
 I did not use any painted tape. If in that location was a mess upward, using a newspaper towel or wash cloth chop-chop and wiping off the moisture paint did the trick.
 View in gallery
 For near colour'due south I merely needed to do one coat, the sanded seemed to do the trick of letting the pigment adhere to the wood nicely. I likewise selected all outside paints for this project. This will permit the paints to final longer. The location I am putting my bench gets a lot of straight sunlight and pelting. If you are putting yours in a covered area, or within, using interior paint would be fine. Once the paint was dry out, information technology was time to motility on with this project.
 View in gallery
 I am using a iv×4 for the legs. This will have a beefy look to the bench, and give the bench the needed back up.
 View in gallery
 Marker the decided height I wanted. Cutting with the tabular array saw along the marked line. I cut 4 of these to make the bench legs.
 View in gallery
 Fix the legs under the bench top to ostend that all are fifty-fifty.
 View in gallery
  View in gallery
 If all lengths seem to be right, screw into place. With the 4×iv being very thick, be sure to check the size of screw needed. The screw needs to exist able to go through the complete four×4. Otherwise it will not be help together correctly.
 View in gallery
 The bench is at present set to exist stained! I selected a outdoor, walnut cease for the staining of the legs and demote frame. Because this stain has both outside elements likewise as the clear protective coat in it, the stain is very thick. Dip the material into the stain.
 View in gallery
 Wipe the stain and cloth on the woods, going along the grain. With the thick consistency of this, using a footling less and then smoothing the stain into the wood is all-time. A piffling goes a long way with this. I did not even accept to re-dip the fabric very often. Just simply wiping and re-wiping the already stained area was enough to spread the stain out on the whole of the forest.
 View in gallery
 Merely i coat was needed for this stain to be good to go.
 View in gallery
 This demote is done! It is bright, colorful, and screams all things summer to me.
 View in gallery
 When planning a outdoor infinite, think of it as a retreat, a extension of your home. In making this experience as cozy every bit possible, dress information technology up. Add some fun and outdoor friendly pillows.
 View in gallery
  View in gallery
 Don't forget to add together some flowers, shrubs or other greenery. This can make the space feel well thought out and fully complete.
 View in gallery
 In doing this you are encouraging yourself every bit well equally your gusts to lounge, relax, visit, enjoy, and go together. Yous take a designated and comfy seating surface area.
 View in gallery
 When decorating for a outdoor space, using lots of fun colors and having them pop is a great idea. These colors could exist a chip much inside a abode, but exterior where information technology is streaming with color and life this DIY wood pallet demote fits right in!
 View in gallery
  View in gallery
 Source: https://www.homedit.com/colorful-garden-bench-using-pallets/
0 Response to "How To Build A Colorful Garden Bench Using Pallets"
Publicar un comentario