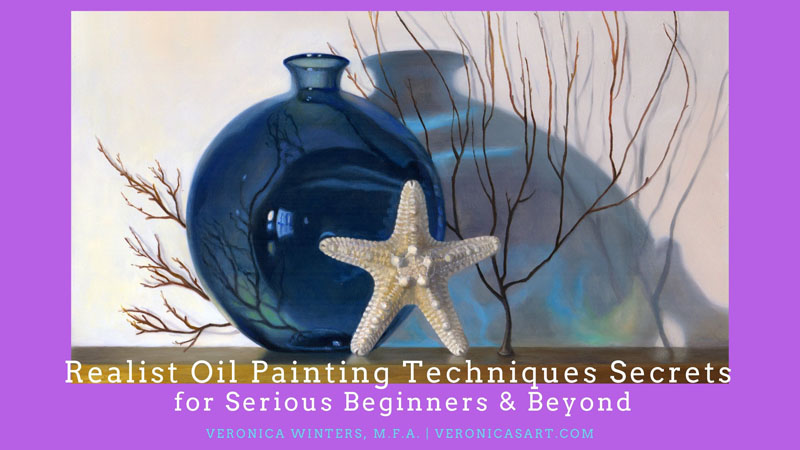
How to Draw White Pencil on Black Paper
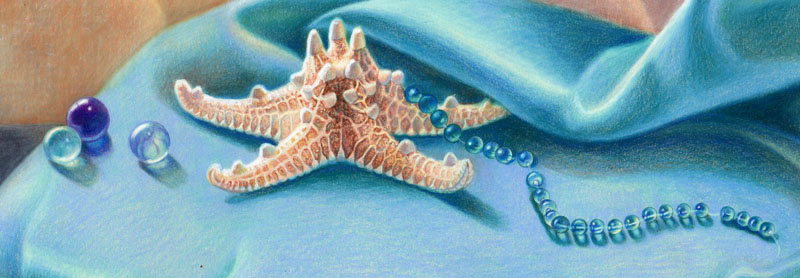
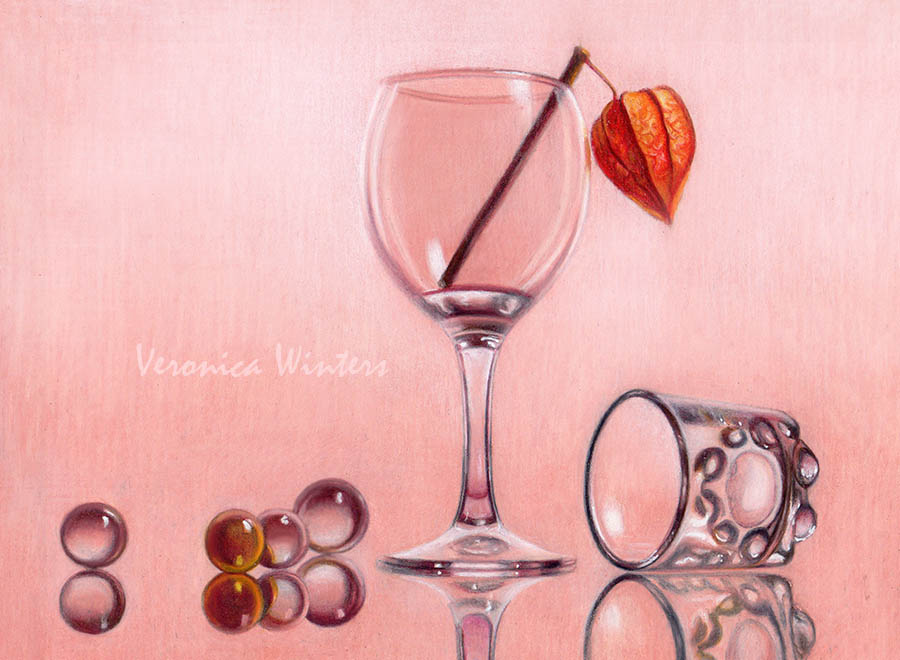
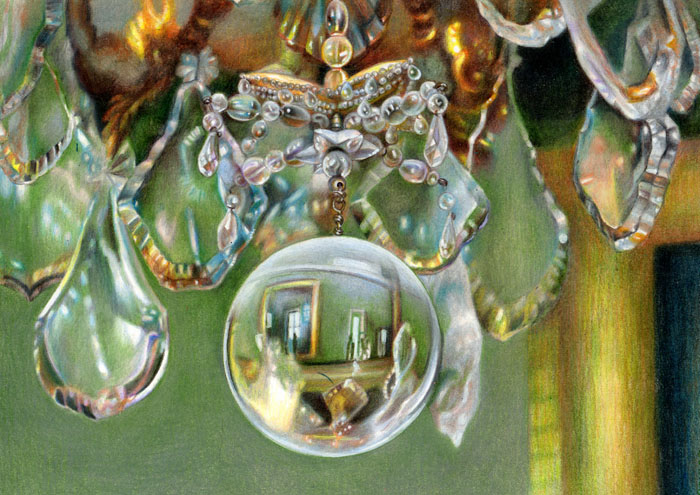
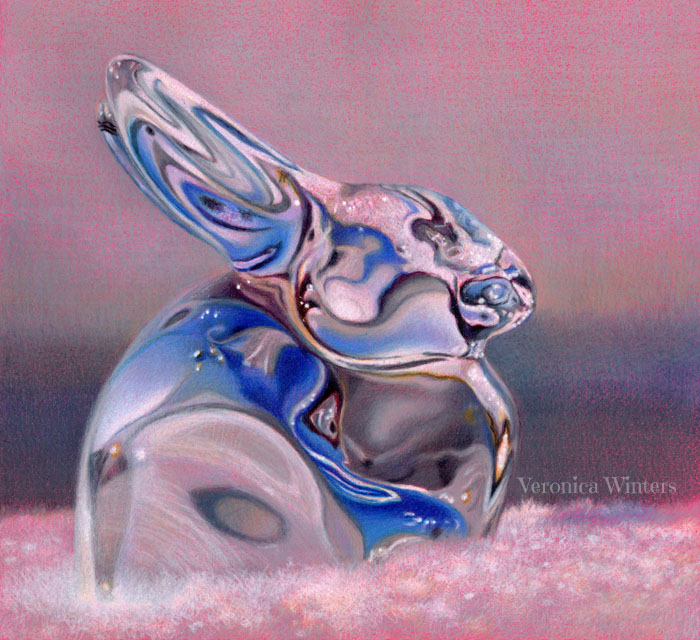
How to draw glass with colored pencils: 5 principles
In this post I'd like to explain the basics of drawing glass and other glass-like, transparent or reflective objects. At the end of this article you'll find additional resources such as my online video course and drawing demonstrations that give you more drawing ideas on how to draw glass.
Drawing crystal or glass or other reflective surfaces is not as difficult as you may think once you understand the basic principle behind it. Observation is key!
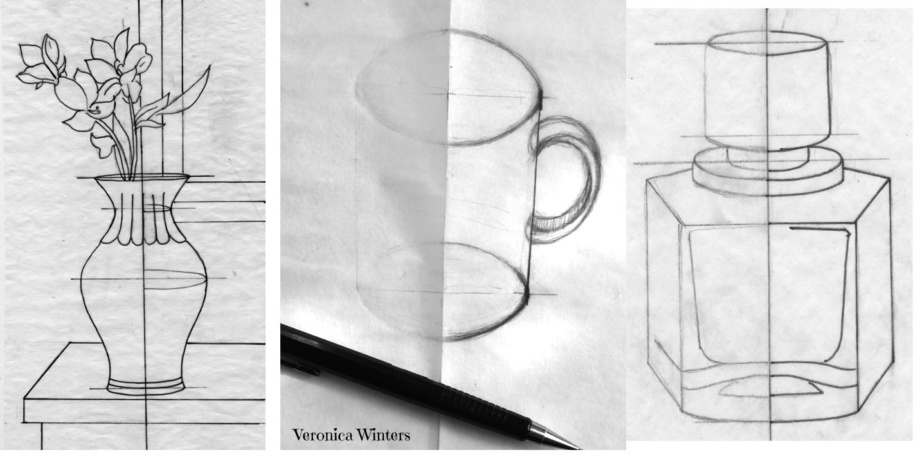
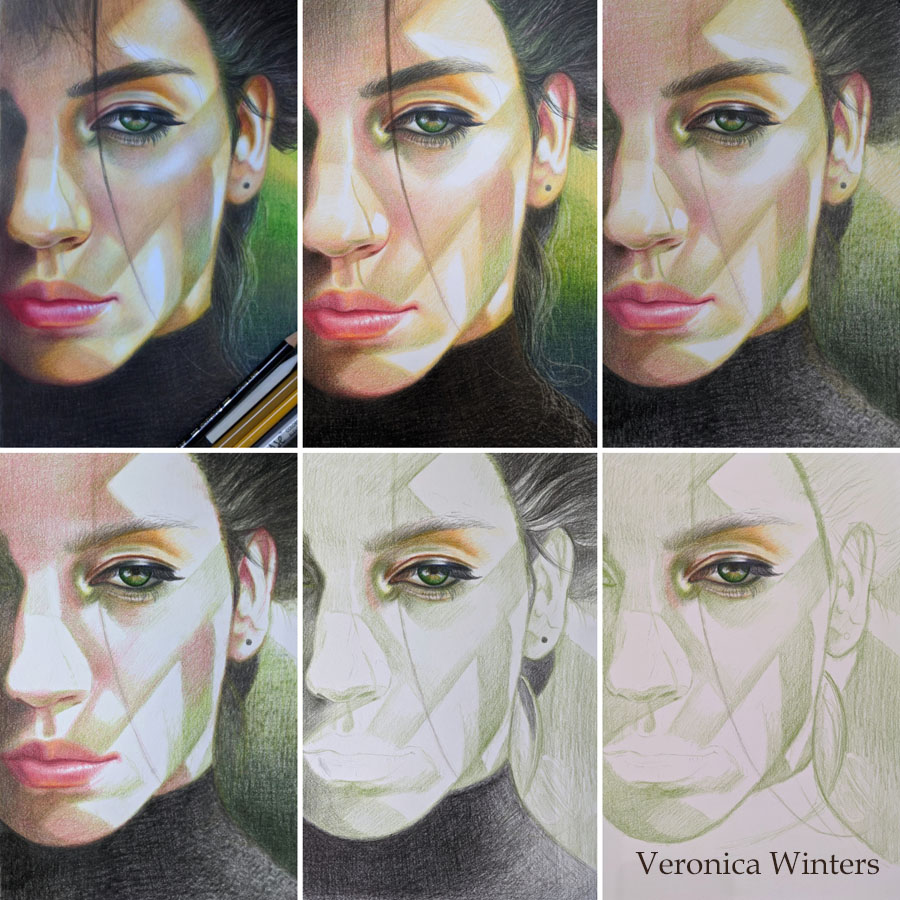
How to draw glass: principle #1 | Symmetry & ellipses
The accuracy of the shapes is the first important thing that's relevant to drawing any surface of object including drawing of wine glass. What this means is that when you draw a wine glass, the shape of the wine glass itself must be accurate with symmetrical sides and perfect ellipses, regardless of the surface you create in it. At first, it's a very laborious process to get the accuracy of shapes going but overtime you'll become a better draftsman, and it will be much easier to keep the shapes accurate, even and symmetrical. Therefore, always strive to achieve the most accurate shape (outline) for your drawing. The overall shape of the object mustn't be crooked.
How to draw glass: principle #2 | General pattern
In drawing of glass and crystal you should aim to break it down to the general pattern first and then fuss over the details. See if the crystal glass has patters with ray cuts, squares, etc. You want to be perfect at repeating this pattern as it curves around the form. Only after that you look at the abstract shapes and colors found within this pattern.
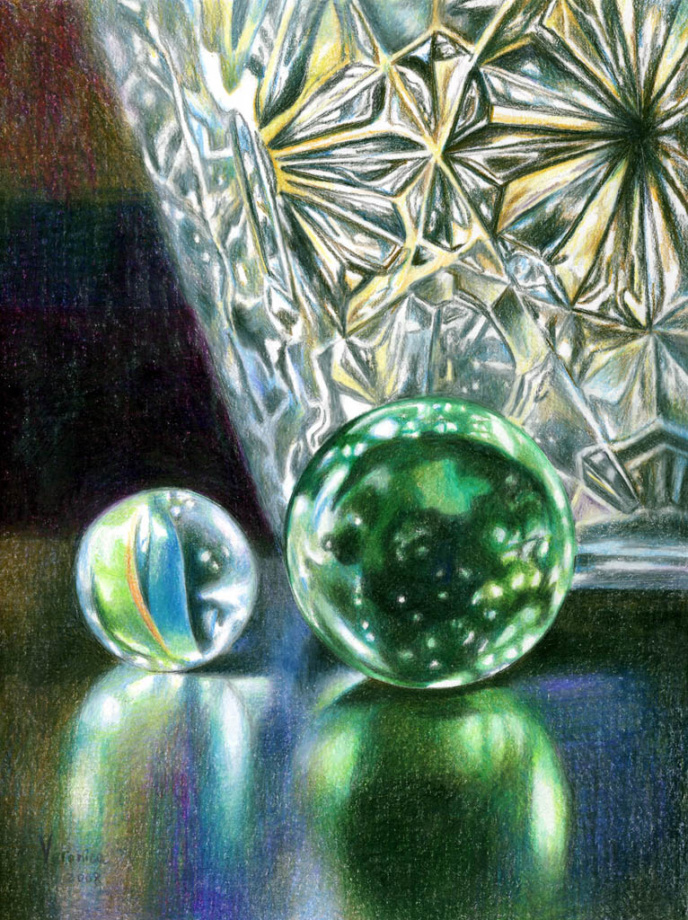
Your aim is to copy the largest shapes found within the design. The more sophisticated the pattern is, the more work you have ahead of you. Therefore it makes sense to either draw big, so it will be easy to put all the abstract designs you see in your drawing of glass, or pick a crystal vase with a very simple pattern.
Always try to find major abstract shapes within the vase or glass. Copy those shapes as precise as possible. Usually these are distortions, patterns or color movements either inside the glass or on its surface.
How to draw glass: principle #3 | Color behind the glass
Glass surface always reflects something behind and around it. So colors of the background must be very similar to the ones inside the wine glass/ glass vase/ glass object. Color intensity could vary though.

How to draw glass: principle #4 | Soft shading
Drawing of glass requires soft shading. Lines must be short not to flatten out the shape. To create volume in the glass vase or wine glass, pay attention how abstract shapes found on the surface curve and wrap around the object. Curve lines. Shade softly with short, overlapping strokes. Don't make lines and shapes inside the vase or glass too straight because it flattens out the object. But if you have a bottle with straight sides, these lines must stay nice and straight.
Always try to improve your shading by placing tight strokes and overlapping the strokes. Don't rely on fixing the unevenness of your shading with the blender. Rotate your paper to place the pencil strokes in the right direction.
How to draw glass: principle #5 | Blending
Glass has no texture. To imitate the glass-like surface blending becomes key. Sometimes you don't need extra blending if you shade with sharp pencils overlapping, crosshatching or moving in circles to create tight shading. Paper's texture has a lot to do with it. Paper must be smooth with just a bit of paper tooth to adhere colored pencil to. If your drawing paper has lots of texture, then blending is necessary.
To imitate the smoothness of glass I shade everything with heavy pencil pressure. Usually I don't use the blender. If you think your shading is not complete without additional blending, use Caran d'Ache full blender at the very end. Blend everything where you don't want to see any texture. Glass vase has no texture but flowers sticking out of it might have some texture, for example.
Putting it all together

Step back and look at your drawing of glass from a distance. Is the overall shape of the wine glass correct? Do you have enough variation in values ranging from light to dark? These are potential places to fix things. Is glass smooth with nice transitions? Do you have strong highlights?
Oftentimes the blending step is not the last one in drawing of glass. Additional layering may be necessary to tweak the values or to soften the edges. When the surface becomes too waxy and doesn't accept any more pigment, spray it with a fixative for dry media. Let it dry and try shading it once again.
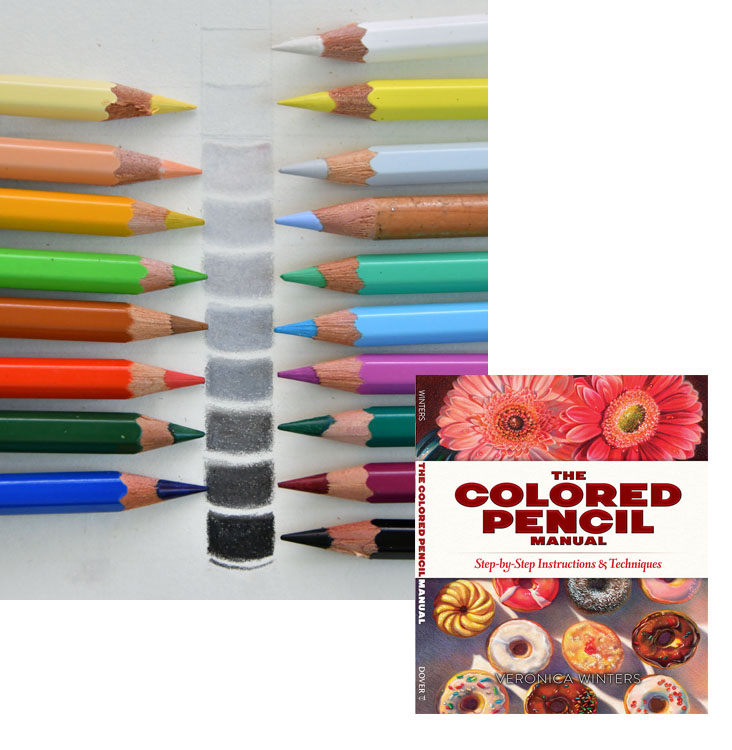
*The Colored Pencil Manual art instruction book: https://amzn.to/3fRpoEb
* How to Color like an Artist art coloring book: https://amzn.to/2LtH0Iq
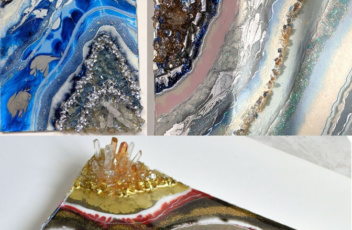
You know that I'm a realist artist but this lockdown was long. I felt drained of creativity, motivation, and inspiration to produce anything. As a result I began to experiment with other mediums in my studio hoping to revive my feeling of joy. For some reason it was difficult to find excitement in my 'regular' portrait painting and colored pencil drawing. So the idea was to learn resin art and fluid art painting techniques from scratch to combine them with my realist art in a new way. Here I'd like to share what I learned doing resin art (and the resin art supplies list at the end of this article).
1. Resin quality & variety
All resins are different in consistency and application. You have to try several different brands to figure out what works for you and your projects. For example, Liquid Diamonds is high-quality resin that runs like water. It's both good and bad for resin artists. It's good because you need much less resin to cover the surface. It also generates less heat as a result of thin application. (Not melting the wax in colored pencil as much due to less heat produced). It's not great because it can run over the edge really badly. The entire batch of mixed resin can potentially run off the surface through one small cavity present between the edge and tape.

Some resins have doming capabilities like Little Windows or KSRESIN. This is great to hold the edge and no so good cost-wise because you need to apply a lot more resin to cover the surface completely especially if you work in subsequent layers. Thicker resins tend to roll off the previous resin layer unless you have enough to cover the entire surface or you've done some sanding. And that's why it depends what kind of resin art project you do.
Each resin works great for specific projects and maybe terrible for others. I've done small jewelry pieces, small and large resin paintings as well as some geode art and large geode pieces. In my experience Little Windows mixes great and gives very few (if any) bubbles working small (jewelry and small craft projects). It's crystal clear, easy to mix and dome, and non-toxic! I didn't like it that much working large however because it likes to be poured all at once and left untouched. Otherwise it could leave strange patterns in the resin. Other resins like KSRESIN or Liquid Diamonds give me a chance to spread the resin around the panel and to manipulate it some to cover the surface without leaving any patterns in it.
2. Consider the scale of your project
As a result the scale of your project or the amount of mixed resin you need requires experience that no one can give you in a tutorial. Only by mixing the resins yourself and applying them in your varied projects you learn what works and what doesn't and how much mixed resin you need for a specific art piece.
One advice I can give you is to start small. Resin is expensive to waste it especially if you buy art resins. But most importantly working small cuts on your frustrations because a lot of things can go wrong working big (mixing not enough resin, falling dust, broken edge, uneven application, bubbles, etc). By working small you minimize your frustration on so many potentially frustrating problems!

3. Consider working time
Working time varies greatly in resins. Quick Coat Resin can start setting up in 10-15 minutes while KSRESIN has 45+minutes working time. If you don't add any powders or paint to the mixture, the working time is long enough to spread it around, torch, level it out and torch again.
In my experience, what I found cuts on working time greatly are high humidity levels, high room temperature and the amount of added pigments mixed into the resins. This becomes crucial to learn when you do large resin art pieces! Because resins can set up almost instantly having acrylic paint or mica powder mixed into them. They'll set up so quickly you won't be able to take them out of your cup! In general it's best to add just a little bit of pigment to resin for it to set up properly.
Also, if you make geode art you want some of your edges to blend more while others look hard. Working time and layering greatly affects what kind of edge you'll get between the colors.
Mixing Ratio
Resins have varied mixing instructions in terms of volume and time needed to mix both parts. You must follow mixing ratios written in the instructions for every new resin you use. Some resins have 2:1 mixing ratios and others have 1:1 ratio. Mixing time varies too and it's very important not to cut on mixing time. Spend as much time as necessary mixing the two parts into one and only after that add pigments/glitter/ powder into it and mix it some more. For example it takes 4 minutes to mix both parts of KSRESIN. Why is it important? You need to do it right to prevent having soft spots, cracking or uneven application.
If you use plastic cups that don't have precise measurements written on them, pick identical cups and measure the level you want with a ruler. For example I can measure and mark 1 inch from the cup's bottom. I mark both cups with a sharpie, pour equal parts of hardener and resin into those cups leveling resin out to that 1″ mark and then I take the 3d cup to combine these two together. If it's 2:1 ratio, you can't measure 2 inches vs 1 inch because the cup widens. So I use the same 1″ cup to measure it twice.
4. Bubbles
Bubbles. Yes those pesky bubbles happen naturally because you mix part A with part B and the air gets trapped in the chemical process of mixing the two parts. Resins are very different in the amount of bubbles they produce. Little Windows resin has very few bubbles that tend to disappear on their own, especially when you let it rest first and then blow some air by your mouth over the art. I never torched this resin and it came out perfectly even and crystal clear. Liquid Diamonds is not super bubbly as well.
You must get a small, culinary torch to work with most (if not all) resins because bubbles stay in cured resin for good and screw up the overall appearance of the finished piece. Some resins are very bubbly and there is no way around it but using the butane torch.

Picking and working with the culinary torch is tricky. I think that the construction of any handheld torch is about the same despite their difference in price. Based on the reviews I've read, all of them have similar flaws not working properly from time to time… ( Just read one-star reviews on Amazon to understand common problems associated with it). The amount of flame changes without changing the knob or it doesn't want to charge butane one day and does charge it just fine the next day.
Buy it. Work with it but be extra careful. The torch can burn the masking tape or other parts of art where there is no resin. Potentially it could burn anything around it or the cured resin in the previous layer…That's why I always use the lowest setting possible and I hold it far enough from the surface not to burn it. Also, I move my hand around the piece evenly without concentrating on any one area. When the resin is bubbly you can see how the bubbles disappear instantly torching them. Usually I repeat the process twice.
I have IDEACone Premium Butane/ Culinary, refillable torch. I don't think it's better or worse than others. It's just the one I got. Also, I buy Bernzomatic butane can at a local hardware store that has the most competitive price on it.
5. Tape
Watch what tape you use to hold canvas or panel edge. I find that cheap or generic masking tapes don't work the same way as Scotch masking tape does. Generic ones can stick to the surface for good. It's very difficult to remove it when the resin cures. You must apply heat (torch it) to take it off and when resin runs over and sticks to it, it often doesn't come off 100 percent. Also cheap masking tape doesn't hold the edge well and may let the resin flow over the edge/under the tape. I had this happen too many times! Scotch masking tape stays in place. It removes easily and rarely needs a torch.
Follow me on Instagram & Facebook
6. Dust, hair & cover
Whenever you work with resins, your space must be super clean and dust-free. Every tiny particle can land on the surface of curing resin to destroy the beauty of the shiny surface. You can't undo it and it ruins the glass-like appearance of the piece if something sits on it's surface permanently, It looks terrible when the dust settles right in the center of your artwork. To get rid of dust falling over your resin art, you need to find a cover for the art piece beforehand. So you can put it over the piece while it cures.
And this is when the scale of your artwork can kill you. Because the larger the piece, the more difficult it gets to apply resin perfectly. This includes mixing enough resin to cover the surface, to keep it dust-free, to mix just the right amount of resin to do colors, to pop the bubbles, to keep the edges clean, etc. Your clean cover must be large enough to protect the resin piece. I use plastic box covers, tin cans, and even Ziplock 15×20 weathershield boxes.
7. Yellowing
All resins yellow with time. Some have inhibitors to slow the yellowing process down. I've seen my resin projects yellow even when they were not exposed to the light at all. So not sure that not exposing it to the light fixes the situation. Yellowing could be a problem if you design your art piece that's supposed to be pure white or has cool color scheme and eventually becomes yellowish. But I find that when the surface is colored, slightly yellowed resin doesn't really change anything visually (because this color change is almost unnoticeable on colored surfaces). Cheap resins yellow very quickly and don't level out easily. KSRESIN Liquid Art Ultra UV Epoxy has UV-light inhibitors in them to yellow much slower with time.
8. Surfaces & molds
Work on sturdy surfaces like wood or canvas panels. Regular canvases bend, cave in and twist. Thus they're not great for resin application in general.
Molds are not made the same! Cheap ones give resins matte look and you have to either polish your resin piece or throw it out. Silicone molds designed specifically for art projects keep resin pieces very shiny when you take them out of the mold and you don't need to do anything extra to make them crystal clear and shiny. So whenever you shop for molds, read reviews first. I often go to Facebook groups to see discussions or to ask a question about resin. I love my jewelry molds from Little Windows store (links are below).
9. Varnish
Because I'm a follower of classical painting, I don't come from making craft projects although there are so many creative resin art ideas I want to explore!!! I wanted to make my drawings look more like paintings under glass with a touch of magic in them. So this is why I began doing resin art. If you decide to try to do something similar, you must protect your drawing with a varnish first. If you don't, it will change the color and tones of your art! The drawing even may disappear. When you apply mixed resin it generates heat and melts some wax in colored pencil. You must prevent it from a complete melt down. I apply several coats of synthetic spray varnish over my drawings outdoors before covering them with resin. My favorite is Grumbacher matte final fixative for pastel, charcoal & pencil (drawing). There is no need to varnish pieces made of resin from scratch. I think it's useful to varnish acrylic pieces before applying resin over the acrylic painting so there is no interaction between the art and the resin.

10. What if?
What if something goes wrong during pouring or resin set up? You could have uneven surface or lots of dust set up on the piece. Or the resin didn't mix properly and produced soft spots or cracks. Wait for it to cure 100%. Then carefully wet sand the surface with 600-800grit sandpaper. It will also give the new layer a better grip. I used 800 grit sandpaper to even out the surface twice on one piece. When you sand it, the resin becomes cloudy and it's nerve-racking but it becomes glossy once you pour a top layer of resin over it.
I recommend Imperial Wetordry sandpaper by 3M. I regret I didn't buy this tool sooner to sand my canvases. The sander is fantastic to have to even out the surface in minutes! I used Black & Decker 1/4 sheet sander that I bought at a local hardware store like Home Depot or Lowes.
After that you're ready to repour. Make sure your piece is leveled before repouring. I end up pouring on my table first but then I take the panel to the floor to cure overnight. High-quality resins level out well.
In conclusion, doing resin art is fun but it also can be very frustrating and expensive process to figure everything out on your own. Please start working small. Use high-quality resins. Learn how to mix and apply colored resins as well as how to use the torch. And happy painting!
Video
Resin art for sale
All resin art pieces are for sale. Email me if you're interested to buy something you see here. Or look at colored pencil gallery images to see available pieces, sizes, and pricing.
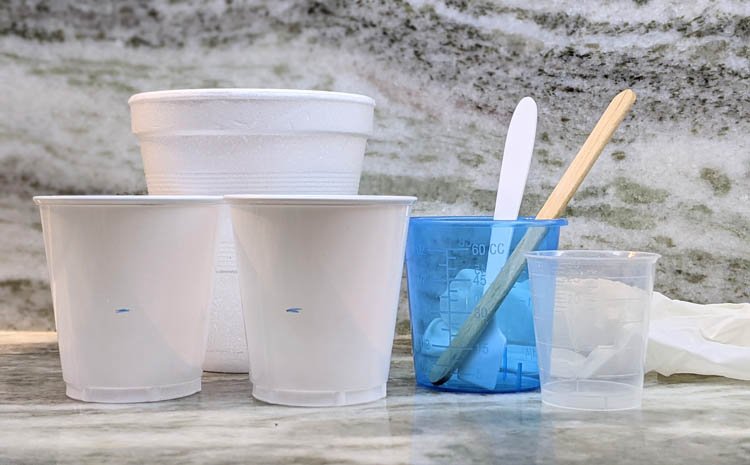
Resin art supplies list:
Shops:
Little Windows resins, quality resin molds & resin art supplies If you shop on this site I have a 15% off coupon for you. Enter beautifulart coupon code at check out. I like their molds. Resin art pieces come out brilliant clear.
The Epoxy Resin Store where you can buy a variety artist-grade resins that includes Liquid diamonds, KSRESIN, the artist's choice, Liquid Art Ultra UV Epoxy and many more!
Resins on Amazon:
Handheld Torch: IDEACone Premium Butane/ Culinary, refillable torch
Bernzomatic butane can ( the cheapest price is at Lowes)
Pinata color rich gold/silver alcohol inks make fantastic, rich gold and silver colors!
Imperial Wetordry sandpaper by 3M
Black & Decker 1/4 sheet sander
Scotch masking tape
Gorilla glue gun and glue sticks
Mixing cups and sticks
Disposable gloves (buy the ones that sit tight on your hands! It's a messy process).
Grumbacher matte final fixative for pastel, charcoal & pencil
Wood panels:
You must have gessoed surface (white ground that you see on panels) to do resin art and acrylic paintings. So you either buy white wood panels or you apply gesso over the wood panels.
I'm an amazon affiliate.
Online Art Classes
Tired making the same mistakes? Take an art class in your pajamas!

Portrait drawing in colored pencil: drawing ideas to try
Portrait drawing in colored pencil is infinite fun because learning never ends. There are numerous ways to be creative and to capture unique personality. To create beautiful portrait drawings artists study more than the human anatomy. It's about seeing and capturing the human soul. It takes something magical or divine to happen drawing on a 2D surface. In this article I'd like to give you some drawing ideas and to share a few tips how you can start creating your colored pencil drawings.
How to get started in colored pencil drawing…
First thing is to study the human anatomy of course. Get yourself a couple of books on human anatomy and proportions.

Always check face proportions and tilt of the head that determines the line up of all the features. I make light lines to place the eyes, nose, and mouth on those lines.
Basic art supplies I often use:
- Transfer paper: white transfer paper: https://amzn.to/3gAaPFo or https://amzn.to/2XMdBPg
- Panels: Ampersand gessobord: https://amzn.to/2WWioP1
- Mono eraser: https://amzn.to/3e6SHRw
- Kneaded eraser: https://amzn.to/3gaZWtH
- Colored Pencils: Prismacolor 36: https://amzn.to/2LUheNS | Pablo 30: https://amzn.to/2A2UhFk | Polychromos: https://www.kqzyfj.com/click-9265447-13717235?url=https%3A%2F%2Fwww.dickblick.com%2Fproducts%2Ffaber-castell-polychromos-pencils%2F%3FclickTracking%3Dtrue%26wmcp%3Dpla%26wmcid%3Ditems%26wmckw%3D20561-0369&cjsku=20561-0369
- Drawing paper: Colored paper. You must pick the SMOOTH SIDE to draw on this one: https://amzn.to/2yr59wf and https://amzn.to/2Xn0pAr | On Amazon Canson colorline, clementine hue: https://amzn.to/3bUkUJP , On Amazon Canson colorline, turquoise: https://amzn.to/3d0MQwU | At Dick Blick Canson colorline (a wide selection): https://www.tkqlhce.com/click-9265447-13717235?url=https%3A%2F%2Fwww.dickblick.com%2Fproducts%2Fcanson-colorline-art-papers%2F%3FclickTracking%3Dtrue%26wmcp%3Dpla%26wmcid%3Ditems%26wmckw%3D11273-5232&cjsku=11273-5232
- Spray varnish for drawings: https://amzn.to/2X0GEzL | DON'T buy krylon spray!
The best way to start drawing in colored pencil is to limit your color scheme to just a few colored pencils or work in black-and-white at all to train yourself to convert colors into values. This is not an easy task and it does take practice. The drawing becomes more realistic when you achieve having 5+ tones in your portrait, ranging from deep darks to pure highlights. It took me years to grasp this concept and I'm still learning this concept every day. 🙂
To see the values (or tones) on your model convert your pictures to grey scale using the software (I have the most affordable version of Photoshop that I bought online on their site). Then take grey or other mid-toned paper to draw on it.
Everything that's dark to very dark is shaded with black colored pencil and the highlights are marked with white. By controlling your pencil pressure, you adjust the brightness or darkness of your values. I picked this colored pencil technique up by looking at the old master drawings that were figure studies for the most part.
When you draw on white paper, you must think of your highlights in advance. Reserve wider spaces for the highlights that you might need because you'll shade up to those pure highlights with some very light colors to make soft transitions into the light. The hightest lights MUST stay free of any shading on white paper to have impact.
How to control light, color & values
Light
All three parameters – light, color and values are important to understand because that's how you get this 3D illusion on paper. The most important element is to see the light direction. No one taught me this when I got started in art, went to colleges and got my degrees. It considerably delayed my improvement until I grasped this concept at one of the classes held by Michael Grimaldi in New York. It's very simple. Study the light direction and where it comes from passing through your subject. Usually all the lights tend to accumulate on one side of the face "hinting" at the light direction.
When the light is soft, diffused and not directional it gets more challenging to see the changes in skin tones and shapes of the shadows. Although such light gives gorgeous skin tones, it's much easier to start drawing portraits where you can see definite lights and shadows! In my colored pencil drawing video course you get ideas and tips how to pick the pictures, pose models and photograph them in various lighting conditions. I also complete demonstrations picking pictures that have good color, clarity, subject and composition.
Color
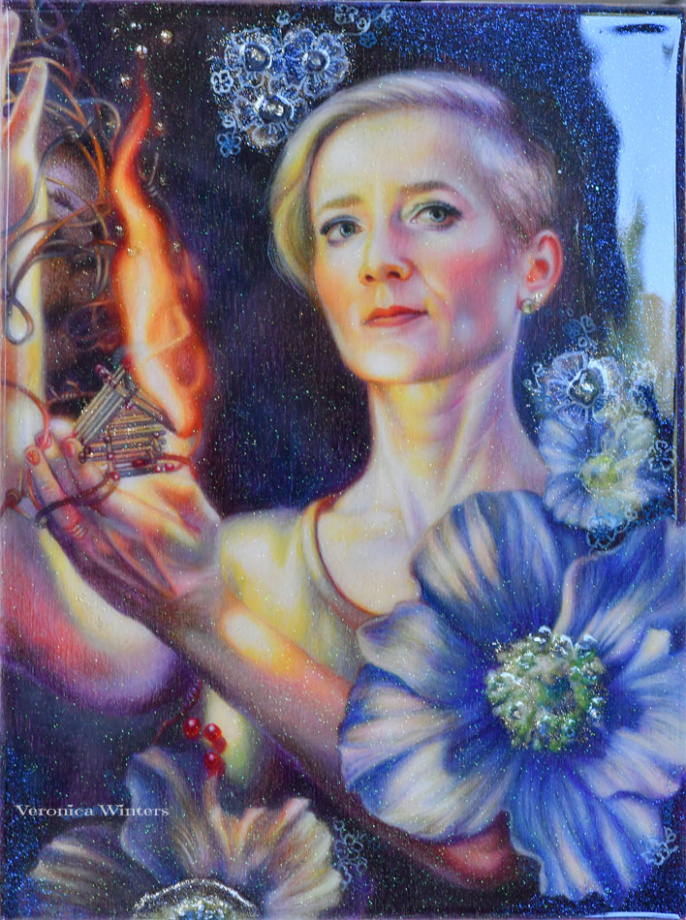
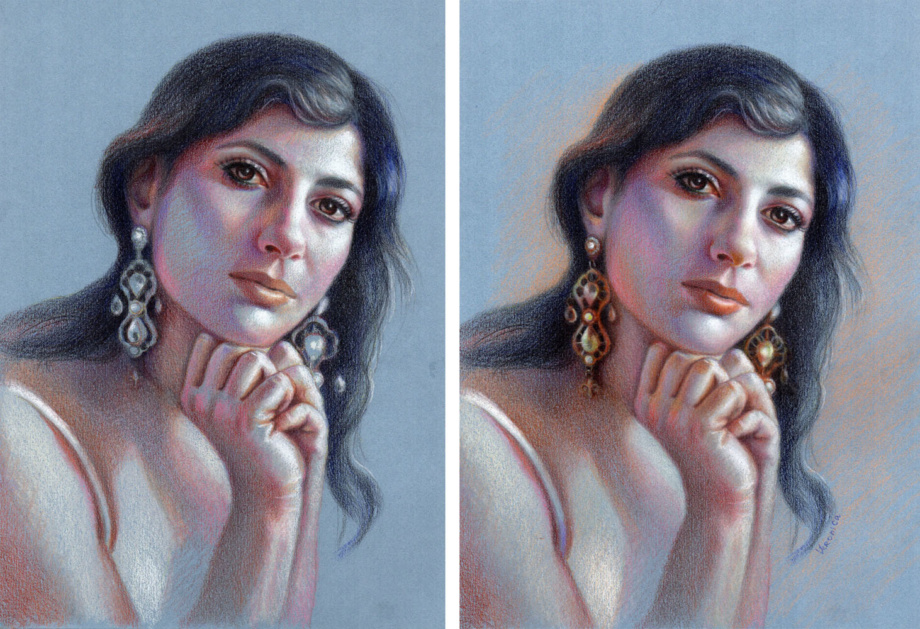
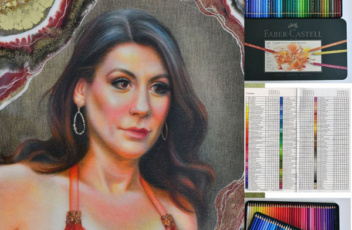
To understand how the color works, limit your colored pencil choices to 15-20 at the most. Rather understand how one color (red) can have lots of variations in color tone (very light to very dark) and color temperature (warm/cool). Because we shade in layers with various pencil pressure we can use 2-3 reds to describe a variety of tones in different parts of the drawing. For instance in this portrait I used just 2 reds – light cadmium red and pink carmine and 2 pinks – dark flash, light flash (Polychromos). I placed red in the ear, mouth, cheeks, neck and even the hair. I adjusted my pencil pressure to get a variety of tones.
Values

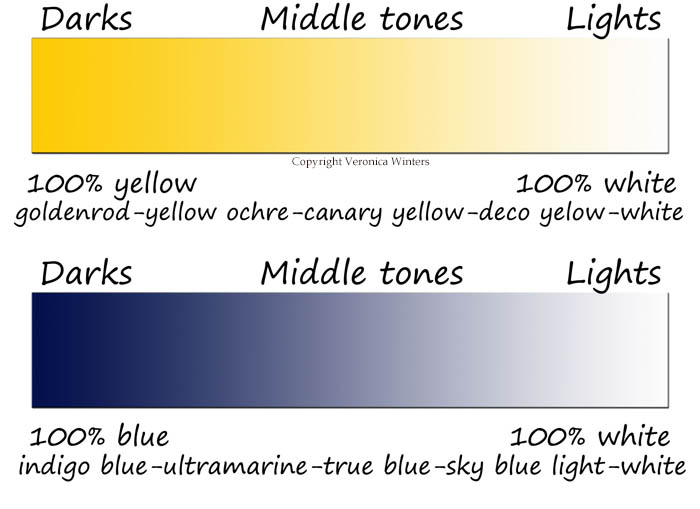
To get better understanding of values, do this fun exercise every time you start a new project. Step back from your reference photo to see it from the distance. You don't look at the details anymore. It's like looking at objects without glasses when it gets a bit blurry. Now pay attention to where you have the strongest lights, darks and middle tones. These are abstracted shapes on the face, not the features like eyes or lips. Most students shade portraits with many colors arriving at the image with no contrast. Everything becomes the middle tone. Start by finding at least 3 values- highlights, deepest darks and midtones. Leave the highlights uncolored if you draw on white paper.
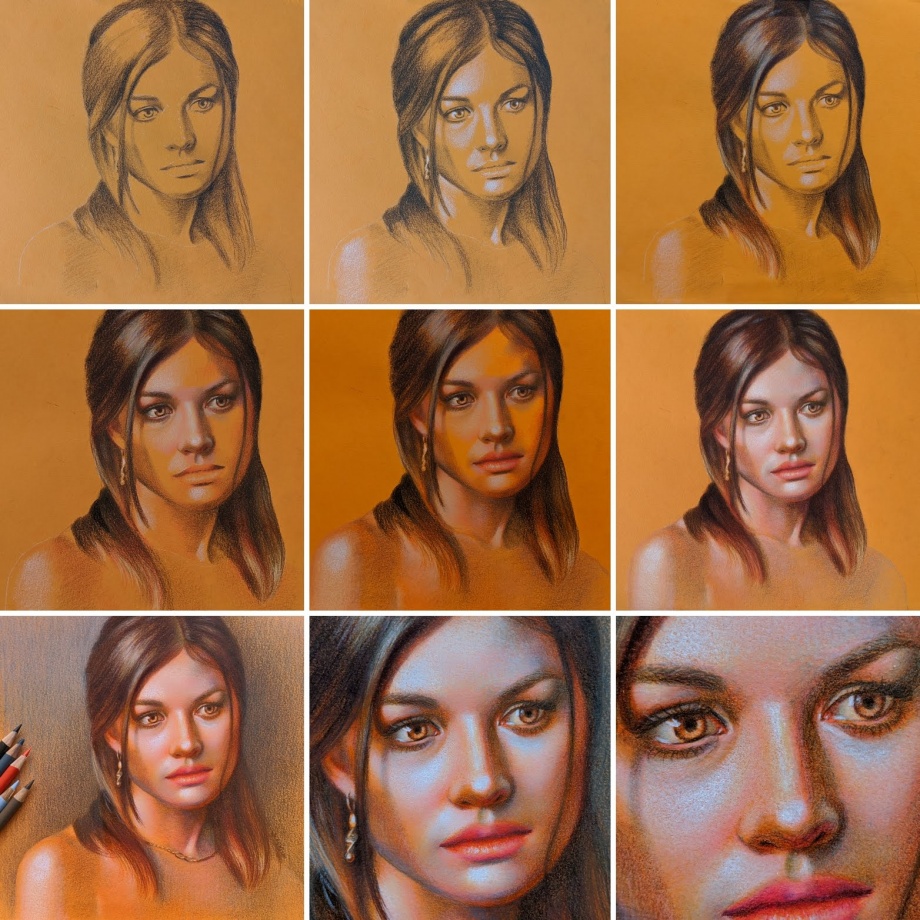
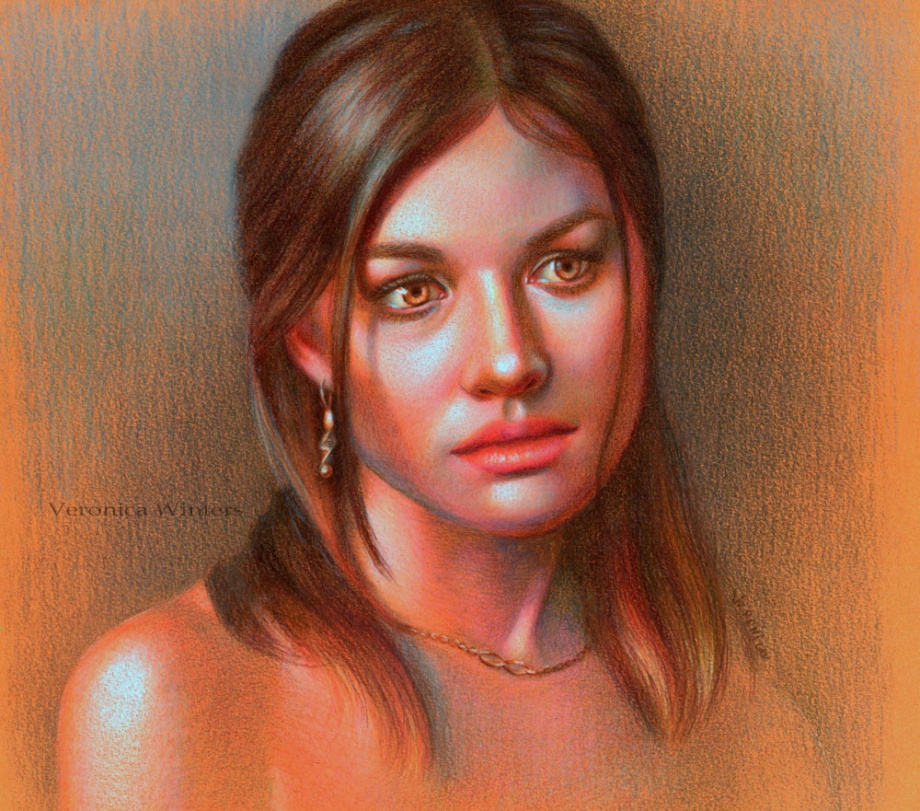
How to draw a portrait in colored pencil on colored paper
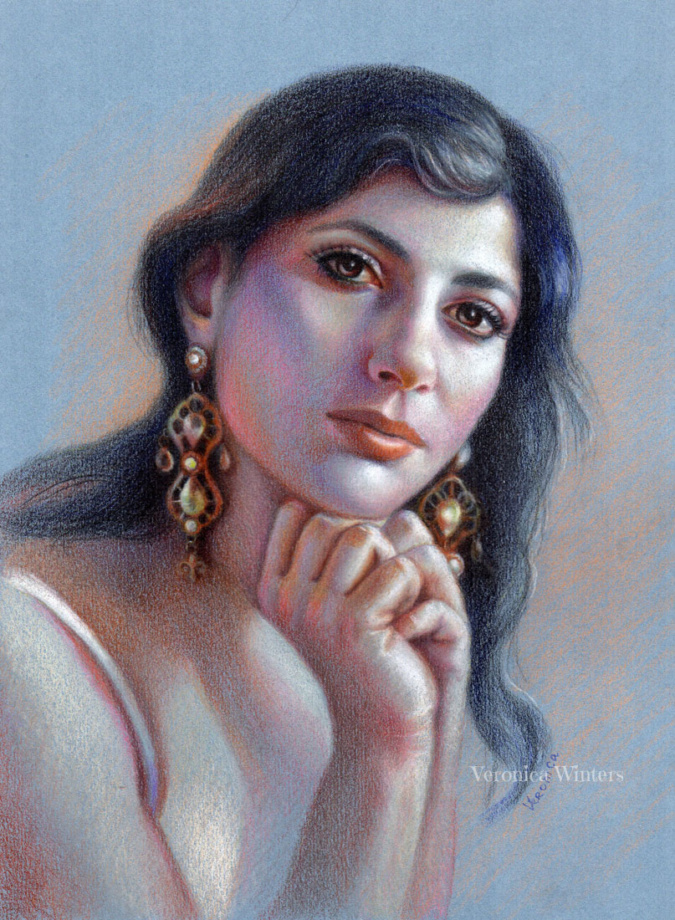
I often draw on colored paper instead of using the white one. Main reason is that it takes much less time to shade everything because colored pencil drawing is a very time-consuming process. My second reason is that I love to push colors to the beautiful extreme using few colored pencils. The result is always surprising even for me 🙂
Art supplies:
While I used Cezanne colored pencils, I don't endorse this brand. Rather use my basic color chart to match your colors with mine.
I used Sarah Transfer paper to transfer the image.
I used Canson Mi-Teintes Pastel drawing pad, 9×12, assorted colors pad. I used blue sheet of paper, smooth side. I strongly recommend to buy a range of colored papers from Canson Colorline brand instead. These are 19×25 sheets of paper that can be subdivided to many pieces to create drawings. They're much smoother and more vibrant than the pastel paper.
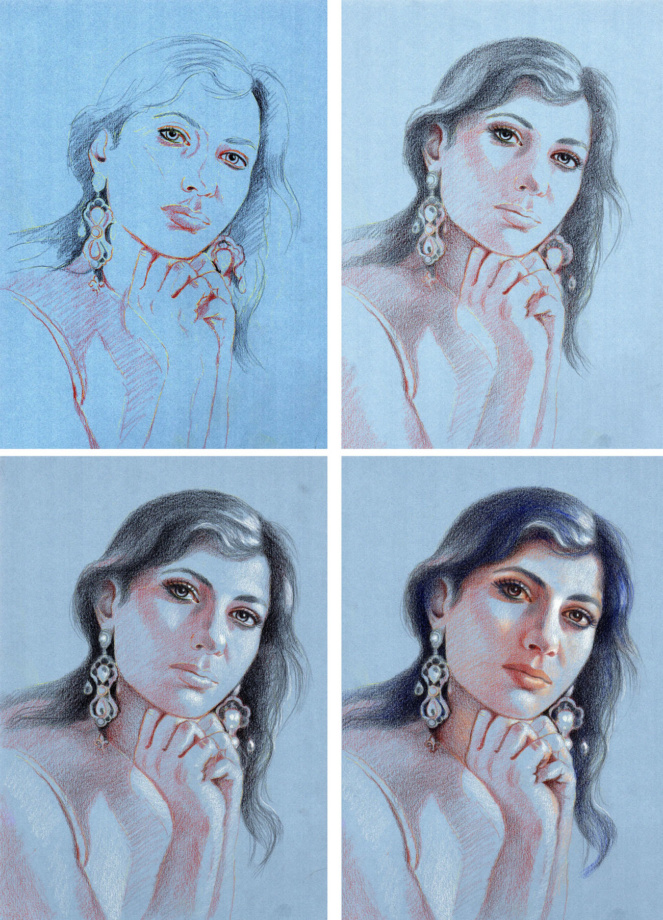
Step1: Use your favorite way of transferring the image onto your drawing paper. Don't sketch with graphite pencil on your drawing paper because the surface must be very clean to accept colored pencils. If you have lots of pencil work on drawing paper and layer colored pencils over it, the colors look dirty and lose luminosity, especially when you work with light colored pencils. So I like sketching on my sketch paper and then transfer the outlines onto my colored paper using off-white transfer paper. In this image you can still see the transfer lines. After that I place the darks.
Step2: I work on the division of space between light and dark using just two colored pencils. I create volume by placing shadows first.
Step3: I mark the highlights with white colored pencil (Prismacolor premier).
Step4: I begin to introduce color, shading the hair and eyes with deep blue hue. I also find the light color to shade light areas around white highlights.
Step5: This is the fun part. I bring more colors in finding subtle differences in color, temperature and tone both in the shadows and the lights. I always overlap colored pencils considerably. It allows for smoother transitions and darker tones to occur.
Step6: I didn't use a solvent or blender. Rather I used a very heavy pencil pressure to get rid of the paper's texture. I used the same colors shading the earrings as I used on her skin. What's different is the pencil pressure that makes colors look much darker. Also I outlined some of the edges in the earrings, which I didn't do shading the skin (trying to keep it soft and smooth). I worked on the face the most making it a focal point, so everything else has a sketchy look.
How to create emotional portraits
To create emotional portraits in colored pencil drawings requires a bit of magic to happen. But it's also about picking the right model that speaks to you. You can be attracted to certain features or light or color. Intensify one of those parameters to get unusual result. I often play with hues drawing on colored drawing papers. I also make a very big emphasis on the expression I see in the model's eyes.
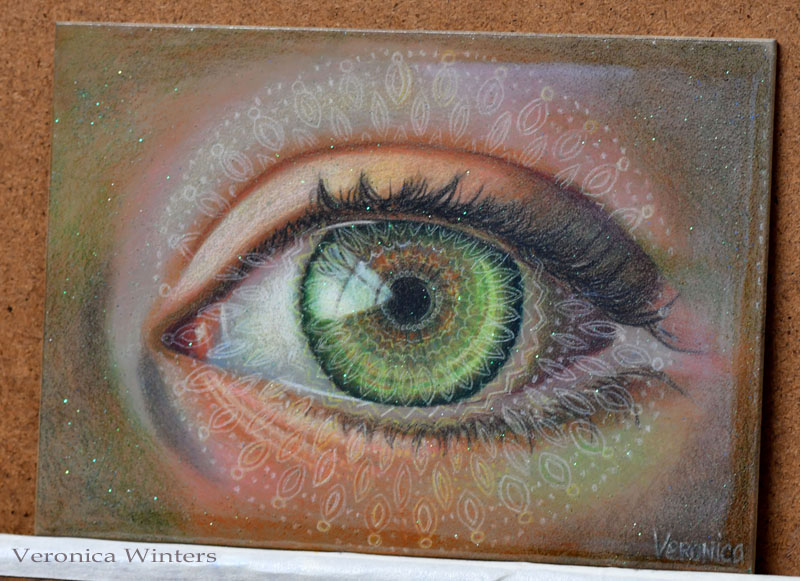
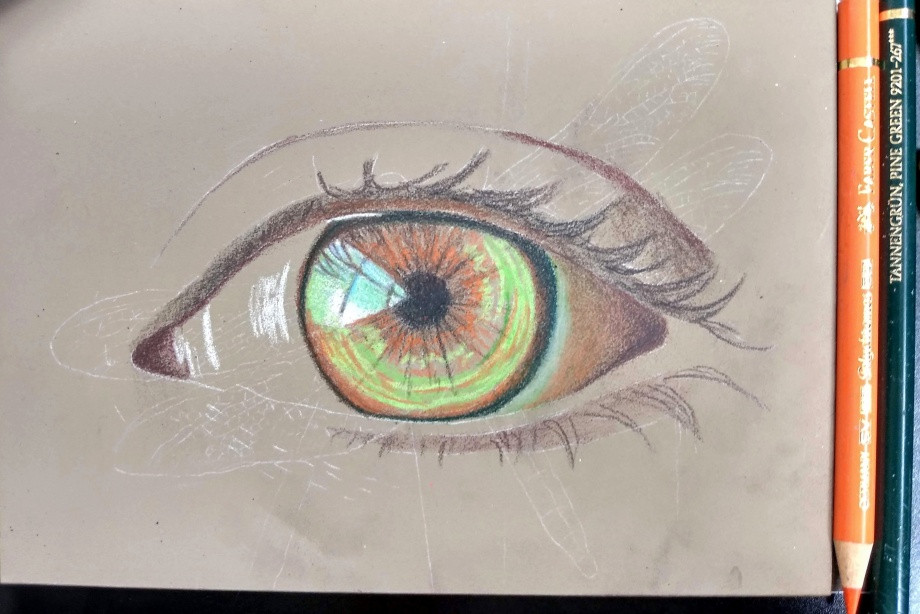
How to draw an eye in colored pencils on colored paper
It's difficult to draw the entire portrait at once. So to practice, you can start drawing facial features separately to gain understanding how light shapes the form. Draw the eye, nose, lips, ear separately many times. Below you'll find an example of me drawing the eye in colored pencil. I often use colored paper because it speeds up the process and lets me create super vibrant colored pencil drawings. A lot of greys look like blues on bright drawing paper. Here I used Canson Colorline Fuschia drawing paper, Prismacolor white+ Cezanne colored pencils. I don't think you should buy a specific brand of colored pencils, rather use the color chart to see and match your colored pencils to mine. White colored pencil must be very soft to give strong highlights ( I often use Prismacolor & Luminance whites). Beware that cheap colored pencils have very weak whites… These are basic colors and a few more hues may have been used in this demo.
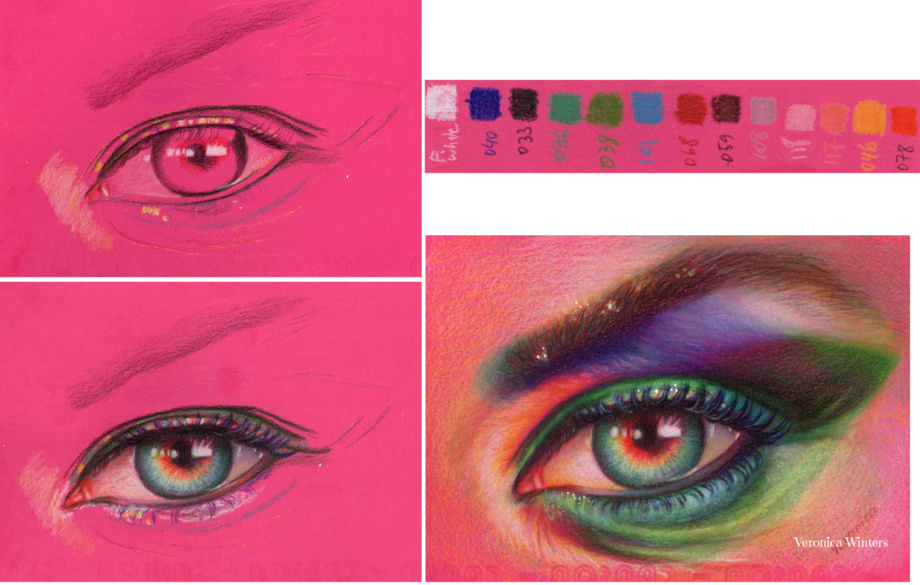
Step 1: Transfer the image using your favorite method. I never sketch my outlines on colored or drawing paper because it needs to be very clean to retain color. I use a semi-transparent sketch paper to do my sketching and then I transfer the perfected outline onto my drawing paper. I decided to rotate my reference photo in order to draw it with a different direction. I map out the shape with black and place the highlights.
Step 2: I draw the the pupil & iris. The pupil must be in the center of the eye and not super black. So I add some brown into it. I use specific strokes to shade the area inside the iris. These strokes go out radially. The top part of the eye always has a shadow cast from the upper eye lid. If you don't place this shadow, the eye is going to stare at you.
Step 3: Basically, I look at my reference and add values. I take a mix of dark green and brown to place the darkest values in the eye creases first. The eyebrow consists of flat shading in brown first. I add greens and grays over this flat shading with short, directional strokes, following the eyebrow's rotation.
I hope that this short demonstration encourages you to draw on colored paper!

I'm an amazon affiliate.
Check out other useful articles here:
- http://veronicasart.com/colored-pencil-painting-made-easy-basic-drawing-papers/
- https://veronicasart.com/koh-i-noor-colored-pencils-drawing-paper-review/
- http://veronicasart.com/colored-pencil-drawing-on-uart-paper-pros-and-cons-to-consider/
- https://veronicasart.com/how-to-improve-art-skills-by-taking-great-pictures-for-colored-pencil-drawing-and-painting/
This article is for more advanced artists who would like to experiment with colored pencils some more. Here you'll find new ideas for your art. In this article you'll find some information how I combine colored pencil drawing with glitter and resin. I also explain my idea behind this drawing.
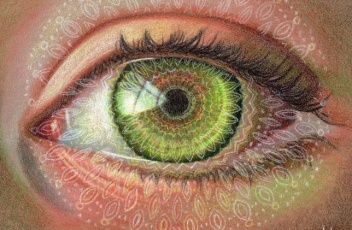
How to draw an eye in colored pencil
Inspiration for this drawing
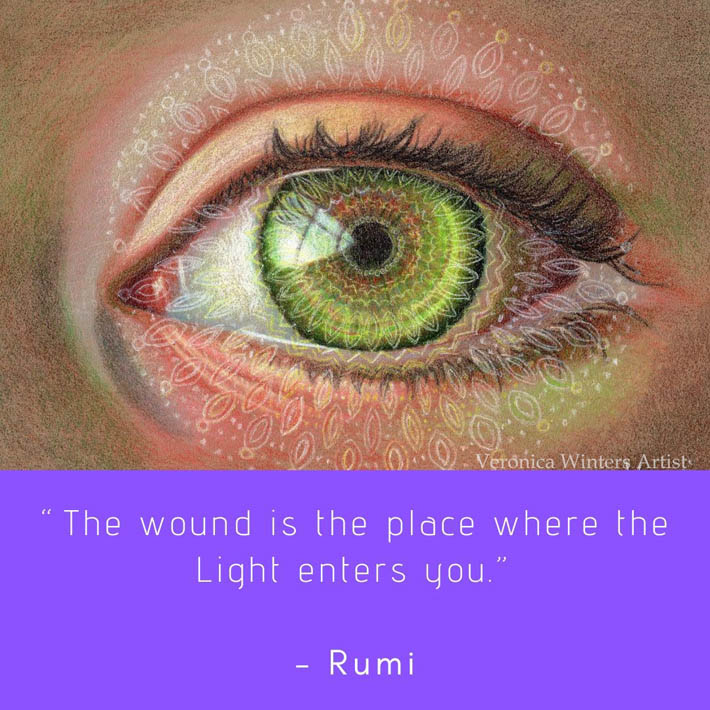
To purchase this drawing, go here.
Basic art supplies for this project
Basic art supplies I often use:
- Transfer paper: white transfer paper: https://amzn.to/3gAaPFo or https://amzn.to/2XMdBPg
- Panels: Ampersand gessobord: https://amzn.to/2WWioP1
- Mono eraser: https://amzn.to/3e6SHRw
- Kneaded eraser: https://amzn.to/3gaZWtH
- Colored Pencils: Prismacolor 36: https://amzn.to/2LUheNS | Pablo 30: https://amzn.to/2A2UhFk | Polychromos: https://www.kqzyfj.com/click-9265447-13717235?url=https%3A%2F%2Fwww.dickblick.com%2Fproducts%2Ffaber-castell-polychromos-pencils%2F%3FclickTracking%3Dtrue%26wmcp%3Dpla%26wmcid%3Ditems%26wmckw%3D20561-0369&cjsku=20561-0369
- Drawing paper: Colored paper. You must pick the SMOOTH SIDE to draw on this one: https://amzn.to/2yr59wf and https://amzn.to/2Xn0pAr | On Amazon Canson colorline, clementine hue: https://amzn.to/3bUkUJP , On Amazon Canson colorline, turquoise: https://amzn.to/3d0MQwU | At Dick Blick Canson colorline (a wide selection): https://www.tkqlhce.com/click-9265447-13717235?url=https%3A%2F%2Fwww.dickblick.com%2Fproducts%2Fcanson-colorline-art-papers%2F%3FclickTracking%3Dtrue%26wmcp%3Dpla%26wmcid%3Ditems%26wmckw%3D11273-5232&cjsku=11273-5232
- Spray varnish for drawings: https://amzn.to/2X0GEzL | DON'T buy krylon spray!
Art supplies used in this demo:
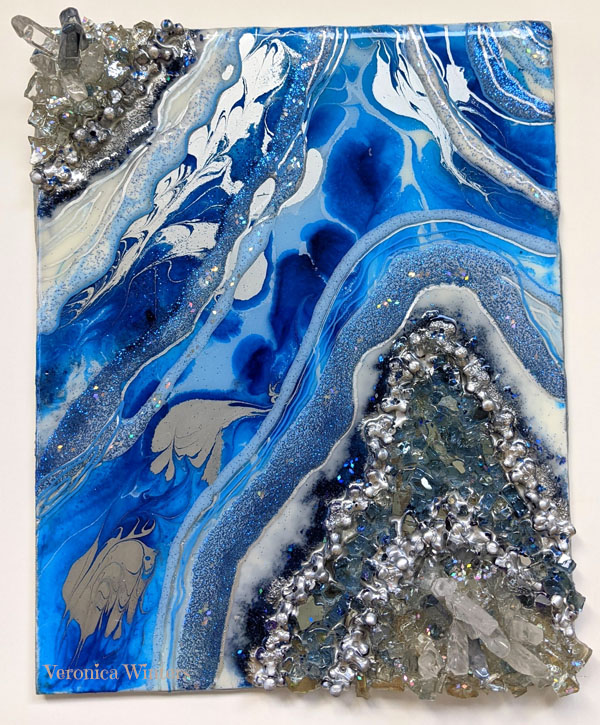
Ampersand pastelbord, Polychromos with a few Prismacolors, Golden Mediums GAC-100 acrylic polymer, Brilliant Resin by Little Windows, some super fine glitter bought at Wal-Mart.
Like my page on Facebook.
Colored pencil drawing in steps
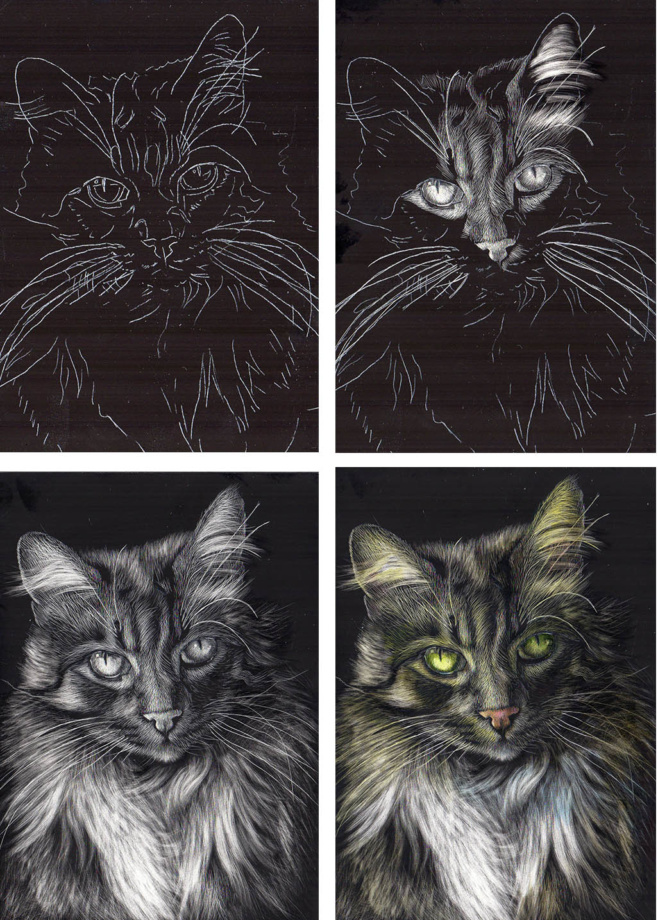
Step 1
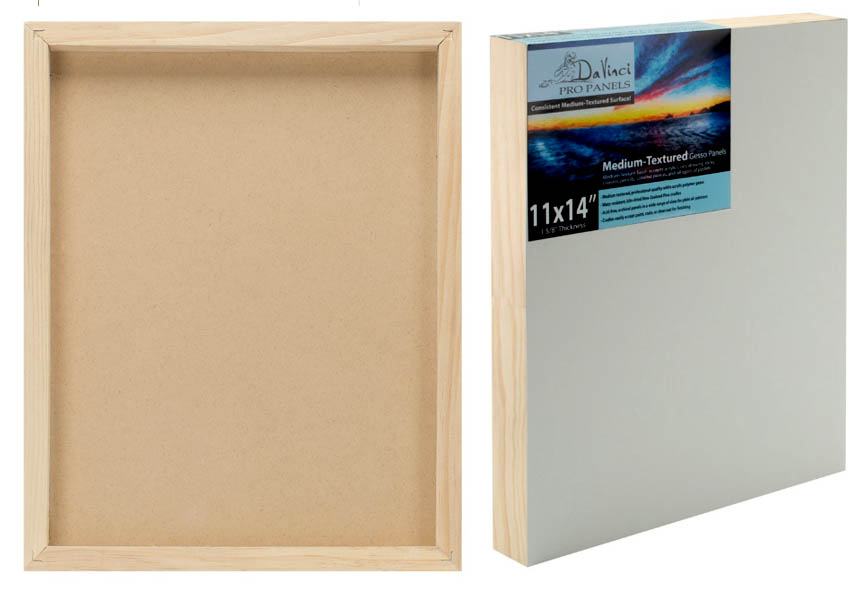
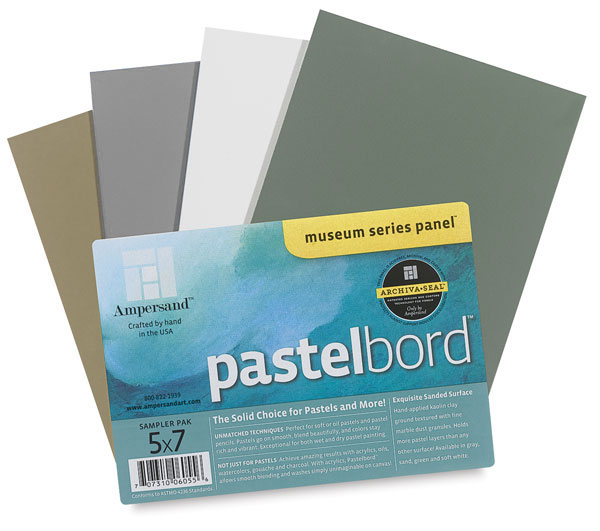
The greatest challenge working on Ampersand pastelbord is the limited layering of colored pencil. Hard pencils work much better on this surface because the board feels like a fine sand paper and it "eats up" soft pencils (Prismacolor Premier).
The greatest advantage working on pastelbord is its archival surface. It's thick, durable and doesn't require mounting before framing like any drawing paper does. I also love working on colored surfaces because colors "pop." Ampersand pastelbord comes in several neutral colors that work great for my drawing style.
Step 2
Once I have the outline in place, I begin drawing by defining the darkest darks and marking the highlights. My colored pencils are super sharp to keep the finest point possible. I fill in the eye watching my values (how light/dark each area is).
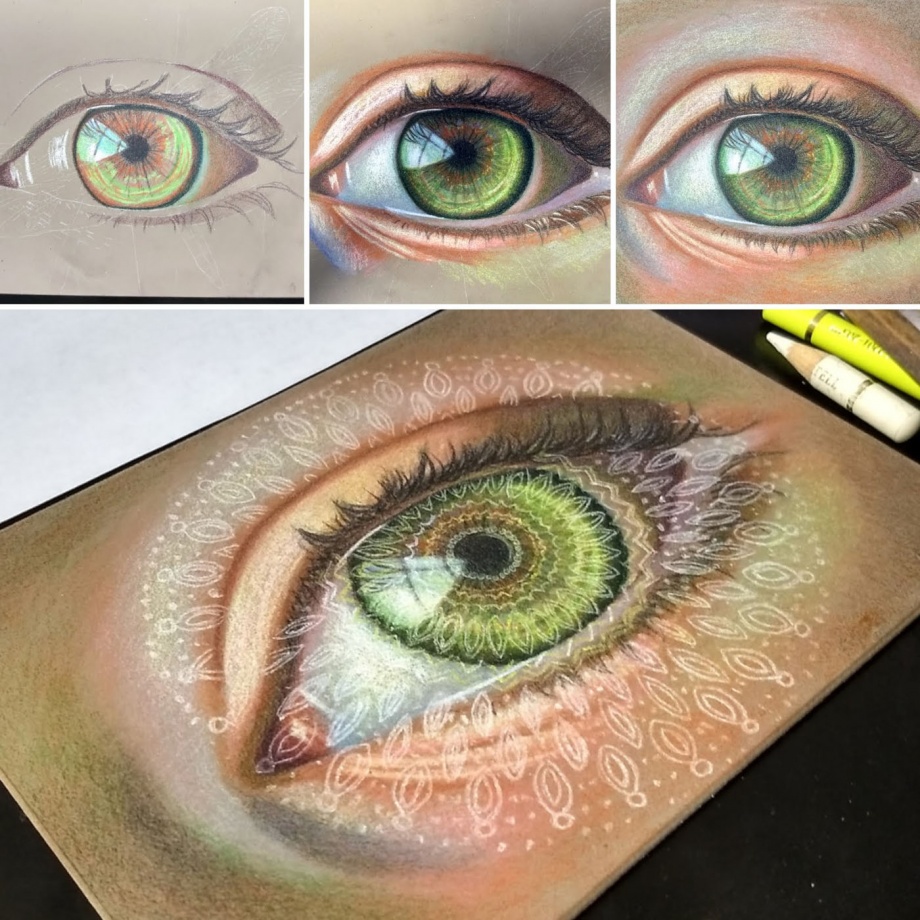
Step 3
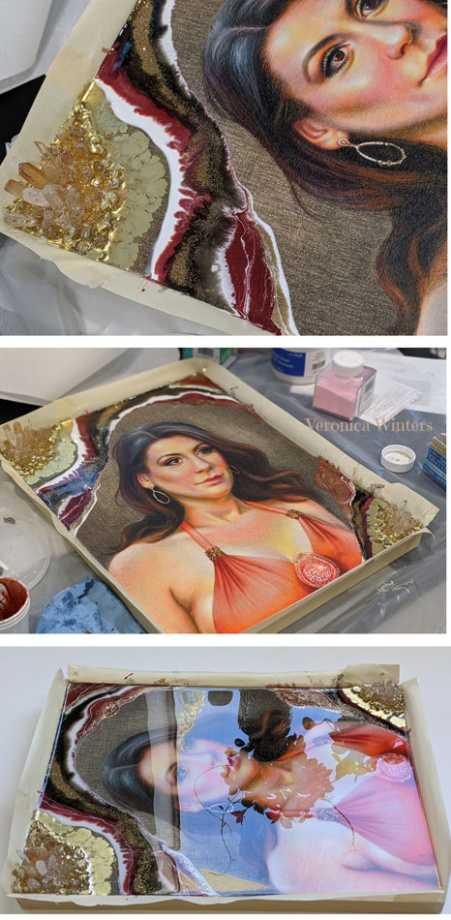
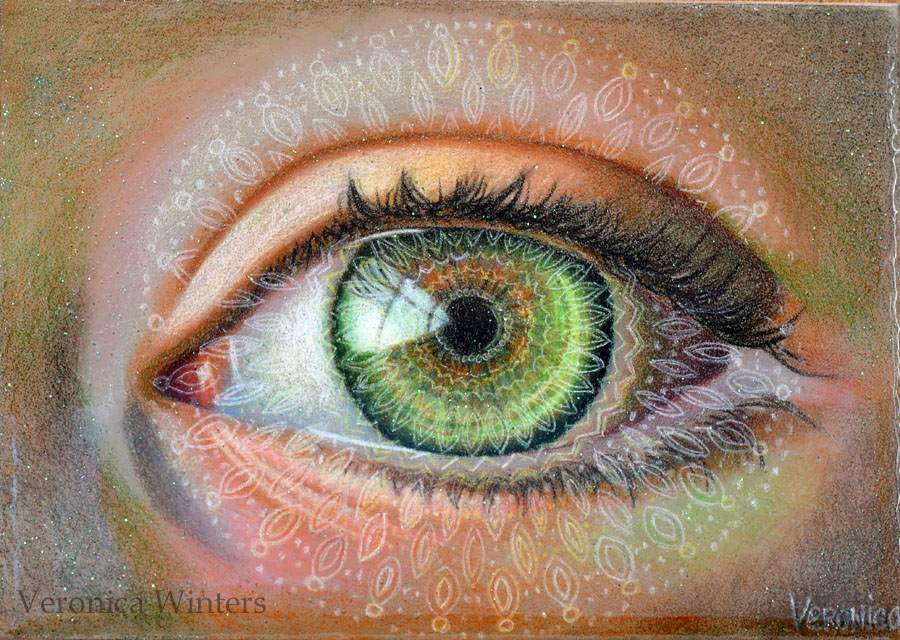
I wanted to create magical feeling in my drawing of the eye. To achieve that I made an overlay of a simple white mandala over the green eye. I used white transfer paper to place the design where I wanted it to be. (It would be very hard to draw any geometric design totally freehand). I reinforced faint outlines with Polychromos Cream colored pencil. The color is off-white and doesn't "compete" with the highlight in the eye. Also I decided to add some extra sparkle with fine glitter (next step).
Step 4
Before proceeding to the next step I use acrylic fixative to seal the surface of my drawing despite the fact that Polychromos are water-resistant colored pencils. Resin can move the pigments and change the color of the surface. Sealing it is necessary to create a barrier. I use the Golden Mediums GAC-100 acrylic polymer. I'm sure there are plenty of other sealants out there. It's just the one I have in my studio. It dries out very fast, so I brush it with a wide soft brush quickly not to make streaks. It dries glossy and clear but may look uneven if you're not quick doing it.
Going beyond drawing
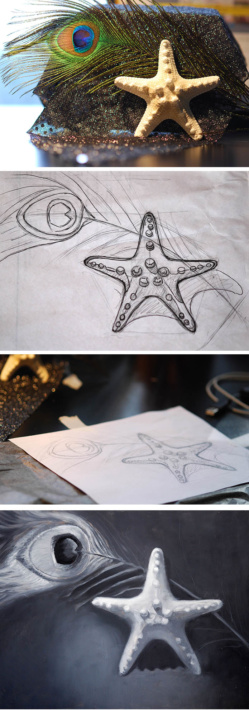
Step 5
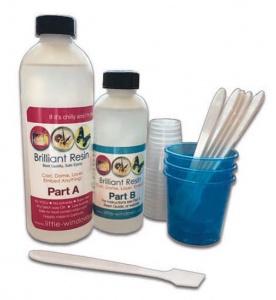
This is the best resin product I found so far! Brilliant Resin by Little Windows doesn't yellow, smell or produce crazy bubbles. It is pricey but I want to make archival, high-quality art and finding the resin product of this kind is a blessing! I got a special discount for my students and readers. Click on the link above and enter "beautiful art" discount code at checkout if you decide to buy resin at Little Windows!
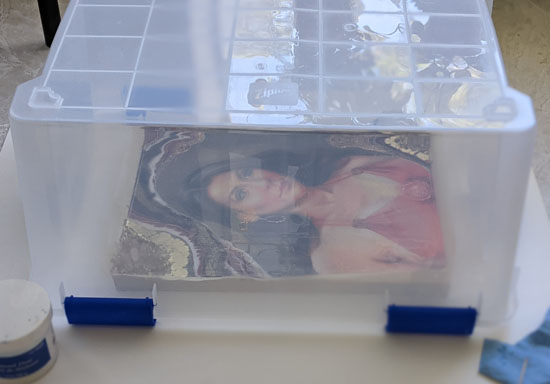
It takes time and practice to learn how resin works. It's tricky to work with it, and you should watch a bunch of videos on YouTube before getting into this. Also, the quality of resin plays a big role in the end result. Inexpensive resin products produce lots of bubbles, smell and give headaches. They may be toxic and sticky. No matter what resin you get, I strongly suggest not to use your "first-time experiment" on your finished drawing. Try to seal a photograph first to get a hang of it! In the video that I'm including below you'll see my set up. Drawing must have a cover against dust and hair while it cures for 24 hours. I also use a doming tray to keep the board suspended. The doming trays are also sold at Little Windows.
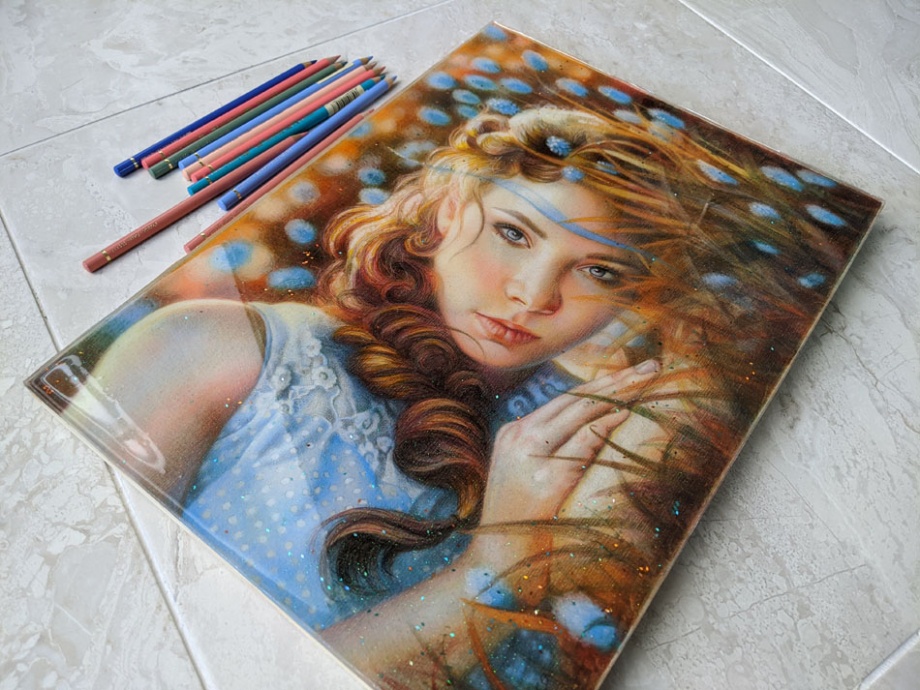
I wait for the sealant to cure for 24 hrs before proceeding to resin pouring. I mixed fine glitter into the resin mix and poured it over my sealed drawing. I let it rest for 24 hrs. The result is a glass-like finish with a touch of magical sparkle!
Video
Other drawings on Ampersand pastelbord
If you find this article inspirational, help your friends see it too by sharing it on social media!
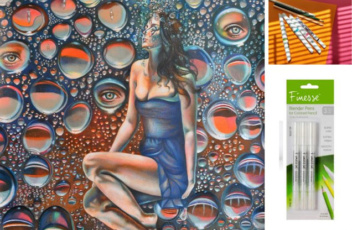
Most of you know that we can blend colored pencils with solvents or the colorless blender. In this post I'd like to share some other blending techniques that don't require blending with Gamsol. While these techniques may not be brand new, I discovered these methods by experimenting with my colored pencil drawing.
Because blending with solvents may look harsh not every drawing is a good candidate for it. I think solvents help out a lot when you end up drawing on textured surface or the size of your drawing paper is large. Yet, not every artist likes blending with solvents. So here is the alternative to that.
Colored pencil blending without solvents
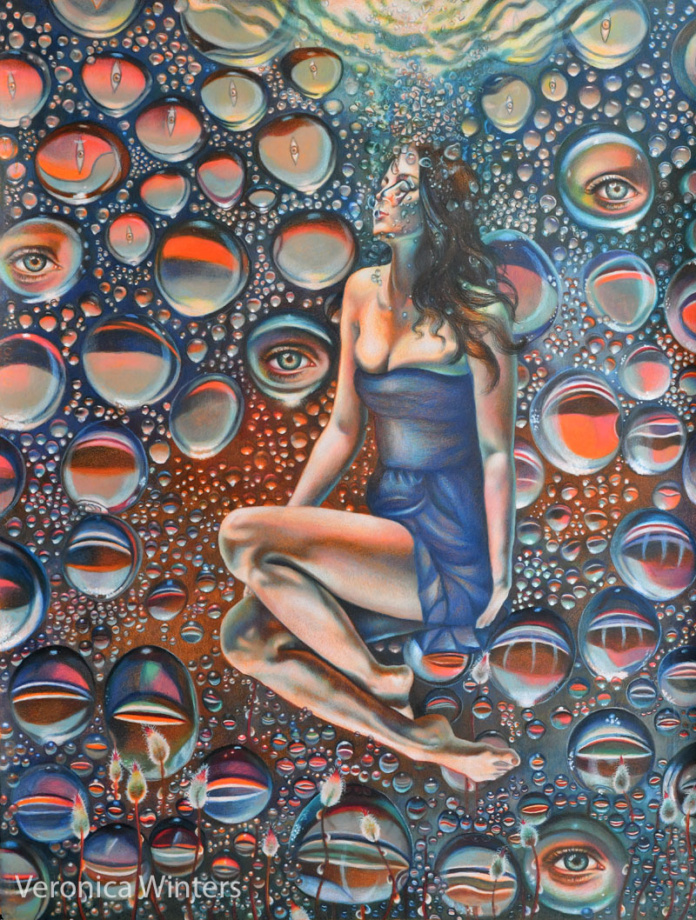
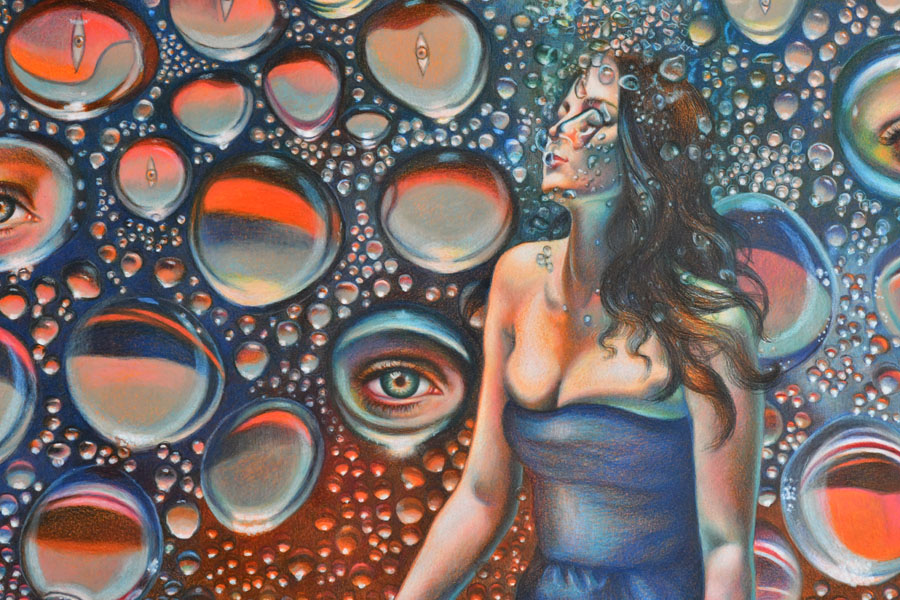
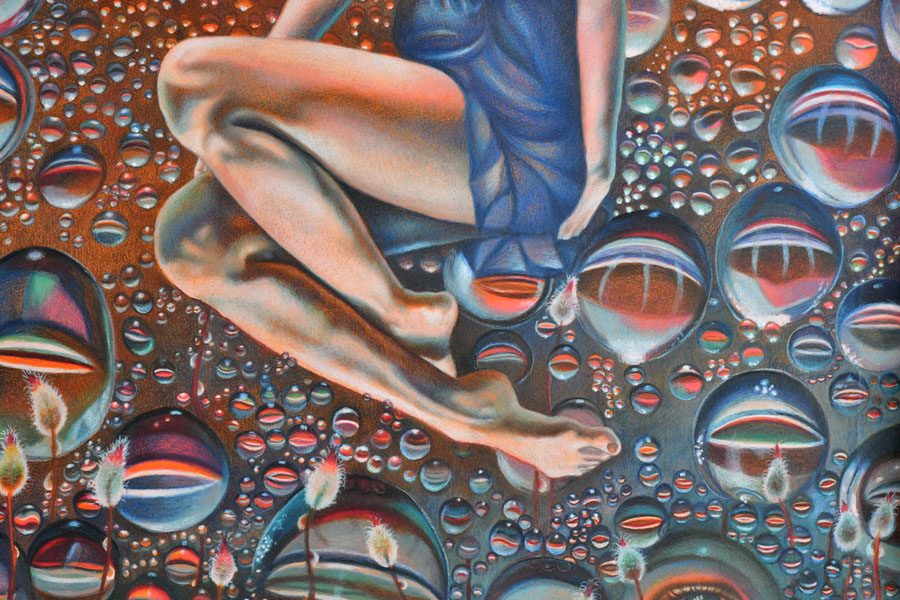
In this drawing titled "Plunge" 19×25″ I used both blending techniques discussed below.
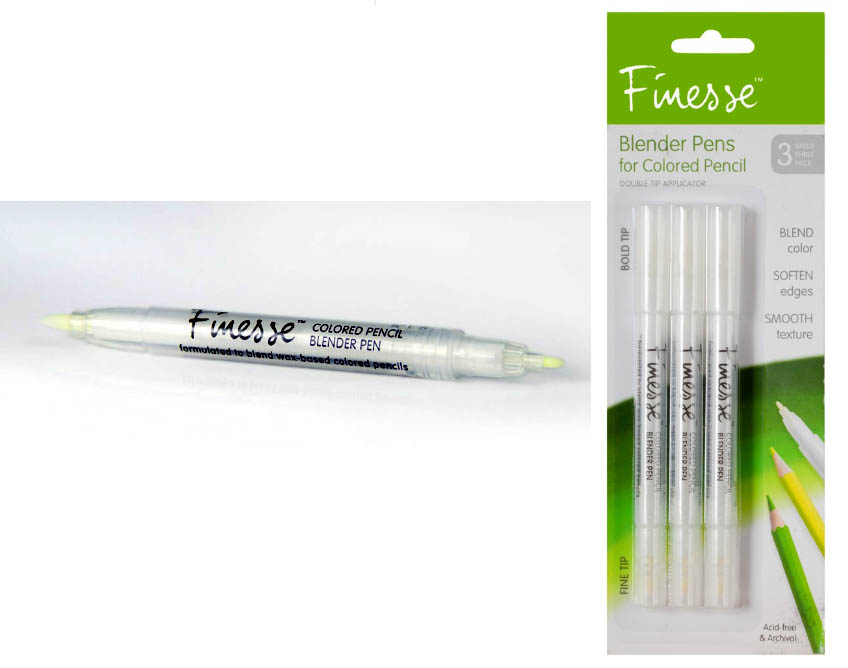
Finesse Colored Pencil blender pen is formulated to blend wax-based colored pencils like Prismacolor Premier and Caran d'Ache Luminance. It won't do much blending for harder pencils like Polychromos but you'll still see some blending occurring because all colored pencils have some wax in them.
This pen is very convenient because it has two tips and you can't spill it like solvents. It's also non-toxic and easy to carry around or store in a colored pencil box. I find that it dries out quite quickly.
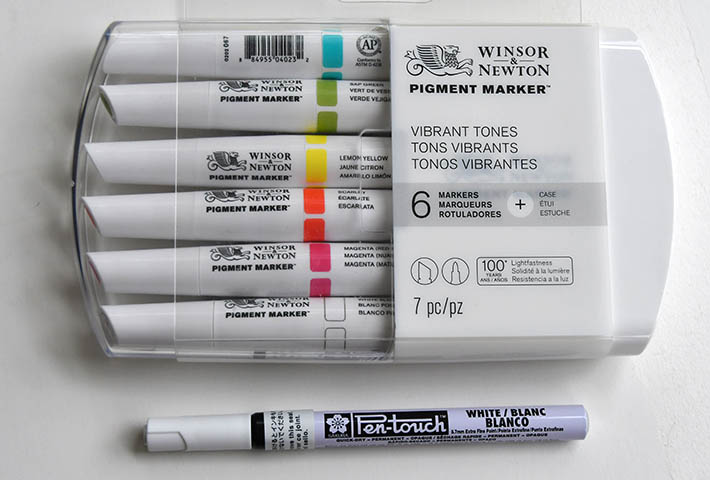
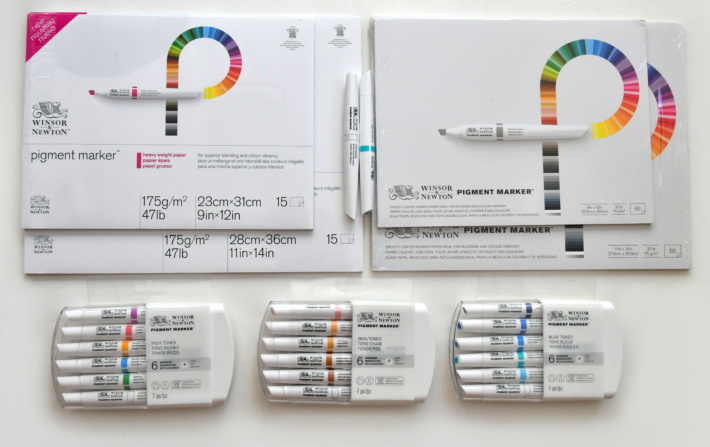
Winsor & Newton Pigment marker, white blender is a very soft white. It's not suitable to make strong, white highlights but what I discovered working with it is more useful. Once I've done some colored pencil shading, I can blend everything with this marker. It does give some white tint to the surface but it also blends it really well. So I use it when I want to both blend and lighten up the area.
Always test your ideas on a separate piece of paper before committing to actual drawing! It's very frustrating to ruin your colored pencil drawing testing something new right on it.
Basic art supplies I often use:
- Transfer paper: white transfer paper: https://amzn.to/3gAaPFo or https://amzn.to/2XMdBPg
- Panels: Ampersand gessobord: https://amzn.to/2WWioP1
- Mono eraser: https://amzn.to/3e6SHRw
- Kneaded eraser: https://amzn.to/3gaZWtH
- Colored Pencils: Prismacolor 36: https://amzn.to/2LUheNS | Pablo 30: https://amzn.to/2A2UhFk | Polychromos: https://www.kqzyfj.com/click-9265447-13717235?url=https%3A%2F%2Fwww.dickblick.com%2Fproducts%2Ffaber-castell-polychromos-pencils%2F%3FclickTracking%3Dtrue%26wmcp%3Dpla%26wmcid%3Ditems%26wmckw%3D20561-0369&cjsku=20561-0369
- Drawing paper: Colored paper. You must pick the SMOOTH SIDE to draw on this one: https://amzn.to/2yr59wf and https://amzn.to/2Xn0pAr | On Amazon Canson colorline, clementine hue: https://amzn.to/3bUkUJP , On Amazon Canson colorline, turquoise: https://amzn.to/3d0MQwU | At Dick Blick Canson colorline (a wide selection): https://www.tkqlhce.com/click-9265447-13717235?url=https%3A%2F%2Fwww.dickblick.com%2Fproducts%2Fcanson-colorline-art-papers%2F%3FclickTracking%3Dtrue%26wmcp%3Dpla%26wmcid%3Ditems%26wmckw%3D11273-5232&cjsku=11273-5232
- Spray varnish for drawings: https://amzn.to/2X0GEzL | DON'T buy krylon spray!
Veronica Winters is an Amazon affiliate.
Inspiration

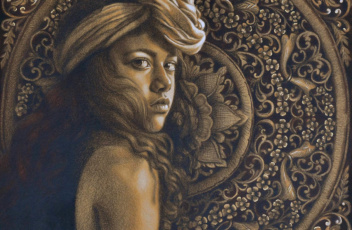
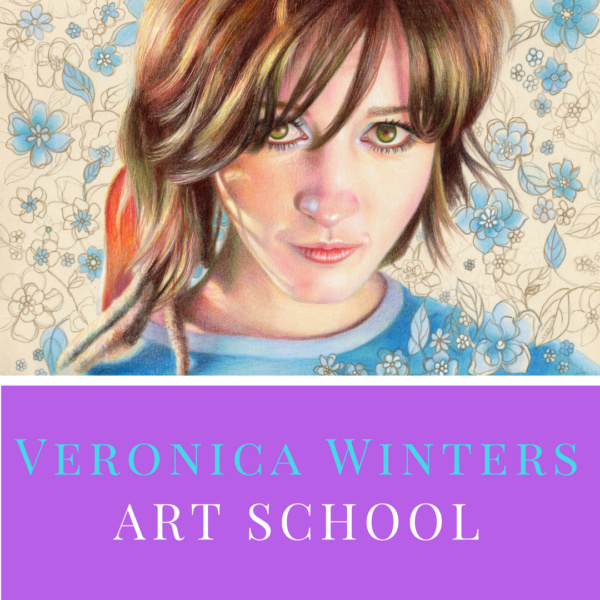
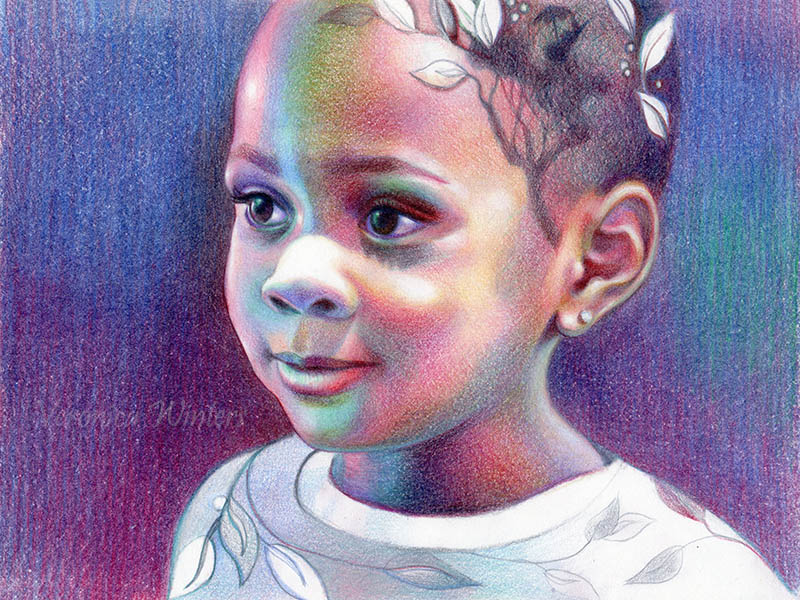
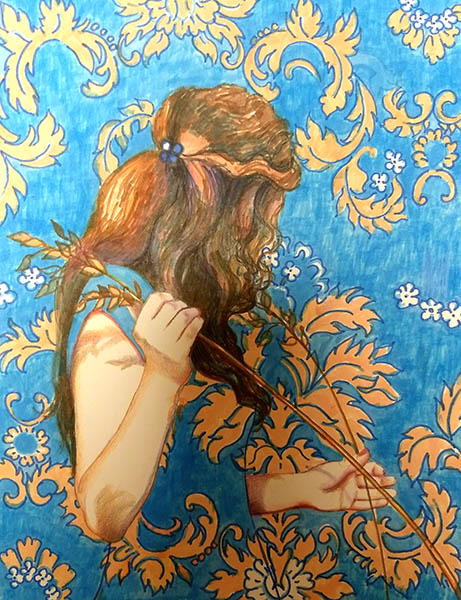
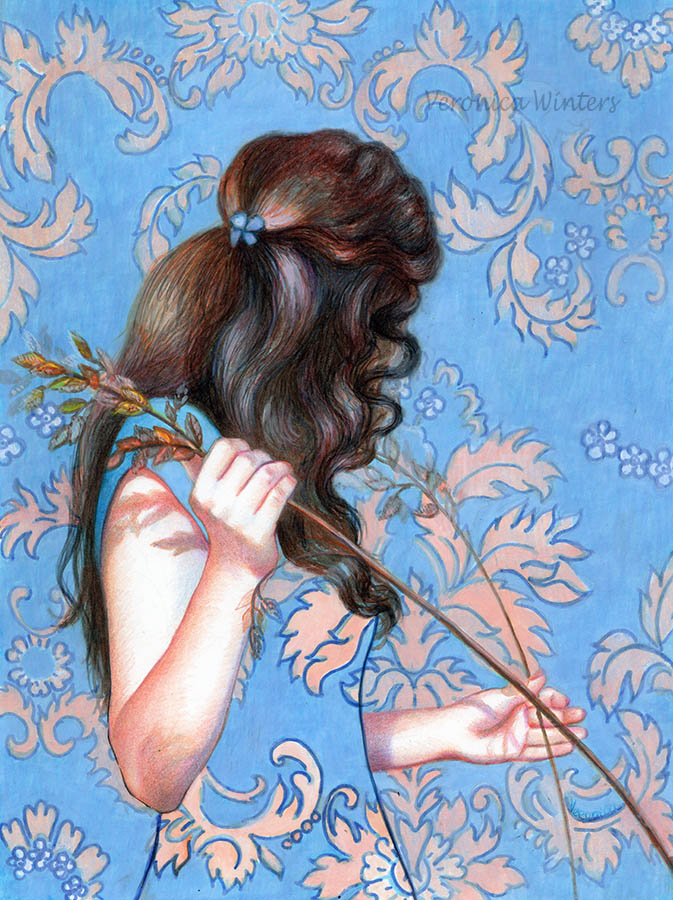
To create this drawing I got inspired by two very different pictures. When I saw a photo of this girl, I knew I would love to draw her because of her intense gaze and beauty reminiscent of the Vermeer's painting titled " Girl with the pearl earring." Also, I wanted to create a drawing with intense darks and unusual personality. I think Ameli's confidence attracted me the most.
I was so happy when Angelika let me use her photo! Angelika Kollin is a professional photographer who shoots poetic portraits of diverse women. See her portrait photography here: https://www.instagram.com/angelikakollin/
I also love rich patterns found in woodcarvings in Asia. My trips to Japan and Thailand let me see a very different side of spirituality and creativity. I also like using mandalas as a symbol for samsara. And this wood carving had such a beautiful design, I couldn't resist the obvious – combining the two images in one drawing! I like that the floral circle in the background almost repeats itself in her headscarf. Elaborate design in the mandala complements curving shapes in her headpiece.
Step-by-step colored pencil drawing
Materials:
Colored mat board (warm beige hue), Faber-Castell Polychromos black, burnt umber, brown ochre, white & Prismacolor Premier white. W&N pigment marker, medium brown. Permanent marker, gold. Grumbacher final fixative for dry media.
Basic art supplies I often use:
- Transfer paper: white transfer paper: https://amzn.to/3gAaPFo or https://amzn.to/2XMdBPg
- Panels: Ampersand gessobord: https://amzn.to/2WWioP1
- Mono eraser: https://amzn.to/3e6SHRw
- Kneaded eraser: https://amzn.to/3gaZWtH
- Colored Pencils: Prismacolor 36: https://amzn.to/2LUheNS | Pablo 30: https://amzn.to/2A2UhFk | Polychromos: https://www.kqzyfj.com/click-9265447-13717235?url=https%3A%2F%2Fwww.dickblick.com%2Fproducts%2Ffaber-castell-polychromos-pencils%2F%3FclickTracking%3Dtrue%26wmcp%3Dpla%26wmcid%3Ditems%26wmckw%3D20561-0369&cjsku=20561-0369
- Drawing paper: Colored paper. You must pick the SMOOTH SIDE to draw on this one: https://amzn.to/2yr59wf and https://amzn.to/2Xn0pAr | On Amazon Canson colorline, clementine hue: https://amzn.to/3bUkUJP , On Amazon Canson colorline, turquoise: https://amzn.to/3d0MQwU | At Dick Blick Canson colorline (a wide selection): https://www.tkqlhce.com/click-9265447-13717235?url=https%3A%2F%2Fwww.dickblick.com%2Fproducts%2Fcanson-colorline-art-papers%2F%3FclickTracking%3Dtrue%26wmcp%3Dpla%26wmcid%3Ditems%26wmckw%3D11273-5232&cjsku=11273-5232
- Spray varnish for drawings: https://amzn.to/2X0GEzL | DON'T buy krylon spray!
Shading in colored pencil:
Step 1:
Most work was done in black pencil only. I used the Polychromos one because it's harder and much less waxy, which gives me higher detail and no wax bloom. The idea is to draw the deepest shadows in black first. Then mark the highlights in shades of white, and touch up the drawing with two other colors where necessary in the end.
While I shaded the entire face in black first, I also made some underpainting using the marker. I shaded the model's hair, jacket and mandala in flat strokes to build up darker hues fairly quickly. While nothing was quick about this drawing, this underpainting saved me some time and colored pencils.
Step 2:
I worked on the figure shading everything in black. My pencil was very sharp to produce refined crosshatching strokes.
Step 3:
While I left the face unfinished, I began shading the flower in the background because its values determined how light/dark I should of shaded the face. Shading the background also lets me work on edges, making softer transitions.
I made the background with less detail on purpose, so it didn't overwhelm the viewer, taking the focus away from the model. Also, my photo of this wood carving had lots of highlights I omitted placing because of the same reason.
Step 4:
I analyzed the light and its direction. Coming from the right, the face receives lots of light. I used Polychromos white to mark the highlights and to create shades of white on her shoulder and headscarf. I strengthened the strongest lights with Prismacolor Premier white afterwards. I also used a gold marker to place very few accents in the background. Unfortunately, it's impossible to photograph gold shimmer as it reflects at different angles not seen in photography. I fix all my drawings with professional spray. I love Grumbacher mat fixative for dry media. (Don't buy Krylon brand. It gives uneven coverage and white bloom in humid climate!)
Thank you for reading! Hope you found it fun and helpful. Check out my shop for art gifts and tutorials. Much love and success in your endeavors!
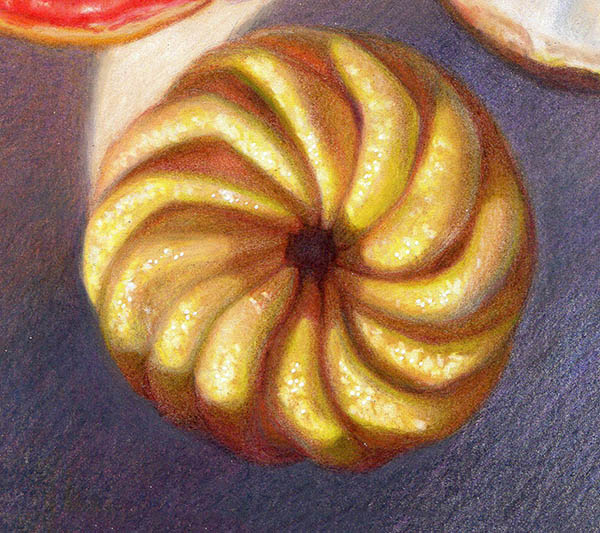
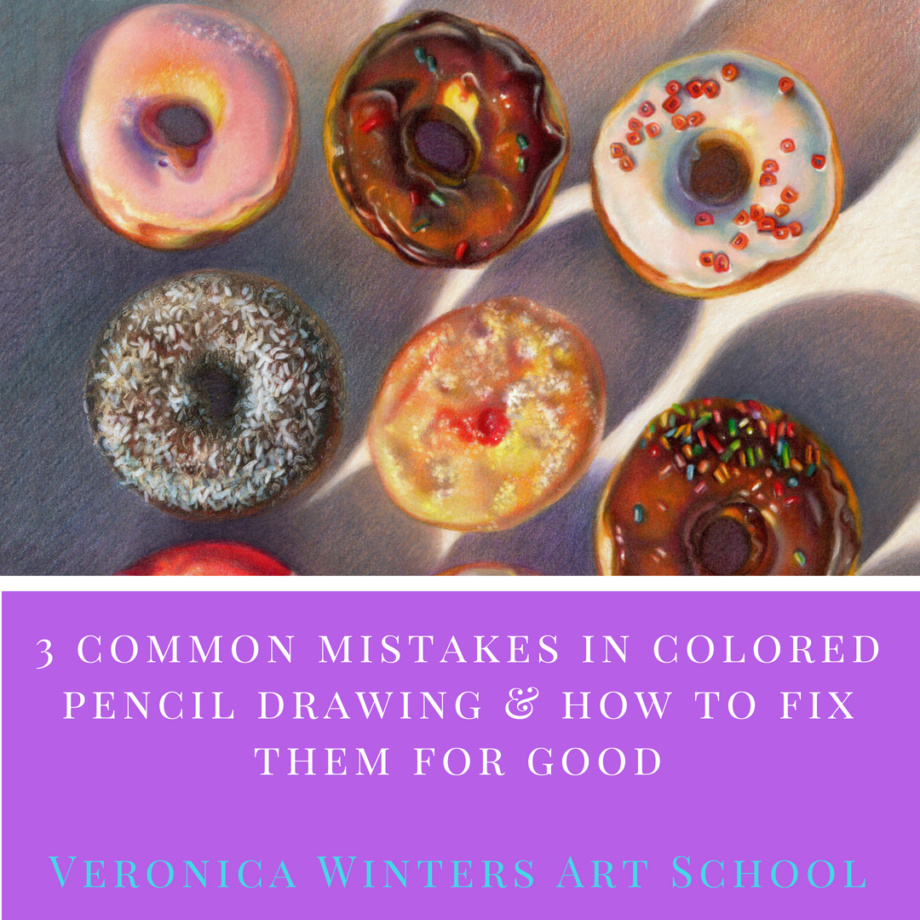
Step-by-step colored pencil drawing of a donut
If you're interested in studying the colored pencil drawing, you must train yourself to become skillful in:
- drawing the shapes correctly
- translating colors into values, and back
- shading evenly
- making creative compositions
- paying attention to the quality of light, and how it turns the form
A full step by step demonstration of 10 donuts is part of my most recent art book The Colored Pencil Manual as well as my video course Complete Colored Pencil Techniques in 90 days.

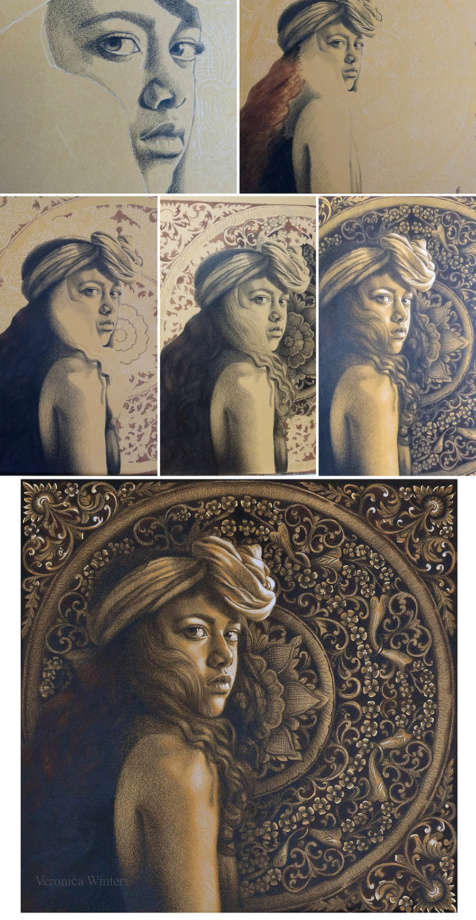
I spent roughly five hours drawing each donut and more than eight hours shading the background for this 12" x 14" drawing!
In this project I don't discuss basic drawing techniques but focus on color, shading, and textures. While I lay out the drawing sequence of every donut, the artwork is completed by filling in the background first and then layering one color at a time while working on all donuts simultaneously. By shading the background first, I create instant contrast to work against in coloring the donuts. It took a considerable creative effort to make this arrangement of donuts for the photoshoot. I aimed at balancing out every texture, color, and shape, which required multiple rotations, changes of place, as well as shooting at different times of the day to capture strong shadows with lots of color.
Materials:
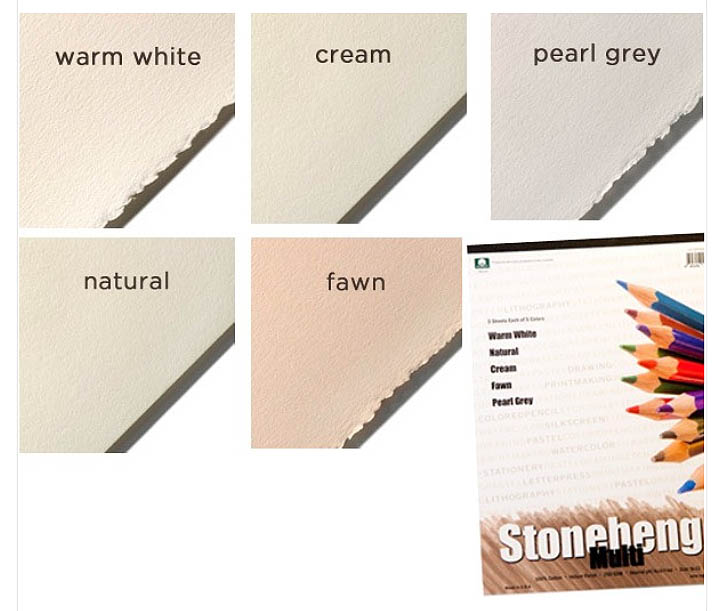
Prismacolor Premier colored pencils unless noted; kneaded eraser; tracing paper (optional); Grumbacher final fixative; a large sheet of printmaking paper that is very light gray in color (it can be replaced with Stonehenge Multi pad color either pearl grey or fawn). This project was completed on a very light gray printmaking paper that often doesn't read as such in photography. It has minimal texture and the colors tend to blend on their own without employing additional blending techniques.
The Color Chart is separate for each donut. In this example some of the textures are created with varied stroke applications, and Sakura Pentouch marker.

Basic colors:
Prismacolor Premier colored pencils unless noted;
1. Terra Cotta 2. Sienna Brown 3. Mineral Orange 4. (Pablo) Yellow 5. White 6. Henna 7. Artichoke 8. Chartreuse 9. Yellow Ochre 10. Yellow Orange 11. 70% Cool Grey 12. Pumpkin Orange 13. Yellow Chartreuse

Step 1
Tap all graphite lines with the kneaded eraser. It's a light donut and graphite will show up once you begin shading.
Begin drawing out the rotation of each fold with either terra cotta or sienna brown. While the color looks reddish here, it's actually a warm brown that the author suggests you use for shading.
Step 2
Once you place the background colors (see the last two steps for instruction), you set the contrast to begin working on the donut. With a sharp point, place random white spots and shade around them with Pablo yellow. Add mineral orange into the brown to warm up the color.
Step 3
With every new step, you keep defining the edges to preserve the correct rotation and clarity in each section. You also work in short, directional strokes on every section to create volume. For that you need to keep rotating your drawing paper as you shade, so the strokes wrap around the forms and don't become too linear.
Define the brown edges with henna and fill them in with this color in light pressure. Add warm, light greens—chartreuse and artichoke—shading around the yellow to create value transitions between the dark (browns) and the light (white). You shade from white to yellow to chartreuse to artichoke. After that the shapes turn to orange-brown shadows (that you've already done).
Step 4
Once the basic pattern of light and shade is in place, you can add variations to the colors seen in the light. The artist shades with yellow ochre, yellow orange, pumpkin orange, chartreuse, and Pablo yellow. Most of the time it is simply layering the same colors over and over again until the right contrast and volume are achieved. Add 70% cool gray into the form shadow in every section.
Texture: Reinforce the texture with white for small dots in the light and add just a few tiny highlights on the left side with the Sakura PenTouch.
Step by step colored pencil drawing video tutorial
I show this colored pencil drawing process in this video.
Basic art supplies I often use:
- Transfer paper: white transfer paper: https://amzn.to/3gAaPFo or https://amzn.to/2XMdBPg
- Panels: Ampersand gessobord: https://amzn.to/2WWioP1
- Mono eraser: https://amzn.to/3e6SHRw
- Kneaded eraser: https://amzn.to/3gaZWtH
- Colored Pencils: Prismacolor 36: https://amzn.to/2LUheNS | Pablo 30: https://amzn.to/2A2UhFk | Polychromos: https://www.kqzyfj.com/click-9265447-13717235?url=https%3A%2F%2Fwww.dickblick.com%2Fproducts%2Ffaber-castell-polychromos-pencils%2F%3FclickTracking%3Dtrue%26wmcp%3Dpla%26wmcid%3Ditems%26wmckw%3D20561-0369&cjsku=20561-0369
- Drawing paper: Colored paper. You must pick the SMOOTH SIDE to draw on this one: https://amzn.to/2yr59wf and https://amzn.to/2Xn0pAr | On Amazon Canson colorline, clementine hue: https://amzn.to/3bUkUJP , On Amazon Canson colorline, turquoise: https://amzn.to/3d0MQwU | At Dick Blick Canson colorline (a wide selection): https://www.tkqlhce.com/click-9265447-13717235?url=https%3A%2F%2Fwww.dickblick.com%2Fproducts%2Fcanson-colorline-art-papers%2F%3FclickTracking%3Dtrue%26wmcp%3Dpla%26wmcid%3Ditems%26wmckw%3D11273-5232&cjsku=11273-5232
- Spray varnish for drawings: https://amzn.to/2X0GEzL | DON'T buy krylon spray!
- I'm an Amazon affiliate.
How to use transfer paper to trace designs for drawing & painting
You need to strive for perfection every step of the way, drawing and painting realistically. Therefore, you must have perfect outlines to have a good start. A lot of times when your drawing is complex, it requires sketching, erasing, and sketching again. It ruins the paper's surface that must stay nice and clean for even shading in graphite or colored pencil later on. That's why I often sketch on a separate piece of paper that matches my canvas (or drawing) size to transfer these outlines onto my drawing paper. It's called Cartoon drawings in the old master era of painting.
What is it for?
You need the graphite transfer paper for precision tracing of your outlines/ lineart onto your drawing paper, canvas or panels if your art is very complex and you wish to keep the working surface clean.
Graphite Transfer paper brands and features
Saral Graphite Transfer Paper
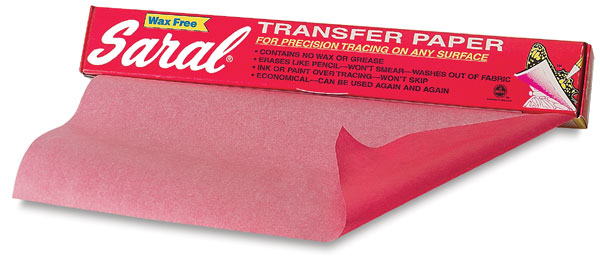
- Comes in 5 colors! Blue, yellow, graphite, white red
- Saral transfer rolls are wax-less, non-toxic, and do not contain acid. The paper allows you to transfer your design from a sketch, pattern, template or by hand to almost any surface. May be used with acetate overlays, plastics and enamel, metal, cloth, wood, fabric, ceramic, canvas, stained glass, tole paintings, architectural work, scrapbooking, watercolor, fine art, and more.
- Shows up equally well on light or dark surfaces and mixtures of the two, such as photos.
- 12 inch x 12 foot roll; comes in a roll (similar to a wax paper roll).
Loew-Cornell Black and White Graphite Transfer Papers
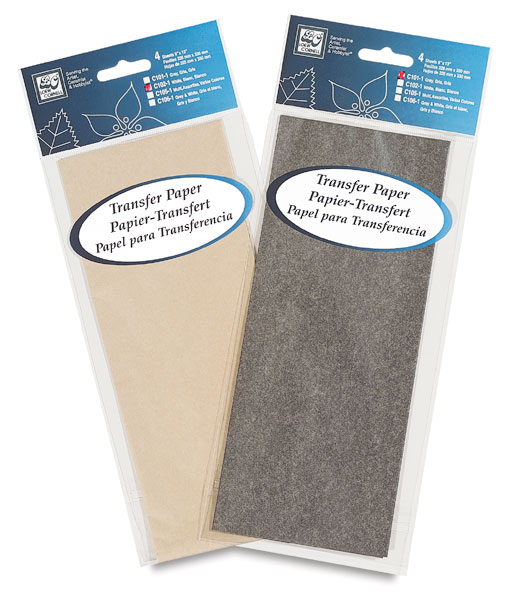
- Waxless, greaseless, smudge proof, erasable
- Doesn't bleed through paint, and it doesn't smear.
- Works for drawing and painting but not recommended for fabric and porous surfaces
- Ideal for large projects due to its size. You can also cut it for smaller projects.
- Reusable! I've been using my two sheets of graphite paper for years, and it still works fine!
- Comes in as a single, large folded sheet of paper in one package. You need to buy two packages to have different colors. Package of 4 Sheets— Each sheet measures 9″ × 13″ | Single Sheet Package — One 18″ × 36″ sheet
Royal & Langnickel® White Graphite Transfer Paper
- It doesn't smear, having no wax or grease
- Comes in one 18 x 36 inch sheet of white graphite paper per package.
- Erases similar to a pencil and is very similar to the Loew-Cornell transfer papers.

Basic art supplies I often use:
- Transfer paper: white transfer paper: https://amzn.to/3gAaPFo or https://amzn.to/2XMdBPg
- Panels: Ampersand gessobord: https://amzn.to/2WWioP1
- Mono eraser: https://amzn.to/3e6SHRw
- Kneaded eraser: https://amzn.to/3gaZWtH
- Colored Pencils: Prismacolor 36: https://amzn.to/2LUheNS | Pablo 30: https://amzn.to/2A2UhFk | Polychromos: https://www.kqzyfj.com/click-9265447-13717235?url=https%3A%2F%2Fwww.dickblick.com%2Fproducts%2Ffaber-castell-polychromos-pencils%2F%3FclickTracking%3Dtrue%26wmcp%3Dpla%26wmcid%3Ditems%26wmckw%3D20561-0369&cjsku=20561-0369
- Drawing paper: Colored paper. You must pick the SMOOTH SIDE to draw on this one: https://amzn.to/2yr59wf and https://amzn.to/2Xn0pAr | On Amazon Canson colorline, clementine hue: https://amzn.to/3bUkUJP , On Amazon Canson colorline, turquoise: https://amzn.to/3d0MQwU | At Dick Blick Canson colorline (a wide selection): https://www.tkqlhce.com/click-9265447-13717235?url=https%3A%2F%2Fwww.dickblick.com%2Fproducts%2Fcanson-colorline-art-papers%2F%3FclickTracking%3Dtrue%26wmcp%3Dpla%26wmcid%3Ditems%26wmckw%3D11273-5232&cjsku=11273-5232
- Spray varnish for drawings: https://amzn.to/2X0GEzL | DON'T buy krylon spray!
- I'm an Amazon affiliate.
How to use transfer paper in your art projects
Make a precise sketch

I sketch out my drawing on a sketch paper and then transfer these outlines onto drawing paper using an HB graphite pencil or a ballpoint pen. You can replace the pen or pencil with a stylus if you want to preserve your original reference sketch/photo for future projects. Check out the Soft-Grip Embossing & Stylus Set Complete by Royal & Langnickel (3 Pack) for that.
A lot of artists, especially beginners skip the sketching step, transferring the image direct from a photo onto the drawing paper. While it's totally possible, beware that many pictures have lens distortion that's especially noticeable in anatomy and photos with linear perspective like cityscapes. So you end up transferring the distortion into your art.
Pick the right color of the transfer paper for your project
For transferring designs to both white and dark paper white transfer paper is ideal. Also, use the white transfer paper for your watercolor painting. Black transfer paper's line doesn't erase completely and is not suitable for watercolor work. Use black transfer paper with caution for your colored pencil work as well. I mostly use this black transfer paper for tracing my designs onto canvas/panels, and I often use white transfer paper for my colored pencil drawing, especially when I draw on colored paper because these white outlines show up well and blend with my subsequent shading. White graphite line will show up even on white paper, but you'll have to observe your lines at an angle. I also love to use white graphite transfer paper to transfer my designs working on scratchboard art!
To buy the graphite paper
- Amazon
- JerrysArtarama
- DickBlick
- Michael's & other craft stores
If you draw in colored pencil, I invite you to watch FREE previews of some of my lessons in my course titled "Veronica Winters complete colored pencil techniques in 90 days."
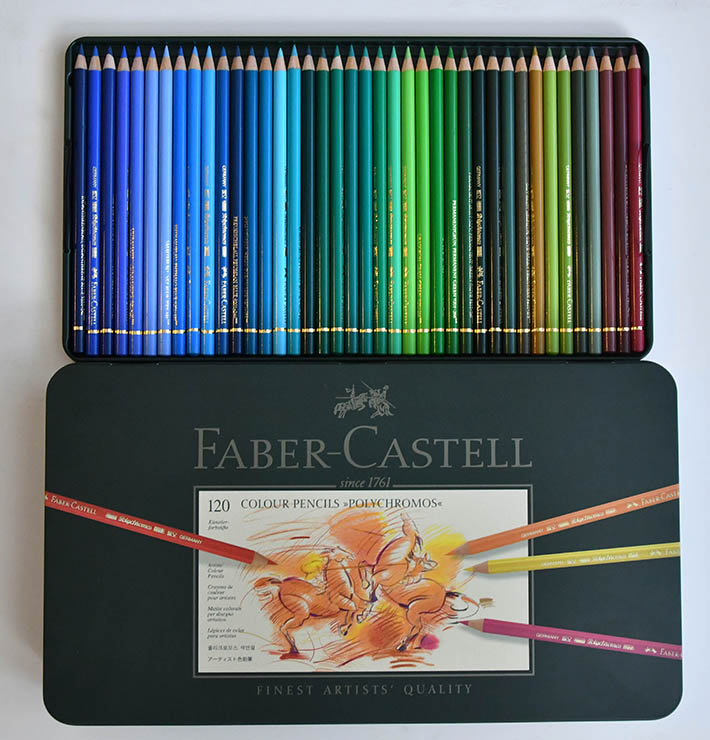
Faber-Castell Polychromos colored pencils review
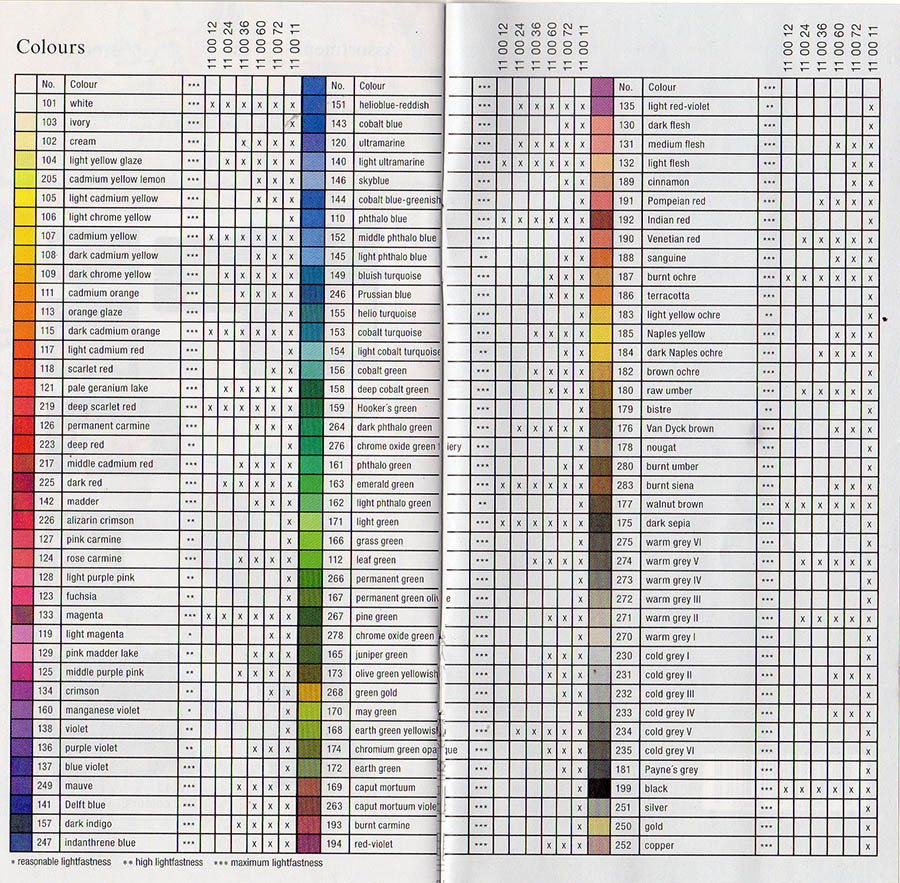
In this article you'll find information about Faber-Castell Polychromos colored pencils and my experience using them on various drawing papers. I'm not an affiliate and I write reviews of art supplies I actually use in my drawings. Below you'll find the Polychromos lightfastness ratings as well as some of my colored pencil drawings made with these colored pencils.
Properties
Lightfastness: most colors are lightfast/very good to excellent
Durability: excellent
Softness: medium softness/ very good
Pigment saturation/vividness: very vivid/ excellent
Oil-based
Faber-Castell polychromos colored pencils review
These colored pencils never break on me. Their durability, color saturation and lighfastness are consistent. Easy to sharpen, Polychromos have a range of beautiful colors with some pinks and purples that have excellent lightfastness ratings, which is difficult to find in other brands, especially Prismacolor. Because they are not very soft, these colored pencils layer nicely and require minimal blending. Their downside is that you've got to find the right paper working with them. Because they are oil-based, they mix and blend more like soft pastels, meaning that the paper should have some texture to adhere the pencils to. And I find that when I work on uart paper, 800 grade or Canson pastel paper, Polychromos impress me a lot more. They are great for detailed work and blend on their own working on slightly textured paper. These colored pencils tend to glide off the smooth paper like Bristol smooth and seem to need more layering to develop contrast.
Because I'm coming from years of experience working with Prismacolor Premier I still like their creamy softness more than any other brand(besides Luminance), however, the Polychromos' durability and great lightfastness make me reach out to this set more often today. When I need a very bright white highlight, I simply add Prismacolor Premier pencil to do the job.
In my comprehensive video course you'll see me draw with these and other art supplies. Subscribe to my monthly e-mail to be the first to know about its release!
Basic art supplies I often use:
- Transfer paper: white transfer paper: https://amzn.to/3gAaPFo or https://amzn.to/2XMdBPg
- Panels: Ampersand gessobord: https://amzn.to/2WWioP1
- Mono eraser: https://amzn.to/3e6SHRw
- Kneaded eraser: https://amzn.to/3gaZWtH
- Colored Pencils: Prismacolor 36: https://amzn.to/2LUheNS | Pablo 30: https://amzn.to/2A2UhFk | Polychromos: https://www.kqzyfj.com/click-9265447-13717235?url=https%3A%2F%2Fwww.dickblick.com%2Fproducts%2Ffaber-castell-polychromos-pencils%2F%3FclickTracking%3Dtrue%26wmcp%3Dpla%26wmcid%3Ditems%26wmckw%3D20561-0369&cjsku=20561-0369
- Drawing paper: Colored paper. You must pick the SMOOTH SIDE to draw on this one: https://amzn.to/2yr59wf and https://amzn.to/2Xn0pAr | On Amazon Canson colorline, clementine hue: https://amzn.to/3bUkUJP , On Amazon Canson colorline, turquoise: https://amzn.to/3d0MQwU | At Dick Blick Canson colorline (a wide selection): https://www.tkqlhce.com/click-9265447-13717235?url=https%3A%2F%2Fwww.dickblick.com%2Fproducts%2Fcanson-colorline-art-papers%2F%3FclickTracking%3Dtrue%26wmcp%3Dpla%26wmcid%3Ditems%26wmckw%3D11273-5232&cjsku=11273-5232
- Spray varnish for drawings: https://amzn.to/2X0GEzL | DON'T buy krylon spray!
- I'm an Amazon affiliate.
Colored Pencil Drawings
In this drawing I didn't do much blending. The colors blended on their own via crosshatching and overlapping. The layering itself was a bit of a problem because Bristol Vellum paper is very smooth.

UArt paper and Polychromos is the best combination of pencils-to-paper ratio I have found so far. UArt is designed for pastel drawing and its surface feels like sand paper. Therefore if you use softer colored pencils on it, it will "eat" your soft colored pencils and blending would require solvents. 800 grade is the finest surface and is suitable for colored pencil drawing with Polychromos or other harder colored pencils like Pablo or Koh-i-Noor.
Because oil-based Polychromos act like pastels, the drawing process is also quite different. It's mostly blocking in large areas in darker colors and then adding the lighter ones on top. For instance, in the first image you see me draw in one color, and in the second image you see me add lighter variations of color, overlapping over the basic brown.
It's also easy to create a fuzzy edge on this paper. In the third image you see me place darker colors in the shirt first, and in the final image I layer the ivory and white over the entire shirt, creating soft, uneven edge and texture.
What's your experience working with Polychromos? Leave a comment below!
Faber-Castell Polychromos lightfastness rating chart
All writing is copyrighted on my site. No part can be copied and distributed without a written permission by the artist.
To see related posts:
In this article you'll find information about Koh-i-Noor colored pencils and Koh-i-Noor drawing paper. I also include the video of these products you can find below. I'm not an affiliate and I write reviews for the art supplies I actually use in my drawings. Koh-i-Noor Hardtmuth is a Czech republic manufacturer and distributor of art supplies and stationery. Founded in 1790 by Joseph Hardtmuth of Austria, this company makes affordably-priced, high-quality art supplies.
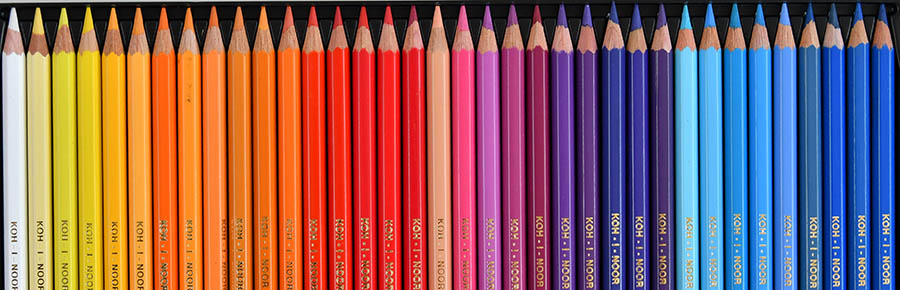
Koh-i-Noor colored pencils review
Lightfastness: varies, but good overall
Durability: fair
Softness: soft
Price: very competitively priced
Pigment saturation/vividness: very good
Video review of the koh-i-noor art supplies
Koh-i-Noor Polycolor colored pencils, 72 colors
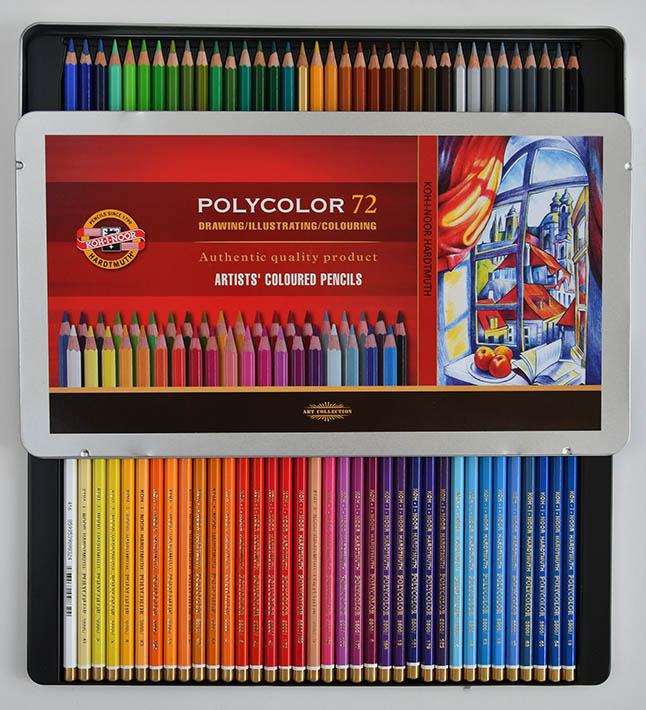
I have a large, 72 colors set and I've done several colored pencil drawings using this set. Overall, these are very good colored pencils to do work on details and small drawings. They are not as creamy as Prismacolor Premier or Luminance but layer quite nicely that requires minimal blending drawing on smooth paper.
Hardness/softness:
These colored pencils feel very similar to Pablo colored pencils in their durability and softness. Because they are not super soft like Prismacolor Premier, you can create lots of details drawing with Polycolor. I think they are very good to draw details over the initial layering done in softer colored pencils. Drawing backgrounds and shading over large areas can be very time-consuming. Occasionally, they break during sharpening, and that's the only downside I see to these colored pencils.
Color/pigment saturation:
Because they are not as creamy as Luminance or Prismacolor, they don't have exceptional saturation/vividness. However, these pencils will pleasantly surprise you with their range of beautiful colors and considerable color saturation. Some colors seem to be a bit softer and more vivid than the others in a set.
Price:
Koh-i-Noor Polycolor box sets are very competitively priced and are worth your dollars to do the detailed work.
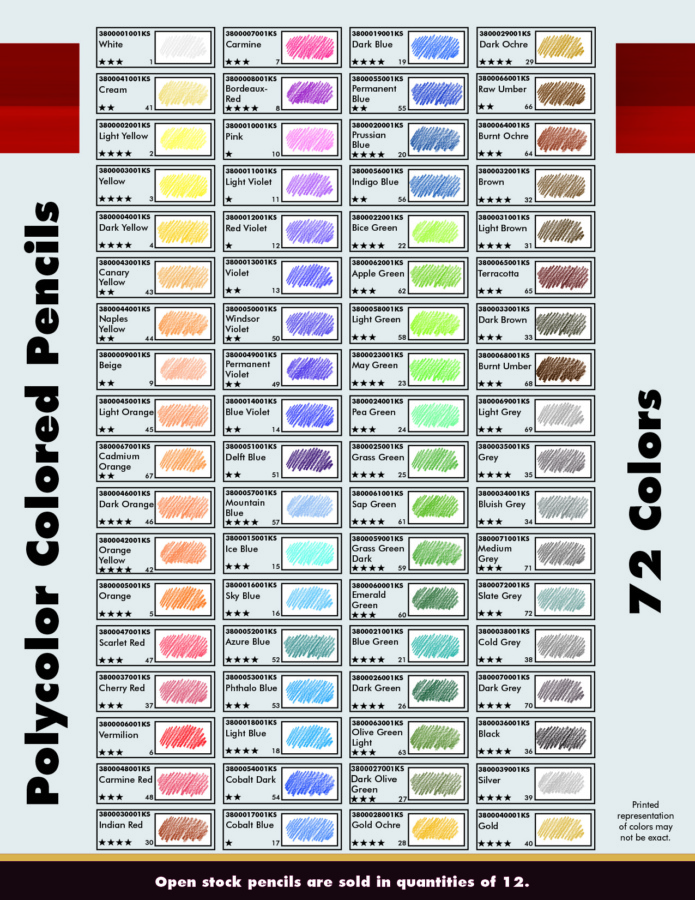
Lightfastness chart:
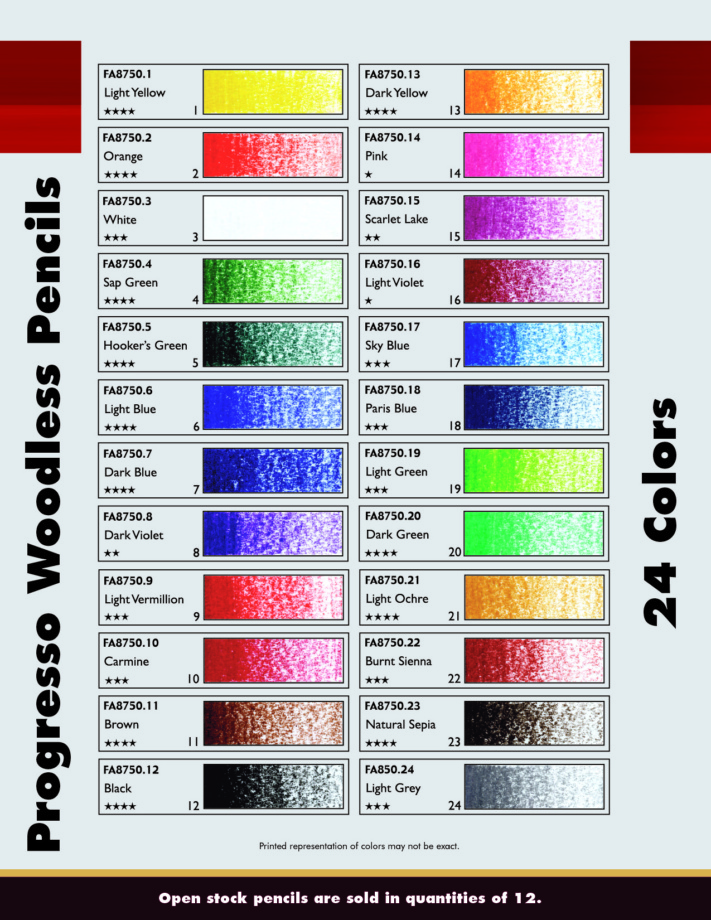
Here you can take note of the lightfastness rating. Koh-i-noor colored pencils vary in its ability to withstand the light, which is similar to the Prismacolor Premier. Most Polycolor colored pencils have a very good lightfastness rating. So, if the lightfastness is important to you, you can weed out all the fugitive colors out of the set from the get go (1-2 stars are fugitive colors).
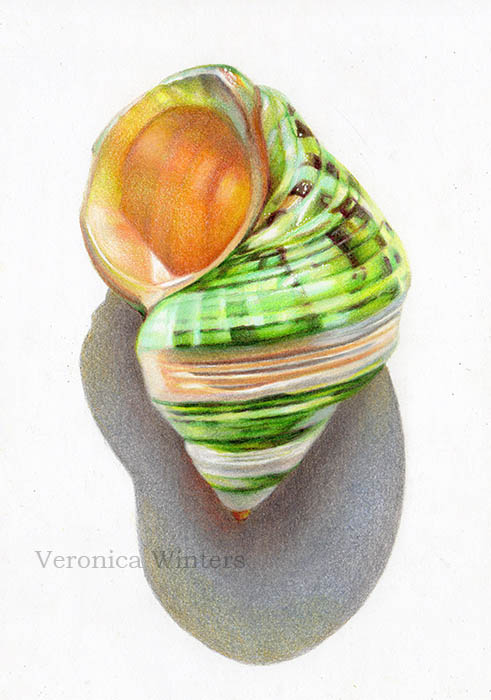
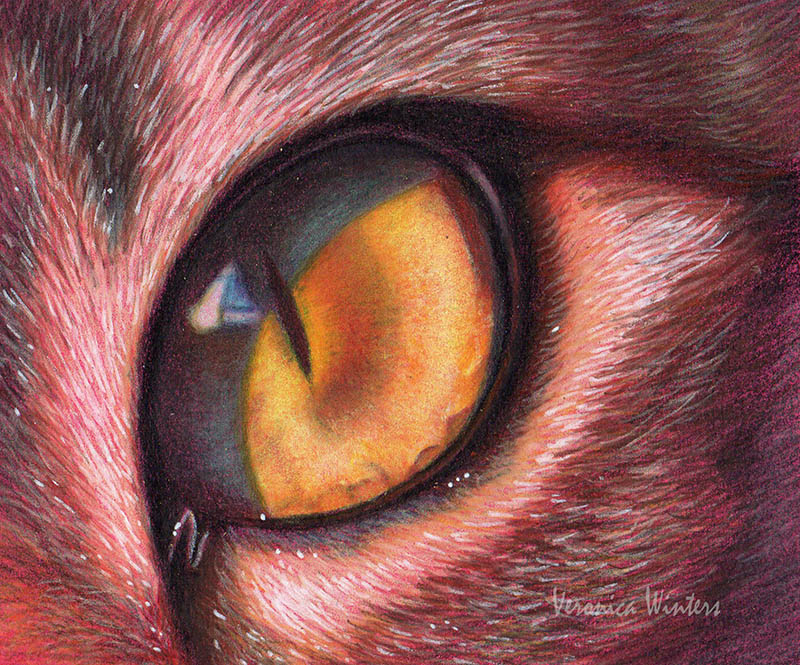
This is one of the drawings completed using the koh-i-noor Polycolor colored pencils.
Koh-i-noor woodless colored pencils review
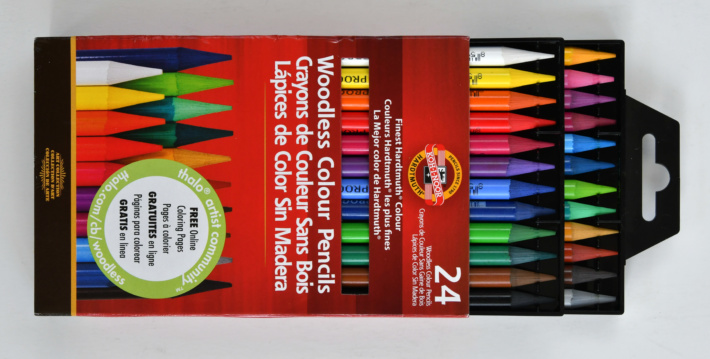
These colored pencils are very similar to Koh-i-Noor Polycolor. They seem to be a bit softer, layer nicely, and some colors seem to be richer in pigment saturation than the others. It's nice to sharpen them to a fine point and then use the pencil on details and large areas alike, but their main problem is breakage. Two pencils broke in half by themselves when I began drawing with them.
This is one of the drawings completed using the koh-i-noor woodless colored pencils and a white pen on colored paper.
Koh-i-Noor Tri-Tone
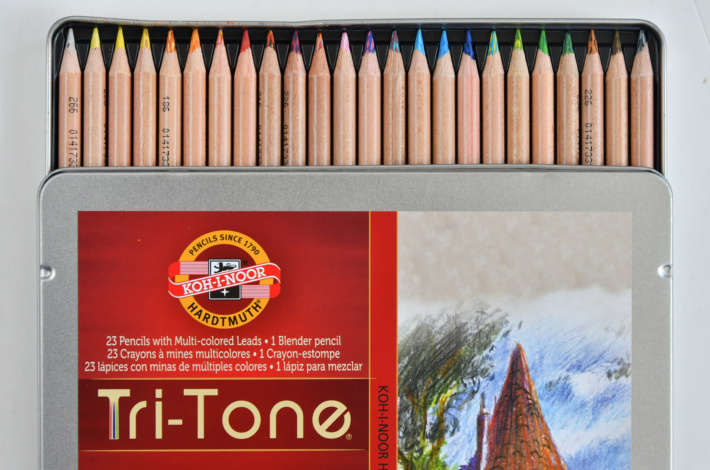
These are really fun pencils to color with! Each colored pencil consists of 2-3 hues you can color with by rotating the pencil to change the color. They are pretty soft and vivid. You can really explore your funky side drawing with Tri-Tone. I think they are great for general coloring and giving to teens. They can be fun for adults too to make small drawings or to work on a coloring page, but their main downside is considerable breakage during sharpening. The lightfastness is pretty good according to the manufacturer's list.
In my comprehensive video course you'll see me draw on this and other papers. Subscribe to my monthly e-mail to be the first to know about its release!
Koh-i-Noor Drawing Paper review

I absolutely love koh-i-noor drawing paper and its my favorite now! I only wish the manufacturer could come up with a bunch of bright colored papers soon. Koh-i-noor manufactures drawing papers with several surfaces: Bristol smooth, Bristol vellum and colored pencil. All of them have thick pages and accept multiple layering, which is great for colored pencil drawing. The surfaces are smooth, yet the minimal texture of Colored Pencil Drawing and Bristol Vellum papers aids to smooth and even layering that basically requires no blending with solvents, and some minimal blending with a pencil blender like Caran d'Ache full blender.
Koh-i-noor black drawing paper has very thin pages but the surface is truly amazing to work on. It is very smooth with just the right paper tooth to grab the color. The in & out pages feature is also really great because I can take a page out, draw on it, and then put it right back into the album for storage.

These are some of my drawings completed on koh-i-noor drawing paper.
In my comprehensive video course you'll see me draw on this and other papers. Subscribe to my monthly e-mail to be the first to know about its release!
How to draw a portrait in colored pencil
This post introduces you to some experimental techniques drawing in colored pencil and more. Here you'll see how you can combine colored pencil with other art supplies, such as gold or silver marker, acetate-like paper and permanent markers. I'm not explaining the basics of the anatomy drawing here, rather I show my trial and error process in drawing portraits in mixed media. In my experience, I've learned that it's very important to find the right paper for your specific colored pencils. The same professional-grade colored pencils work differently on various papers. I find that if I use Prismacolor Premier colored pencils (that are very soft), they work best on the Stonehenge paper pads, while harder colored pencils do better on a rougher surface. Below I explain what materials I've used drawing portraits and with what results.
Artistically, I wanted to depart from expected and accepted realism and to draw a portrait that is playful and well designed. Every drawing has its movement and a color scheme that I plan out beforehand. Those who draw in colored pencil know how long and laborious the process is when a 9×12″ drawing takes up to 40 hours to complete. So planning is very important to success of the finished drawing. I usually draw from my own pictures and rarely take someone else's references because as an artist I have a vision of capturing the light and color usually absent in phone snapshots. The best investment I've made into my tools is the camera with excellent lens. I have Nikon D500 that captures an amazing range of color and tone. A lot of times I draw in colored pencil to develop my artistic ideas that I can take to oil painting.
How to make a mixed media portrait
Materials: Faber-Castell Polychromos colored pencils, Koh-I-Noor Bristol Vellum Paper, Winsor & Newton white pigment marker, Painters gold metallic marker, Grumbacher final fixative for dry media.

These colored pencils are not as soft as Prismacolor Premier, but a lot more durable and lightfast, and therefore Polychromos are becoming my favorite colored pencils. They do require a specific type of paper to work on I'm yet to find, so what I'm showing here was quite a struggle in layering the colors because these colored pencils tend to glide off the smooth page but can produce incredible detail in a small area. In the drawing of Christina the face and hair have at least 6 layers of color that may not show as such. I kept layering the color to deepen the values as much as I could.
The trick to drawing anything is to keep the overall form correct and symmetrical, while shading the image to create a variety of values. Usually students don't push their tones far enough to create enough contrast in the drawing. In portrait drawing you need to pay attention to subtle shifts in tone, general color and color temperature (warm/cool) in skin tones. These shifts in color and tone in the skin are not as drastic as in other parts of the person (hair and clothing).
I added layers of resin over my drawing on wood. But before working with resin, I used a spray varnish to protect the drawing from changing colors.
Basic art supplies I often use:
- Transfer paper: white transfer paper: https://amzn.to/3gAaPFo or https://amzn.to/2XMdBPg
- Panels: Ampersand gessobord: https://amzn.to/2WWioP1
- Mono eraser: https://amzn.to/3e6SHRw
- Kneaded eraser: https://amzn.to/3gaZWtH
- Colored Pencils: Prismacolor 36: https://amzn.to/2LUheNS | Pablo 30: https://amzn.to/2A2UhFk | Polychromos: https://www.kqzyfj.com/click-9265447-13717235?url=https%3A%2F%2Fwww.dickblick.com%2Fproducts%2Ffaber-castell-polychromos-pencils%2F%3FclickTracking%3Dtrue%26wmcp%3Dpla%26wmcid%3Ditems%26wmckw%3D20561-0369&cjsku=20561-0369
- Drawing paper: Colored paper. You must pick the SMOOTH SIDE to draw on this one: https://amzn.to/2yr59wf and https://amzn.to/2Xn0pAr | On Amazon Canson colorline, clementine hue: https://amzn.to/3bUkUJP , On Amazon Canson colorline, turquoise: https://amzn.to/3d0MQwU | At Dick Blick Canson colorline (a wide selection): https://www.tkqlhce.com/click-9265447-13717235?url=https%3A%2F%2Fwww.dickblick.com%2Fproducts%2Fcanson-colorline-art-papers%2F%3FclickTracking%3Dtrue%26wmcp%3Dpla%26wmcid%3Ditems%26wmckw%3D11273-5232&cjsku=11273-5232
- Spray varnish for drawings: https://amzn.to/2X0GEzL | DON'T buy krylon spray!
- I'm an Amazon affiliate.
How to draw a portrait in colored pencil and permanent markers
Materials: Prismacolor Premier colored pencils, Winsor & Newton pigment markers, W&N pigment marker heavy weight paper, Grumbacher final fixative for dry media.
This W&N pigment marker heavy weight paper is designed specifically for the W&N markers. It doesn't bleed through and its smooth surface is very good for colored pencil drawing in general. But you have to get used to it too because layering feels different than on other drawing papers. In this drawing Invisible I I went back and forth shading in colored pencils and markers, creating the first layer with the markers and then layering colored pencils on top, blending them with the markers and layering again. I didn't use the markers drawing the skin tones. The hair, however, have layers of markers only. I find that these markers don't layer evenly and I have to shade with colored pencils over them a lot. The main reason for me to try layering with the markers is the speed of covering the background space. Colored pencil is a very time-consuming medium and shading with the markers speeds it up by a lot. Because of their uneven layering, however, I have to shade with the colored pencil over them. What I really like about the Winsor & Newton pigment markers is their projected lightfastness of 100 years… If your materials are not lightfast, they tend to fade off the page quite quickly. Various pigments have different lightfastness rating and you may see some pigments fade much faster than the others.
The W&N heavy weight paper is much better for colored pencil drawing than their lightweight paper. The lightweight paper is just too smooth and too thin to accept the colored pencil. That's why don't buy it unless you plan on drawing with the markers only. It's great for drawing with the markers exclusively.
In my next drawing you see the initial layer done in the markers only that shows how unfinished it looks without colored pencil shading over them. So using the markers helps me to cover the surface quickly, but the refinement is achieved through regular colored pencil layering.
This is the first layer.
And here you can see how the surface of the drawing changes by applying white colored pencil over the blue marker. Whenever you want to lighten up the surface with the colored pencil, use Prismacolor Premier white pencil because it's the softest colored pencil that does the job. You have to use maximum pencil pressure to blend the colors well.
Materials: Faber-Castell Polychromos colored pencils, Koh-I-Noor Bristol Vellum Paper, Winsor & Newton pigment markers, Painters gold metallic marker, Grumbacher final fixative for dry media.
Technically, layering on bristol smooth paper is always very difficult for me using Polychromos. I find that Ploychromos don't "stick" to the surface of bristol papers. Therefore despite my efforts at multiple layering, the shading seems not quite complete. I always spray my drawings with the fixative to prevent fading and smudging. I strongly recommend the Grumbacher fixatives because they spray evenly and even out the surface beautifully. Cheap sprays don't get rid of pencil bloom and spray unevenly.
How to draw a portrait in pencil and colored pencil
Materials: Tombow graphite pencils, 4-6B, 2H, Koh-I-Noor Bristol Vellum Paper, Prismacolor Premier bronze metallic colored pencil, Grumbacher final fixative for dry media.
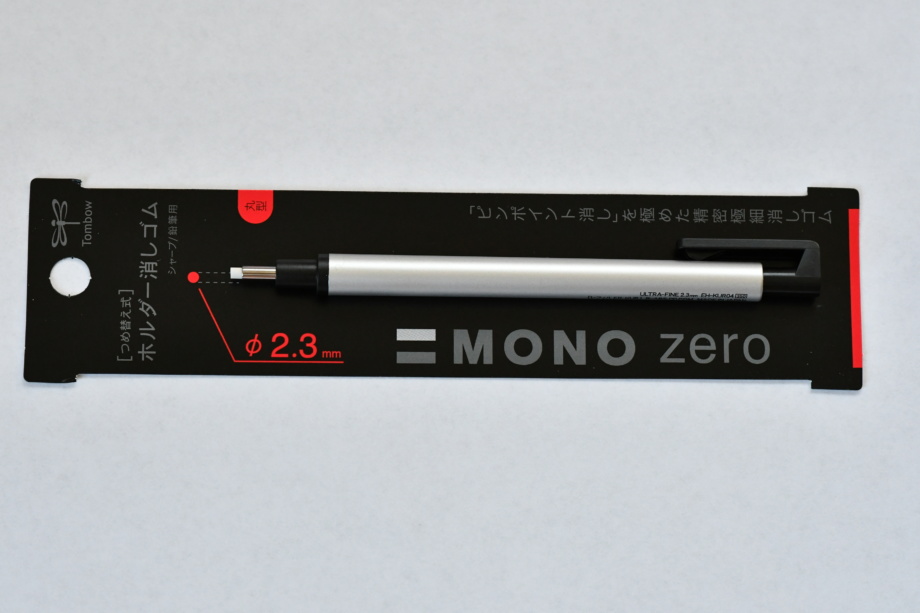
In this drawing I shaded the figure to completion first because graphite smudges and it's important not to smudge it over the colored pencil areas to keep the color clean. Once the figure was complete, I sprayed the drawing lightly, let it dry, and used metallic colored pencil to draw the leaf design to create the movement. The fixative prevented the smudging. I sprayed it one more time once the drawing was complete. For graphite work, I usually shade the darks with soft pencils (4-6B) but switch to the hard ones to develop the skin tones (2H). The only eraser I use is the kneeded eraser. It leaves no residue and lifts out the highlights beautifully. If I need to get into tiny details and to erase there, I absolutely love the Tombow Mono eraser that I order on Amazon from a store in Japan.

Koh-I-Noor drawing papers are my favorites now! Their surface and thickness is perfect for pencil and colored pencil drawing! The pages also have the unique in&out design, allowing me to put my drawings back into the pad if I need to. I absolutely love the paper's high quality surface that let's me color effortlessly, especially when using soft colored pencils.
How to make a mixed media portrait using dura-lar paper, colored pencils and markers
This is the most experimental drawing for me in terms of its surface. I wanted to create more depth in the drawing and therefore played with the paper's surface changing it to acetate-like paper. Here I'm showing my experiments in how to draw portraits step by step.
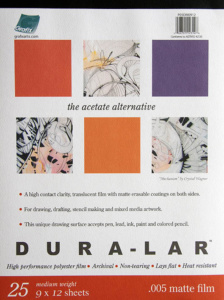
Materials: Faber-Castell Polychromos colored pencils, Dura-Lar Paper, Painters gold metallic marker, a scalpel/ X-Acto knife/ scissors for paper cutting, Grumbacher final fixative for dry media.
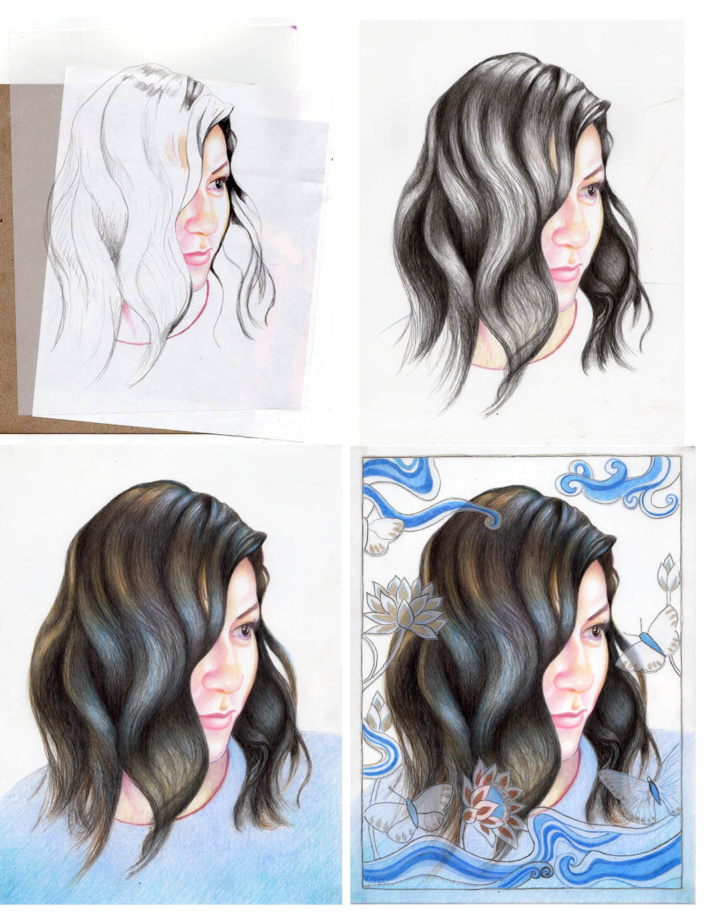
Dura-Lar is a .0005 matte and archival film that's translucent and non-tearing. This is the acetate-like paper that's quite transparent and therefore needs some backing to show the drawing in full. Either white or color acid-free backing is necessary to begin drawing because you can't really see the colors unless you put something underneath your artwork. In the first image you can see how translucent it is where both white paper and brown paper show through. I didn't use white pencil to draw the highlights, rather they show as white because of my white paper placed underneath the drawing.
In the second image at the top you see me layer basic anatomy structure and a hair pattern. I use Faber-Castell Polychromos colored pencils to draw the image. Because this paper is very smooth, it basically accepts a couple of color layers, making it difficult to create subtle transitions in tones. I've tried to use Prismacolors with this paper before, which are much softer pencils and have found it even harder to create subtle transitions in color and tone. However, the very effect of transparency can be explored a lot more, in my opinion. It's possible to place different backgrounds and photographs underneath the drawn image, creating a different sense of depth and realism.
In the third image at the bottom you see me layer as much color as possible. I must say that I was interested in drawing the hair more than the face.
In the last image you see the second layer of this transparent paper placed over the portrait drawing. I tried to cut this paper with a scalpel but found that it was really hard and small scissors worked much better, cutting out the shapes. Paper cutting turned out to be a very laborious process just like the drawing on such smooth surface, resulting in much struggle to finish the work. I connected all three pieces of paper with the archival, double-sided tape in the corners.
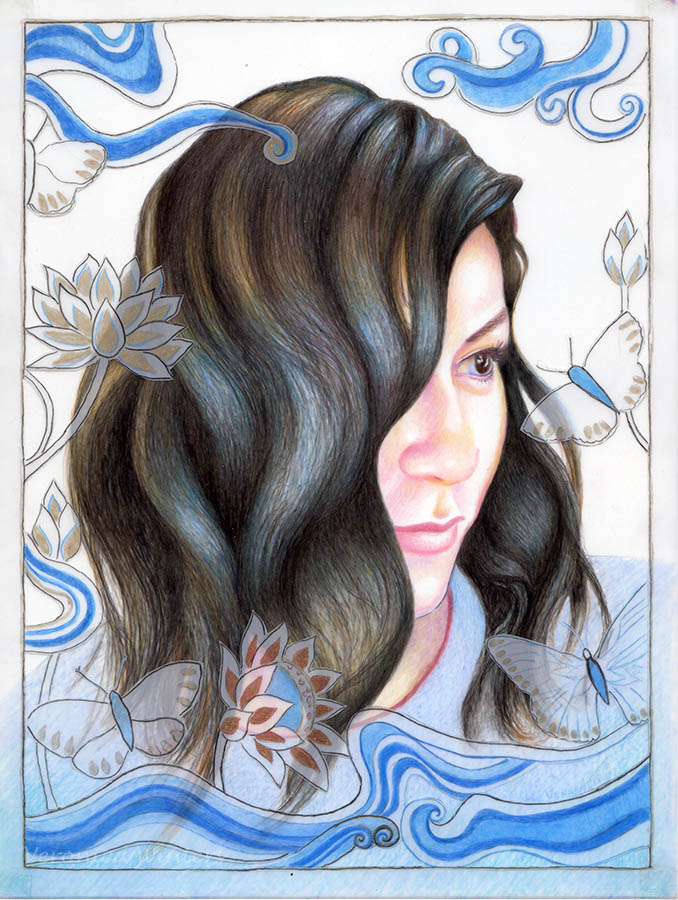
Once again I've played with the Japanese pattern I saw on my trip. I think the best way to frame such artwork would be a floater frame where the image floats in the middle sandwiched between the two layers of glass as opposed to framing with a mat.
What do you think? Have you tried these materials and techniques? Let me know! Feel free to share this post on Facebook and Twitter.
Khaleesi Drawing from Game of Thrones
There is something about the character that attracts you when you watch a movie. I think it happens because you find part of yourself present in that person. Sometimes it's not obvious and you need to search deep inside to find the connection. Khaleesi has fragile beauty of course, but she also grows to become a fierce and powerful woman.🌟🌟🌟
Drawing is an essential building block to any representational art form. Pencil drawing is something I practice as much as I can because it improves and informs me of shapes, colors and composition applied to colored pencil and oil painting.
Basic art supplies I often use:
- Transfer paper: white transfer paper: https://amzn.to/3gAaPFo or https://amzn.to/2XMdBPg
- Panels: Ampersand gessobord: https://amzn.to/2WWioP1
- Mono eraser: https://amzn.to/3e6SHRw
- Kneaded eraser: https://amzn.to/3gaZWtH
- Colored Pencils: Prismacolor 36: https://amzn.to/2LUheNS | Pablo 30: https://amzn.to/2A2UhFk | Polychromos: https://www.kqzyfj.com/click-9265447-13717235?url=https%3A%2F%2Fwww.dickblick.com%2Fproducts%2Ffaber-castell-polychromos-pencils%2F%3FclickTracking%3Dtrue%26wmcp%3Dpla%26wmcid%3Ditems%26wmckw%3D20561-0369&cjsku=20561-0369
- Drawing paper: Colored paper. You must pick the SMOOTH SIDE to draw on this one: https://amzn.to/2yr59wf and https://amzn.to/2Xn0pAr | On Amazon Canson colorline, clementine hue: https://amzn.to/3bUkUJP , On Amazon Canson colorline, turquoise: https://amzn.to/3d0MQwU | At Dick Blick Canson colorline (a wide selection): https://www.tkqlhce.com/click-9265447-13717235?url=https%3A%2F%2Fwww.dickblick.com%2Fproducts%2Fcanson-colorline-art-papers%2F%3FclickTracking%3Dtrue%26wmcp%3Dpla%26wmcid%3Ditems%26wmckw%3D11273-5232&cjsku=11273-5232
- Spray varnish for drawings: https://amzn.to/2X0GEzL | DON'T buy krylon spray!
Step by Step drawing
In this photo you see how I began my pencil drawing by blocking in the darks and leaving out spaces for the lights. Both lights and darks become the two extremes between which I create a range of tones at a later stage. I also work on the eyes in the first step to make sure they line up and rotate at the right diagonal.
Drawing Paper
I'm amazed by the quality of this paper. It's quickly becoming my favorite because Koh-I-Noor in & out pages are thick, smooth, and versatile. I love how easy it is to layer both graphite and colored pencil on it that hardly needs any blending! Also, I can place my drawings back into the pad for a beautiful presentation. I've drawn onKoh-I-Noor Bristol vellum, Bristol smooth, Colored Pencil and Black Drawing drawing papers so far. All of them are fantastic! While Koh-I-Noor Black Drawing has thin pages, the rest of them are thick, and all are smooth with a different degree of light texture present to grab the pencil. Give it a try!
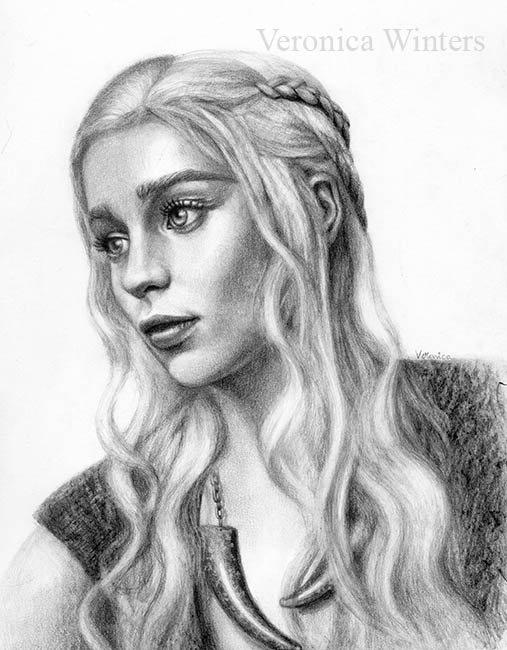
Once I'm done blocking in the values and I have developed a range of tones, I work on textures. In this drawing of Khaleesi you see the texture of clothing that I've done via rubbings. I placed a pumice stone under my paper and shaded over it with a soft pencil where the clothing should be. This rubbing gave me the initial texture I worked around in pencil to develop it further.
I also use the kneaded eraser a lot to make soft lift outs, to create subtle edges, and to clean up without leaving grease and residue on paper.
To make texture in the jewelry on Khaleesi's neck, I used some magic tape. I placed it over the shaded area, made short strokes on the tape with a ballpoint pen and lifted it out to reveal this unique texture.
Don't miss out on a great deal! Grab your tutorials bundle here.


How to draw hair in colored pencil and markers
If you work in colored pencil, you know how long it takes to complete one drawing. To speed up the process many artists use the watercolor pencils, neocolor crayons, or markers. If you feel open to some experimentation drawing hair and underpainting your backgrounds, using permanent markers may become your thing. It's my first time to use the markers and I'm sure I'll make more posts as soon as I complete more drawings with them. Below you'll find my drawing process step-by-step.
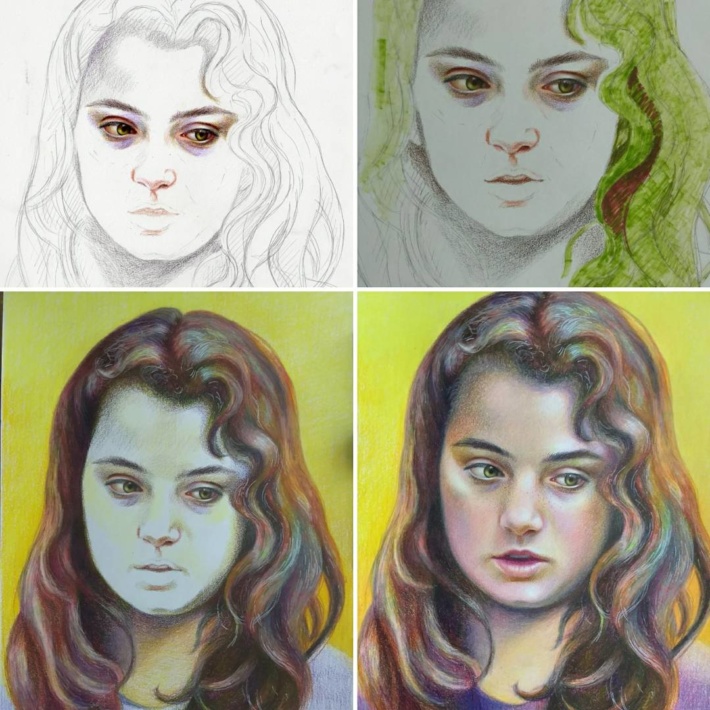
Step 1
I sketch out the face using HB pencil on Strathmore drawing medium paper. This paper has a very slight texture that becomes somewhat problematic later. If you want to try out this technique, draw on Stonehenge paper or Bristol papers that are smoother and thicker.
Step 2
My pigment markers include just a few colors. Therefore I didn't use black or brown on the hair. Instead I used a combination of sap green and red to get the darkest hue possible in the beginning. Usually, wax-based black colored pencil gives a lot of wax bloom and therefore underpainting the darks in markers is a good idea.
I also use yellow to fill in the background.

Here you can see how crazy these colors look. Because it's just an underpainting, I'm not worried about the fine details, but I watch for major patterns and waves happening in the hair.
Step 3
Once pigment markers are dry, I work in colored pencil over it. The underpainting gives me new, surprising color combinations. This is the step where I understand that smoother paper would work better with this drawing simply because layering over the markers in colored pencil still reveals paper's texture, which I thought would be eliminated by the markers' pigments.
When I'm done filling in the hair, I blend with the colorless pencil blender, and create the highlights with some fly aways, using the Sakura Pen-touch marker that has a thin, sharp point.
I fill in the face in colored pencil only.
Step 4
In my final step I spray the fixative lightly, let it dry, and adjust minor things, like edges and details. A light coat of spray fixes the paper and allows me to work on areas that become too waxy and don't accept pigment anymore.
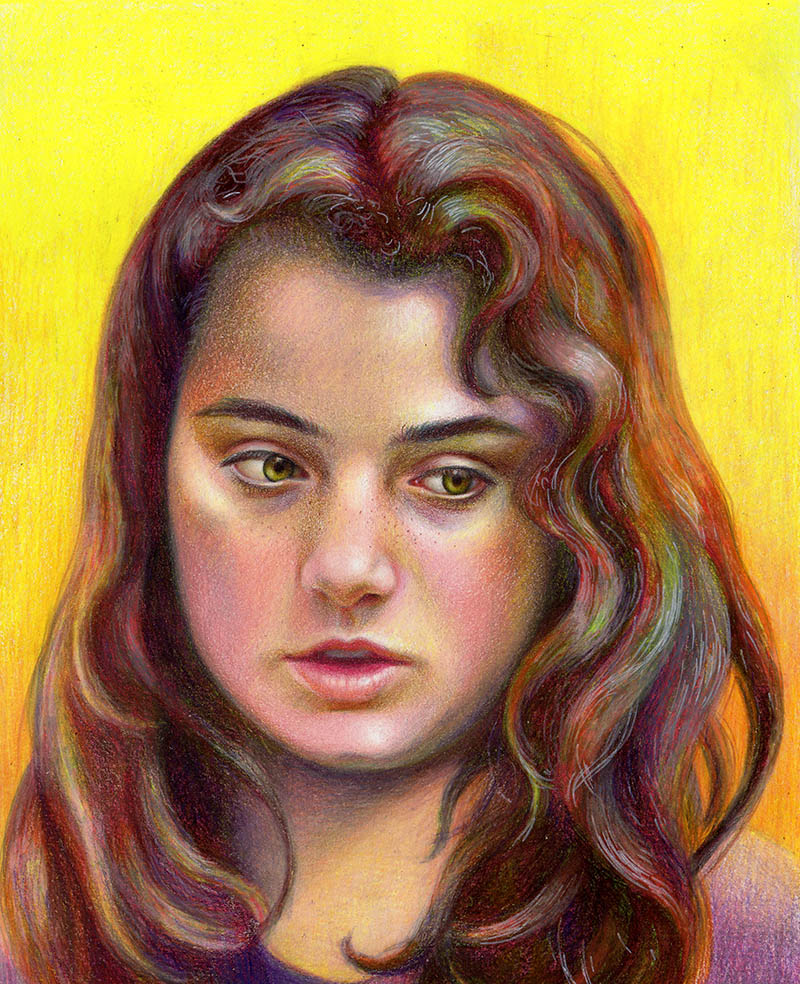
As you can see my end result is not hyper-realistic but very colorful. I'm pretty sure if I underpaint in black or brown marker, it would give me great image as well.
Basic art supplies I often use:
- Transfer paper: white transfer paper: https://amzn.to/3gAaPFo or https://amzn.to/2XMdBPg
- Panels: Ampersand gessobord: https://amzn.to/2WWioP1
- Mono eraser: https://amzn.to/3e6SHRw
- Kneaded eraser: https://amzn.to/3gaZWtH
- Colored Pencils: Prismacolor 36: https://amzn.to/2LUheNS | Pablo 30: https://amzn.to/2A2UhFk | Polychromos: https://www.kqzyfj.com/click-9265447-13717235?url=https%3A%2F%2Fwww.dickblick.com%2Fproducts%2Ffaber-castell-polychromos-pencils%2F%3FclickTracking%3Dtrue%26wmcp%3Dpla%26wmcid%3Ditems%26wmckw%3D20561-0369&cjsku=20561-0369
- Drawing paper: Colored paper. You must pick the SMOOTH SIDE to draw on this one: https://amzn.to/2yr59wf and https://amzn.to/2Xn0pAr | On Amazon Canson colorline, clementine hue: https://amzn.to/3bUkUJP , On Amazon Canson colorline, turquoise: https://amzn.to/3d0MQwU | At Dick Blick Canson colorline (a wide selection): https://www.tkqlhce.com/click-9265447-13717235?url=https%3A%2F%2Fwww.dickblick.com%2Fproducts%2Fcanson-colorline-art-papers%2F%3FclickTracking%3Dtrue%26wmcp%3Dpla%26wmcid%3Ditems%26wmckw%3D11273-5232&cjsku=11273-5232
- Spray varnish for drawings: https://amzn.to/2X0GEzL | DON'T buy krylon spray!
- I'm an Amazon affiliate.
6 drawing mistakes & how to fix them fast!
As I've been teaching drawing since 2004, I came to understanding what mistakes every art student makes on his/her path. Today I'd like to list the most common mistakes and to provide you with the solution to each of them.
1.I have crooked lines that make my drawing look uneven.
Fix: Work on the perfection of your drawing by checking the "anatomy" of your shapes in a mirror for possible mistakes. When you look at your image in the mirror, your mind reads the information differently, allowing you to see the mistakes. The same happens when you look at your artwork upside down.
2. My drawing lacks clarity.
Fix: Always shade right to the edge of your outline without leaving the uneven, white spaces. When we shade we have the tendency to lose the edge. As a result our drawing falls apart by becoming uniformly soft, lacking focus and definition. While not everything should be defined or outlined, most students have a problem of not "connecting" the numerous lines (in other words, making the shading even).
So, outline the edge with the line of the correct value (tone) and shade right to that edge to restore the original outline.
This video illustrates the concept: https://youtu.be/GaDyhypmWwY
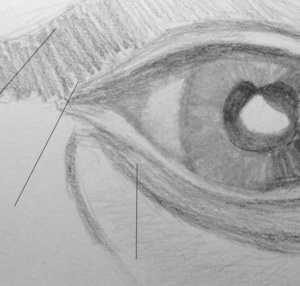
3. My drawing looks messy.
When we sketch out the lines graphite tends to smear all over the place. It's important to keep the drawing clean to give a nice impression of a finished work even if it's not finished. While it sounds obvious, you won't believe how many students make messy drawings!
If you draw in colored pencil, it's vital to keep all the graphite pencil marks super light and avoid smudging as much as possible.
Fix: the kneaded eraser is your best bet! It doesn't leave any residue on paper and erases softly.
4. The objects in my drawing escape or fall off the page.
Start your sketch with the envelope where you mark the top, bottom and sides of your objects. Then draw inside those markings without "leaving" the envelope.
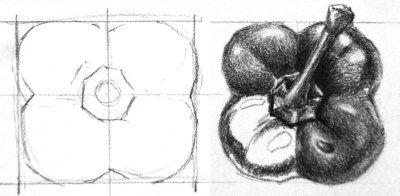
5. I focus on drawing the contour so hard, but it never looks right when I'm done.
Fix: always make directional lines first, and position your shape over that line. This technique gives you the right rotation & position of your subjects in space.
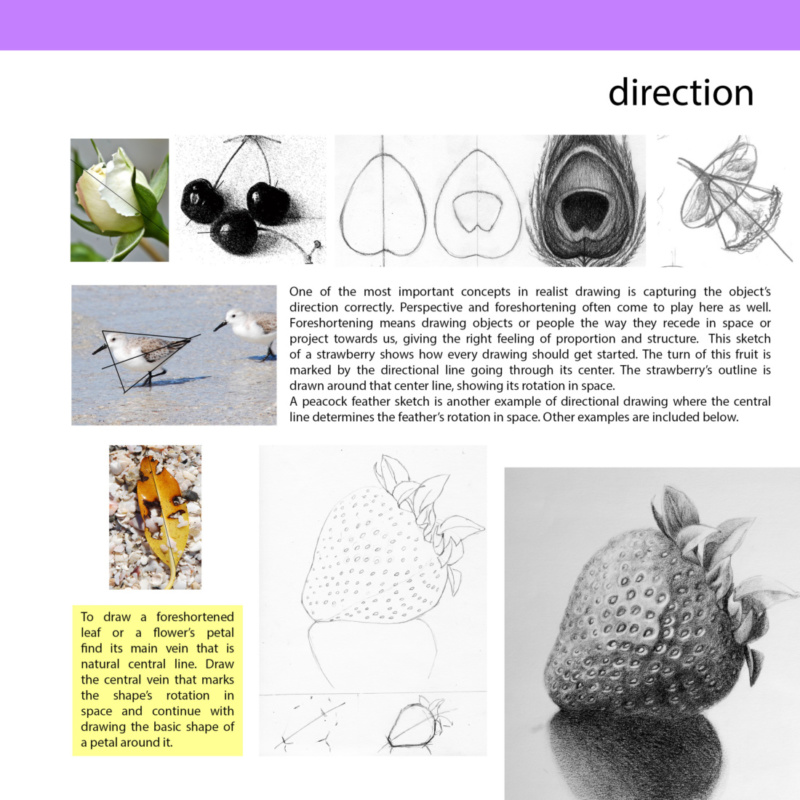
6. I don't know where to start shading.
Fix: start shading from your darkest shadows! Then continue to your mid tones and finish up with the lightest shading around the highlights.
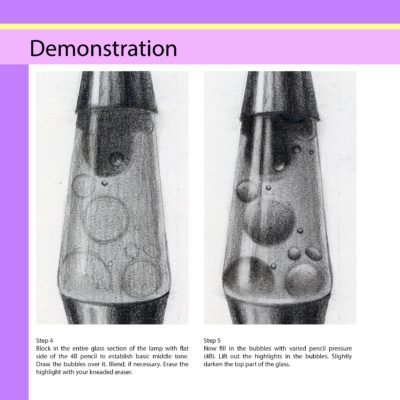
Hope it helps! And now you can go and create your masterpiece following these tips. 😁

Step by step drawing tutorials can be found here.
Basic art supplies I often use:
- Transfer paper: white transfer paper: https://amzn.to/3gAaPFo or https://amzn.to/2XMdBPg
- Panels: Ampersand gessobord: https://amzn.to/2WWioP1
- Mono eraser: https://amzn.to/3e6SHRw
- Kneaded eraser: https://amzn.to/3gaZWtH
- Colored Pencils: Prismacolor 36: https://amzn.to/2LUheNS | Pablo 30: https://amzn.to/2A2UhFk | Polychromos: https://www.kqzyfj.com/click-9265447-13717235?url=https%3A%2F%2Fwww.dickblick.com%2Fproducts%2Ffaber-castell-polychromos-pencils%2F%3FclickTracking%3Dtrue%26wmcp%3Dpla%26wmcid%3Ditems%26wmckw%3D20561-0369&cjsku=20561-0369
- Drawing paper: Colored paper. You must pick the SMOOTH SIDE to draw on this one: https://amzn.to/2yr59wf and https://amzn.to/2Xn0pAr | On Amazon Canson colorline, clementine hue: https://amzn.to/3bUkUJP , On Amazon Canson colorline, turquoise: https://amzn.to/3d0MQwU | At Dick Blick Canson colorline (a wide selection): https://www.tkqlhce.com/click-9265447-13717235?url=https%3A%2F%2Fwww.dickblick.com%2Fproducts%2Fcanson-colorline-art-papers%2F%3FclickTracking%3Dtrue%26wmcp%3Dpla%26wmcid%3Ditems%26wmckw%3D11273-5232&cjsku=11273-5232
- Spray varnish for drawings: https://amzn.to/2X0GEzL | DON'T buy krylon spray!
I'm Amazon affiliate.

How to use the artist's color wheel
Color theory seems overwhelming at first, and I find it hard to remember all of the definitions at once. This visual tool is a must-have for all realist artists because it's visual and makes it easy to reference colors and to make color choices!
In this video I explain how to use the artist's color wheel to understand color theory and how to apply it to your artistic process.
Basic art supplies I often use:
- Transfer paper: white transfer paper: https://amzn.to/3gAaPFo or https://amzn.to/2XMdBPg
- Panels: Ampersand gessobord: https://amzn.to/2WWioP1
- Mono eraser: https://amzn.to/3e6SHRw
- Kneaded eraser: https://amzn.to/3gaZWtH
- Colored Pencils: Prismacolor 36: https://amzn.to/2LUheNS | Pablo 30: https://amzn.to/2A2UhFk | Polychromos: https://www.kqzyfj.com/click-9265447-13717235?url=https%3A%2F%2Fwww.dickblick.com%2Fproducts%2Ffaber-castell-polychromos-pencils%2F%3FclickTracking%3Dtrue%26wmcp%3Dpla%26wmcid%3Ditems%26wmckw%3D20561-0369&cjsku=20561-0369
- Drawing paper: Colored paper. You must pick the SMOOTH SIDE to draw on this one: https://amzn.to/2yr59wf and https://amzn.to/2Xn0pAr | On Amazon Canson colorline, clementine hue: https://amzn.to/3bUkUJP , On Amazon Canson colorline, turquoise: https://amzn.to/3d0MQwU | At Dick Blick Canson colorline (a wide selection): https://www.tkqlhce.com/click-9265447-13717235?url=https%3A%2F%2Fwww.dickblick.com%2Fproducts%2Fcanson-colorline-art-papers%2F%3FclickTracking%3Dtrue%26wmcp%3Dpla%26wmcid%3Ditems%26wmckw%3D11273-5232&cjsku=11273-5232
- Spray varnish for drawings: https://amzn.to/2X0GEzL | DON'T buy krylon spray!
- I'm an Amazon affiliate.

How to blend colored pencils with a solvent
In this 1-minute video I show the basics of colored pencil blending with Gamsol. You can substitute Gamsol for another solvent like Turpenoid Natural.
You must have wax-based colored pencils like Prismacolor Premier or Luminance for this technique to work well for you
It works very well on dark to medium colors. I use a different technique for blending the lights, using the colorless blender/ caran'd'Ache full blender. 🙂
Basic art supplies I often use:
- Transfer paper: white transfer paper: https://amzn.to/3gAaPFo or https://amzn.to/2XMdBPg
- Panels: Ampersand gessobord: https://amzn.to/2WWioP1
- Mono eraser: https://amzn.to/3e6SHRw
- Kneaded eraser: https://amzn.to/3gaZWtH
- Colored Pencils: Prismacolor 36: https://amzn.to/2LUheNS | Pablo 30: https://amzn.to/2A2UhFk | Polychromos: https://www.kqzyfj.com/click-9265447-13717235?url=https%3A%2F%2Fwww.dickblick.com%2Fproducts%2Ffaber-castell-polychromos-pencils%2F%3FclickTracking%3Dtrue%26wmcp%3Dpla%26wmcid%3Ditems%26wmckw%3D20561-0369&cjsku=20561-0369
- Drawing paper: Colored paper. You must pick the SMOOTH SIDE to draw on this one: https://amzn.to/2yr59wf and https://amzn.to/2Xn0pAr | On Amazon Canson colorline, clementine hue: https://amzn.to/3bUkUJP , On Amazon Canson colorline, turquoise: https://amzn.to/3d0MQwU | At Dick Blick Canson colorline (a wide selection): https://www.tkqlhce.com/click-9265447-13717235?url=https%3A%2F%2Fwww.dickblick.com%2Fproducts%2Fcanson-colorline-art-papers%2F%3FclickTracking%3Dtrue%26wmcp%3Dpla%26wmcid%3Ditems%26wmckw%3D11273-5232&cjsku=11273-5232
- Spray varnish for drawings: https://amzn.to/2X0GEzL | DON'T buy krylon spray!
- Blender: https://amzn.to/2ZMvgsW
- I'm an Amazon affiliate.

How to draw a portrait in colored pencil step by step
Here you'll find the information how to draw a person in colored pencil step by step. Over the years I've drawn various subjects, but drawing people is becoming my passion. I love to draw stories and emotions though the human form. Before we start, please consider the following drawing tips that will help you find, or set up the subject for your project.
Before you start drawing:
- Pick the person to draw that will keep you interested and motivated to take your artwork to the finish line.
- Always consider and study the lighting on your model. Most colored pencil artists work from pictures. Learn to take good pictures as your reference material. To begin you may look at portrait photography online to understand how the light changes the form.
- Keep track of some professional artists working in the field, and study their artwork for composition, design, and the use of a color.
- If you just start out pick the image with a face looking straight at you. Eliminate the head's rotation for now that complicates things.
Step by step drawing demonstration:
I had a photo shoot with my model, positioning her under a single light source to give me definite shadows.
In this demonstration I use a very light grey, smooth, printmaking paper, the surface of which is similar to Stonehenge paper pad. I also draw with the Prismacolor Premier colored pencils and Luminance. I use Gamsol solvent with a synthetic brush and Caran d'Ache full blender for blending.
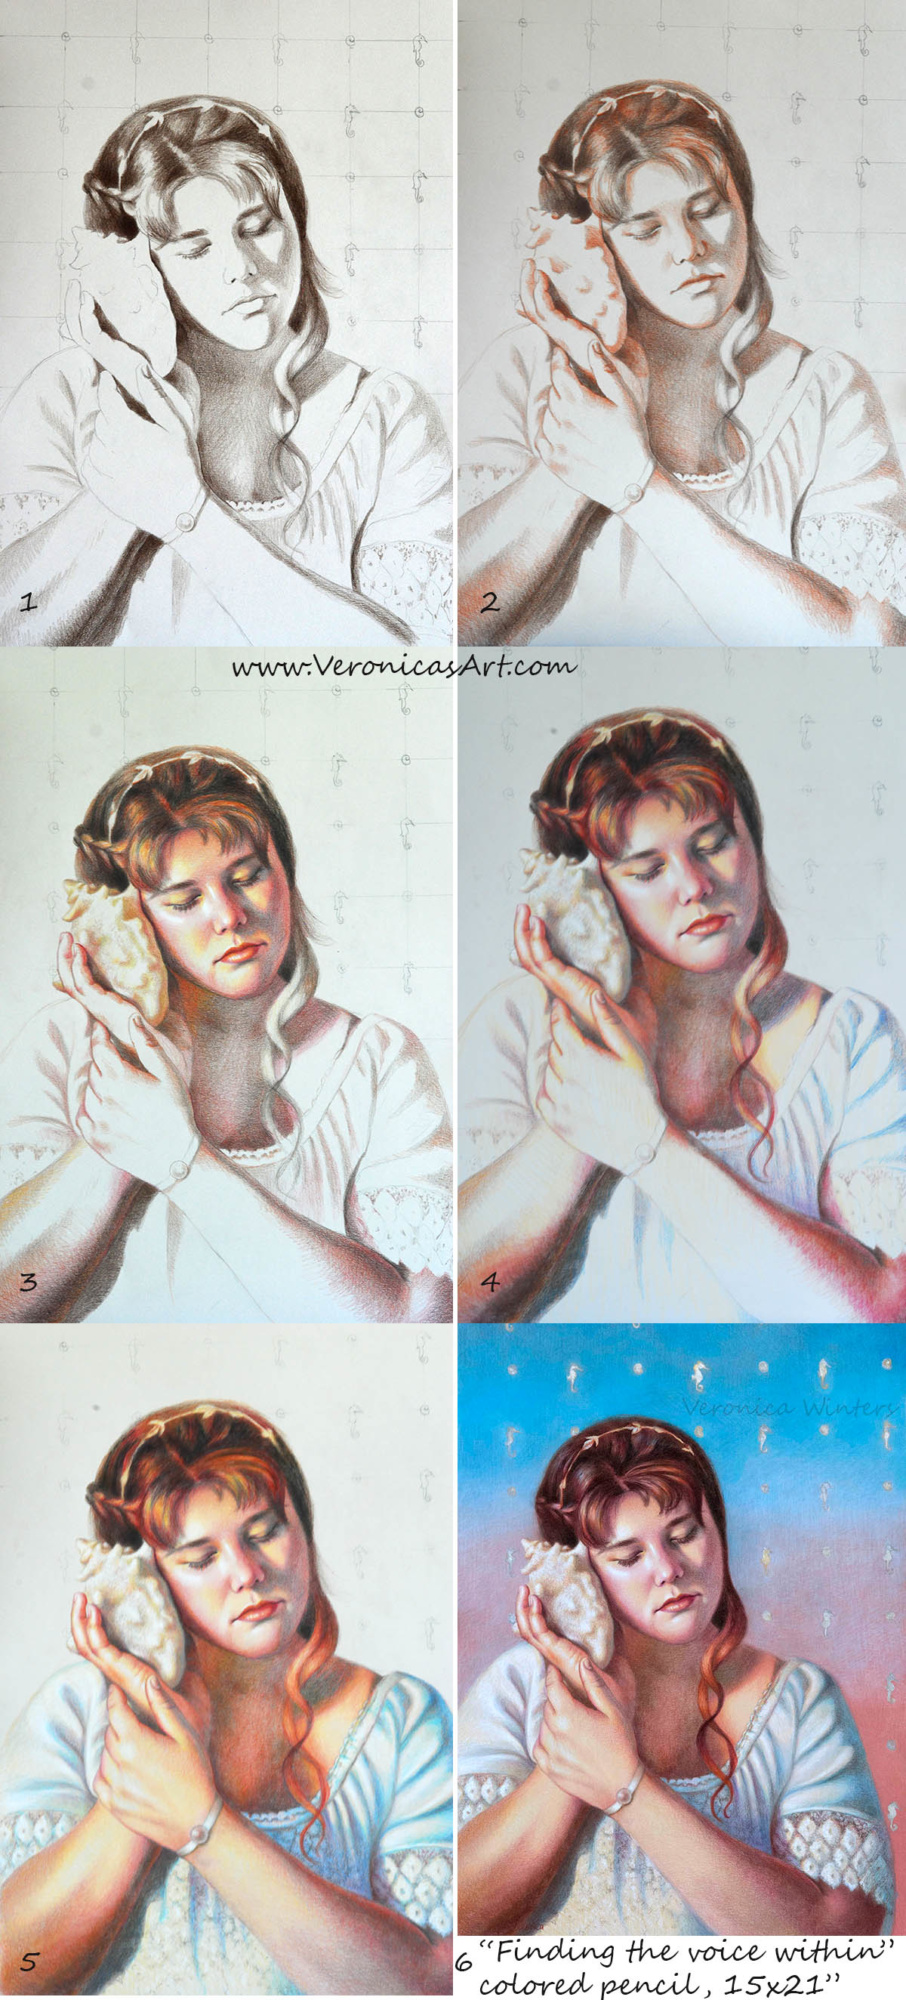
Basic art supplies I often use:
- Transfer paper: white transfer paper: https://amzn.to/3gAaPFo or https://amzn.to/2XMdBPg
- Panels: Ampersand gessobord: https://amzn.to/2WWioP1
- Mono eraser: https://amzn.to/3e6SHRw
- Kneaded eraser: https://amzn.to/3gaZWtH
- Colored Pencils: Prismacolor 36: https://amzn.to/2LUheNS | Pablo 30: https://amzn.to/2A2UhFk | Polychromos: https://www.kqzyfj.com/click-9265447-13717235?url=https%3A%2F%2Fwww.dickblick.com%2Fproducts%2Ffaber-castell-polychromos-pencils%2F%3FclickTracking%3Dtrue%26wmcp%3Dpla%26wmcid%3Ditems%26wmckw%3D20561-0369&cjsku=20561-0369
- Drawing paper: Colored paper. You must pick the SMOOTH SIDE to draw on this one: https://amzn.to/2yr59wf and https://amzn.to/2Xn0pAr | On Amazon Canson colorline, clementine hue: https://amzn.to/3bUkUJP , On Amazon Canson colorline, turquoise: https://amzn.to/3d0MQwU | At Dick Blick Canson colorline (a wide selection): https://www.tkqlhce.com/click-9265447-13717235?url=https%3A%2F%2Fwww.dickblick.com%2Fproducts%2Fcanson-colorline-art-papers%2F%3FclickTracking%3Dtrue%26wmcp%3Dpla%26wmcid%3Ditems%26wmckw%3D11273-5232&cjsku=11273-5232
- Spray varnish for drawings: https://amzn.to/2X0GEzL | DON'T buy krylon spray!
- Blender: https://amzn.to/2ZMvgsW I'm an Amazon affiliate.
- I work on the outline of my drawing on a sketch paper, and then transfer it to my high-quality drawing paper. It's crucial to get the anatomy right at this step. Therefore I take my time and check for mistakes by looking at my drawing in the mirror. I keep fixing the outlines until the portrait looks good to me. Next I create the underpainting by working from dark to light in one dominant color that I see in my photo. Here I use dark brown to complete the initial shading. I focus on shadows only to block them in with the consistency needed to develop a sense of light and shade.
- In the second step I carefully introduce the second color and slightly overlap it over the first one to create softer transition into the light.
- In the third step I focus on the face and add warmer colors (yellows and pinks) in the middle tones.
- In this step I throw the same colors I've used in the face into her neck, arms and even hair. This is important to do for color unity, so that everything ties together visually. This is the main reason why I work from general to specific, and don't draw one area from start to finish, ignoring the rest of the picture.
- I introduce the blues and lilacs into her shirt that creates a play between the warm skin tones and cool hues of the clothing. As usual I work from dark to light, so I shade the darkest folds first, then add the middle tones and finish up with the lights. Please see below how I approach drawing highlights on colored paper.
- In my last step I work on the background that compliments my subject. Here I've experimented quite a bit. I added silver acrylic paint to paint the seahorses, so they change their color slightly, depending on the viewer's position to the drawing. I din't use any Gamsol on the face because it would make the darks appear too harsh. I fixed the drawing with a final fixative for dry media, spraying it twice outside.
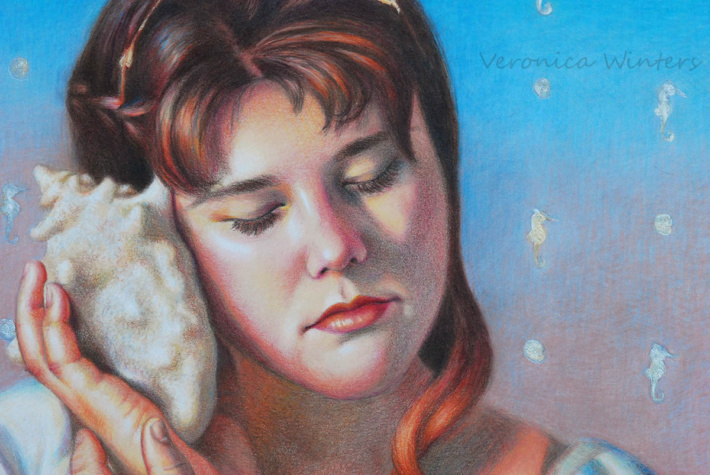
Blending & background:
Blending
There are two basic colored pencil blending techniques. One requires blending with a solvent and another with a colorless blender that looks like a pencil. Sometimes one technique is better than the other. While the solvent dissolves the pigment and moves it around fast, making the color look darker and blended, some colors may look too harsh after the application. The pencil full blender ( I recommend the one by Caran d'Ache) blends all the colors equally, but the process is very time-consuming especially if you work large, and requires a very heavy pencil application to achieve even blending.
Background
Background is important. Never draw your subject without considering the color and value of the background behind it as the background determines contrast and edges. You must have enough color on the page to do the blending with Gamsol. Otherwise, there is not enough pigment to dissolve the colors. Be conservative in your application, and never allow your solvent to run like water. Use a small brush to have a controlled application. Let the first layer dry completely.
In my drawing I painted the seahorses with the acrylic paint after the blending. You need to have a good brush for this that keeps a fine point. I didn't use any water to spread the paint around, but used it for cleaning up the brush periodically, because the acrylic paints dry super fast.
In my second layer I shaded with the same colors with a much heavier pencil pressure.
In my third layer I added light grays and blues to make softer transitions and to achieve a different effect of "soft fuzziness". I also shaded with grays to neutralize the brightness of the colors so that the background doesn't "compete" with the figure.
Drawing of white fabric and highlights:
I use pure white colored pencil only over some previously applied color underneath it, reason being white by itself is a cool, dull color that needs a punch. I shade with white with the heaviest pencil pressure over the previously applied light color. I consider the color temperature of the highlight (warm or cool) as well.
What tutorial would you like to see on my website? Post your comments below. 🙂
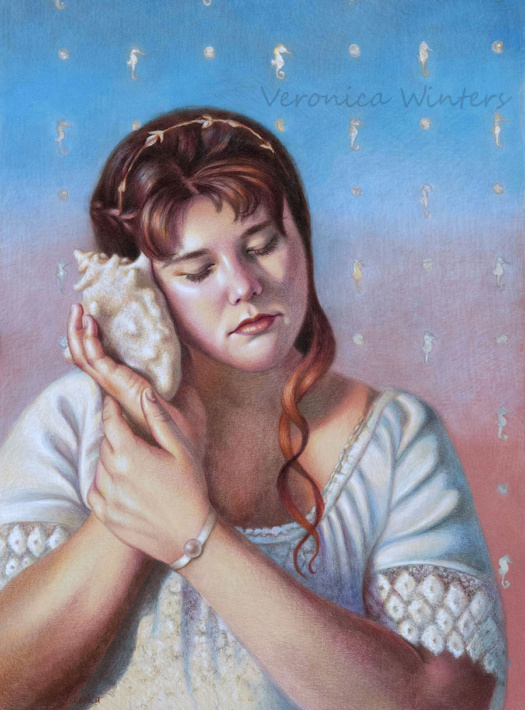
"Finding the voice within" is the artwork about understanding and trusting yourself to navigate in this world. It's inspired by the healing energy and colors of the ocean that's symbolized in the female form.

These are some of the tutorials available for download. They teach the basics of color theory, layering and blending in colored pencil.

Portrait drawing in colored pencil: as love grows
In this post I show my basic process of drawing a portrait. While I prefer painting from life, a lot of times it's not possible. So, I take pictures of a model and then draw from my monitor or a picture. I often add additional elements to my drawing that are not photographed. Here you see me place orchids to the right. Usually, I create drawings as my studies. Some of them become paintings in the future.
About the artwork
Love is a complex feeling that begins with loving yourself. Love moves and helps us grow. Sometimes it's hard to find love: it can be as elusive and fragile as these beautiful orchids, but thus we are blessed to see the beautiful things in daring places where others may see nothing at all.
Colored Pencil Drawing step-by-step:
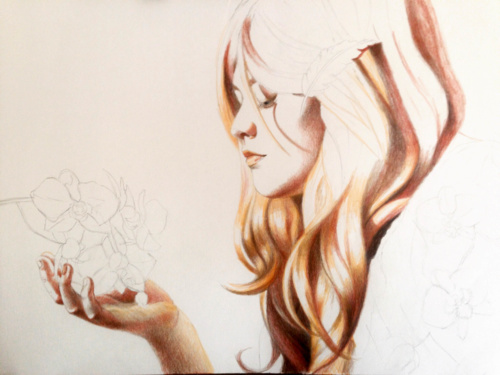
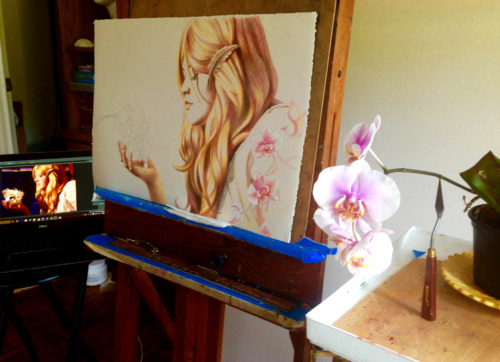
In the beginning I focus on blocking in the shadows, using dark brown and sienna brown.
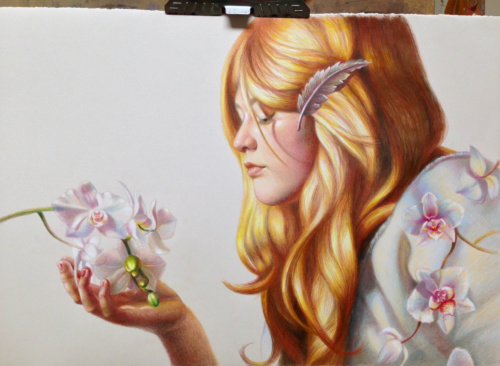
Here I add color for the middle tones.
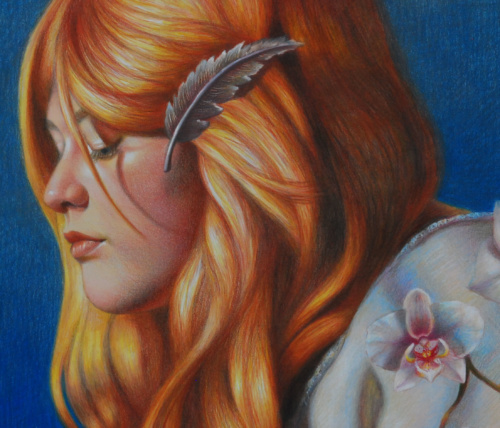
Tip: In my experience, drawing larger is actually faster than drawing small. Since colored pencil is a very slow medium, we tend to draw small. But I figured that I spent more time shading the 9×12″ pieces, had less detail and experienced more problems working small. So I increased the size of this drawing to 15″ x 22″ and it made a big difference for me. I didn't have to force and cramp every detail in there, yet it looks complete.
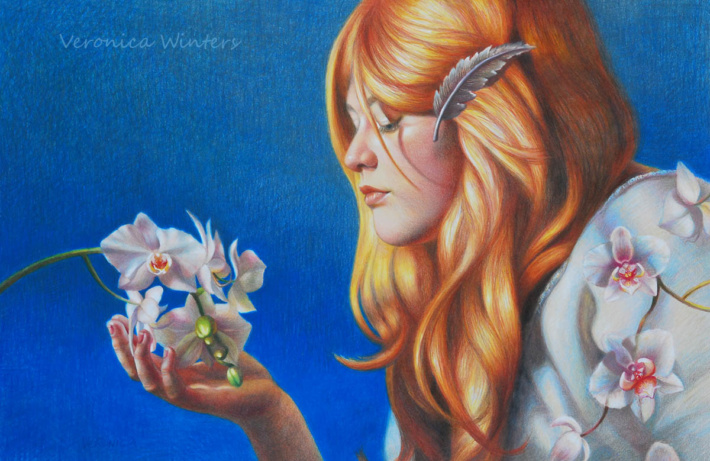
About this artwork
Love is a complex feeling that begins with self-love and self-care. Love moves and helps us grow. Sometimes it's hard to find love: it can be as elusive and fragile as these beautiful orchids, but thus we are blessed to see the beautiful things in daring places where others may see nothing at all.
Tutorials:
On my website you can find several step-by-step colored pencil demonstrations and art books available in a digital and print format.
Basic art supplies I often use:
- Transfer paper: white transfer paper: https://amzn.to/3gAaPFo or https://amzn.to/2XMdBPg
- Panels: Ampersand gessobord: https://amzn.to/2WWioP1
- Mono eraser: https://amzn.to/3e6SHRw
- Kneaded eraser: https://amzn.to/3gaZWtH
- Colored Pencils: Prismacolor 36: https://amzn.to/2LUheNS | Pablo 30: https://amzn.to/2A2UhFk | Polychromos: https://www.kqzyfj.com/click-9265447-13717235?url=https%3A%2F%2Fwww.dickblick.com%2Fproducts%2Ffaber-castell-polychromos-pencils%2F%3FclickTracking%3Dtrue%26wmcp%3Dpla%26wmcid%3Ditems%26wmckw%3D20561-0369&cjsku=20561-0369
- Drawing paper: Colored paper. You must pick the SMOOTH SIDE to draw on this one: https://amzn.to/2yr59wf and https://amzn.to/2Xn0pAr | On Amazon Canson colorline, clementine hue: https://amzn.to/3bUkUJP , On Amazon Canson colorline, turquoise: https://amzn.to/3d0MQwU | At Dick Blick Canson colorline (a wide selection): https://www.tkqlhce.com/click-9265447-13717235?url=https%3A%2F%2Fwww.dickblick.com%2Fproducts%2Fcanson-colorline-art-papers%2F%3FclickTracking%3Dtrue%26wmcp%3Dpla%26wmcid%3Ditems%26wmckw%3D11273-5232&cjsku=11273-5232
- Spray varnish for drawings: https://amzn.to/2X0GEzL | DON'T buy krylon spray!
- Blender: https://amzn.to/2ZMvgsW I'm an Amazon affiliate.

The best professional colored pencils & graphite pencils for artists
Would you like to know what makes a big difference in your drawing? Yep, you guessed it, it's the colored pencils you use! Ditch your Crayola and pick one of the brands listed here. You won't be disappointed. And to make sure of that, here is a short video explaining you the difference between a good pencil and a bad one.
Video
What makes the professional colored pencils different?
- lightfastness
- lead's softness
- durability (breakage of its core)
Brands worth your buck:

- The absolute best are Swiss madeCaran d'Ache Luminance. They have the best lightfastness rating, the strongest core and the softest lead to produce professional colored pencil drawings. They are the most expensive ones too, sold at $4 per pencil.
- Prismacolor Premier colored pencils have a very soft core and nice coverage, but not all of them are lightfast. You should download their lightfastness chart to see the rating of every pencil they have. LF-1 and LF-2 are good to go, but avoid using pencils with the # III and # IV ratings. They fade from your page within 2 years. Literally.
- Swiss made, Pablo colored pencils is a cheaper alternative to the Luminance manufactured by the same company. These have a very strong core that resists breakage, but they are not as soft and don't have as much pigment as other pencils listed here. These are great for developing details in my work. The lightfastness star rating is written on them.
- Coming from Germany, The Faber-Castell Polychromos colored pencils are different from the brands mentioned above, because they don't have the wax in them and behave more like soft pastels when you start blending them. Therefore, solvents don't work on them as well as on wax-based colored pencils. They have a very strong lead with the lightfastness rating written on every pencil.
Some of the tutorials available for download:
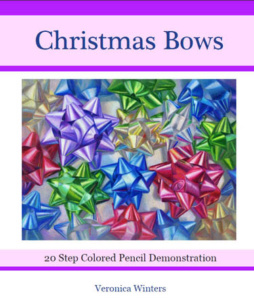
https://veronicasart.com/step-step-drawing-tutorials/
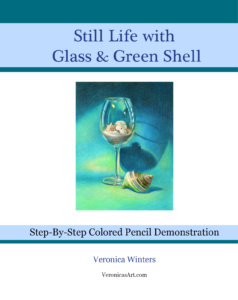
What makes the professional graphite pencils stand out from the rest?
- High quality of the lead
- Resistance to breakage
- Consistent coverage
- Various degrees of softness and hardness. (9H is the hardest pencil for the lightest shading, and 9B is the softest pencil for the creation of the darkest values).

The best graphite pencils:
- Coming from Japan, the Tombow Mono graphite pencils are the top of the line for professional drawing.
- The Cretacolor Monolith woodless pencils
- Prismacolor ebony graphite pencils are great for beginners in art that don't need to sacrifice quality over the money spent on art supplies.
- The Faber-Castell 9000 graphite pencils
Of course, there are many more brands and pencils. Instead of buying a box, buy them separately at a local store or online. Work with them and then invest into the professional box of colored pencils you like best! 🙂
Basic art supplies I often use:
- Transfer paper: white transfer paper: https://amzn.to/3gAaPFo or https://amzn.to/2XMdBPg
- Panels: Ampersand gessobord: https://amzn.to/2WWioP1
- Mono eraser: https://amzn.to/3e6SHRw
- Kneaded eraser: https://amzn.to/3gaZWtH
- Colored Pencils: Prismacolor 36: https://amzn.to/2LUheNS | Pablo 30: https://amzn.to/2A2UhFk | Polychromos: https://www.kqzyfj.com/click-9265447-13717235?url=https%3A%2F%2Fwww.dickblick.com%2Fproducts%2Ffaber-castell-polychromos-pencils%2F%3FclickTracking%3Dtrue%26wmcp%3Dpla%26wmcid%3Ditems%26wmckw%3D20561-0369&cjsku=20561-0369
- Drawing paper: Colored paper. You must pick the SMOOTH SIDE to draw on this one: https://amzn.to/2yr59wf and https://amzn.to/2Xn0pAr | On Amazon Canson colorline, clementine hue: https://amzn.to/3bUkUJP , On Amazon Canson colorline, turquoise: https://amzn.to/3d0MQwU | At Dick Blick Canson colorline (a wide selection): https://www.tkqlhce.com/click-9265447-13717235?url=https%3A%2F%2Fwww.dickblick.com%2Fproducts%2Fcanson-colorline-art-papers%2F%3FclickTracking%3Dtrue%26wmcp%3Dpla%26wmcid%3Ditems%26wmckw%3D11273-5232&cjsku=11273-5232
- Spray varnish for drawings: https://amzn.to/2X0GEzL | DON'T buy krylon spray!
- Blender: https://amzn.to/2ZMvgsW I'm an Amazon affiliate.
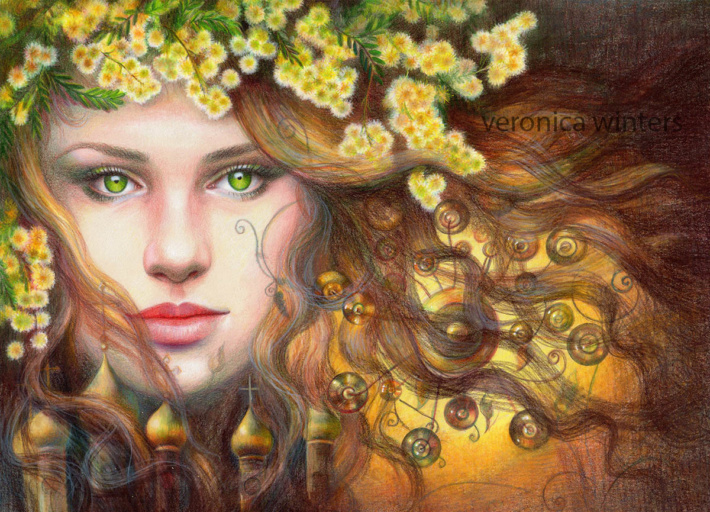
The power of story-telling in colored pencil drawing
What is art for you? What pulls you in to look at paintings? Is it the beauty that we see? The color? or an idea? A memory or emotion? It's all of the above for me.
How I create a story
Stories come to me as an emotional response to my surroundings and people I encounter. Creating a painting is falling in love with the idea, a visual element, and even the light shaping the form. I see a lot of beauty in people's faces even when they may appear ordinary to the outside world. Every person has that special, beautiful side to him or her that I so like to capture!
I usually draw or paint from my pictures, but sometimes I brake the rules and follow my aesthetic and perception, working from my photographs. When I shoot portraits, I aim to tap into a special place, to open the character of a person, to see a novel side of him or her.
I create stories around the models, and not the other way around. Therefore, it's vital for me to get the "right expression" or the "right pose" before I could proceed with the design of my artwork. It's shooting blind at times with plenty of trial and error experiences. After the general edit of my pictures, I pick one or two images to work from.
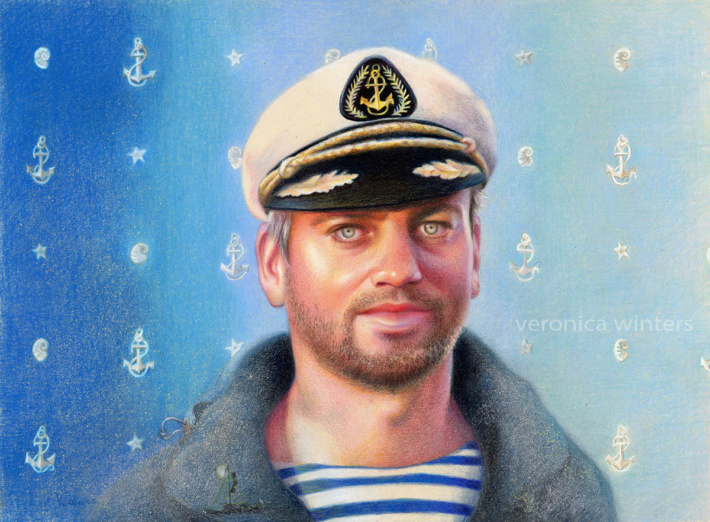
In this drawing the model is an avid lover of boats and travel. I created a nautical background here to highlight the man's romance with the sea.
Next I focus on the overall theme and color of a piece. Blues and greens tend to be calm and soothing, while the reds and yellows give an upbeat vibe. Every color carries its own significance to me and affects the perception of my subject. Thus I almost never leave the background to color last. And even if I do, I know what's supposed to be there. The idea is set in the beginning and I often draw the background simultaneously with my subject. It's much easier to maintain the color unity and the overall movement in the piece this way.
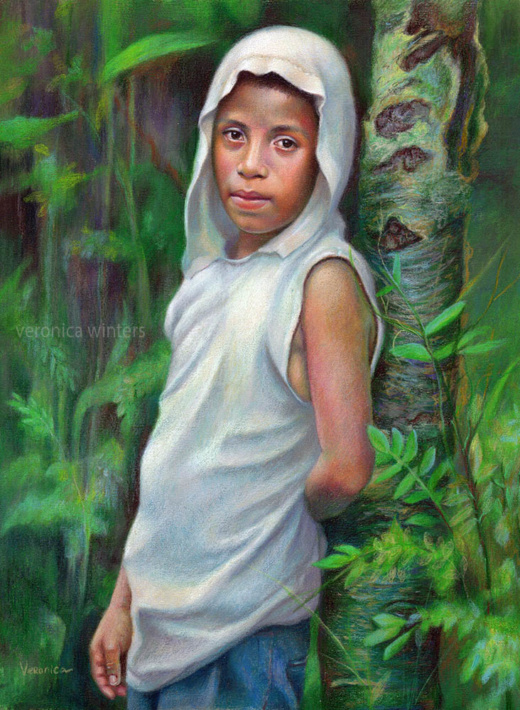
This is a very special drawing for me. I took a picture of the boy in Nicaragua. He wore shabby clothes and I didn't speak English. Yet, he was eager to pose for me as soon as he saw my Nikon aiming at him. The expression in his eyes is infinite.
I find the artwork with the narrative to be the most fulfilling to me. It lets me create a world that may exist although it doesn't. The power of storytelling is more evident in my oil paintings where I let the figures keep their secrets and give the visual enjoyment to people looking at my work.
Basic art supplies I often use:
- Transfer paper: white transfer paper: https://amzn.to/3gAaPFo or https://amzn.to/2XMdBPg
- Panels: Ampersand gessobord: https://amzn.to/2WWioP1
- Mono eraser: https://amzn.to/3e6SHRw
- Kneaded eraser: https://amzn.to/3gaZWtH
- Colored Pencils: Prismacolor 36: https://amzn.to/2LUheNS | Pablo 30: https://amzn.to/2A2UhFk | Polychromos: https://www.kqzyfj.com/click-9265447-13717235?url=https%3A%2F%2Fwww.dickblick.com%2Fproducts%2Ffaber-castell-polychromos-pencils%2F%3FclickTracking%3Dtrue%26wmcp%3Dpla%26wmcid%3Ditems%26wmckw%3D20561-0369&cjsku=20561-0369
- Drawing paper: Colored paper. You must pick the SMOOTH SIDE to draw on this one: https://amzn.to/2yr59wf and https://amzn.to/2Xn0pAr | On Amazon Canson colorline, clementine hue: https://amzn.to/3bUkUJP , On Amazon Canson colorline, turquoise: https://amzn.to/3d0MQwU | At Dick Blick Canson colorline (a wide selection): https://www.tkqlhce.com/click-9265447-13717235?url=https%3A%2F%2Fwww.dickblick.com%2Fproducts%2Fcanson-colorline-art-papers%2F%3FclickTracking%3Dtrue%26wmcp%3Dpla%26wmcid%3Ditems%26wmckw%3D11273-5232&cjsku=11273-5232
- Spray varnish for drawings: https://amzn.to/2X0GEzL | DON'T buy krylon spray!
- Blender: https://amzn.to/2ZMvgsW I'm an Amazon affiliate.
Some colored pencil techniques:
- It's vital to draw on smooth paper. I burned out drawing on textured paper every time i tried it. While Bristol smooth paper might be too smooth for you, I find the Stonehenge papers to be exceptional in terms of layering, smoothness, and color choices.
- Don't economize on professional colored pencils. If you still draw with crayola, don't expect the results you see in other students' work. 🙂 Some professional brands include: the Prismacolor premier, Pablo, and the top of the line is Luminance.
- If you are the very beginner in drawing, I strongly suggest to draw objects from life using graphite pencils. Draw one object from different points of view and under various lighting conditions. Adding color is like stepping up a notch or two. So if you are not that good drawing shapes correctly, the colored pencils is not going to fix it for you. A few of my art instruction books have demos done in graphite and then progress to colored pencil drawing. You can check them out here: http://www.veronicasart.com/Books.shtml , or find the book descriptions right here in my blog, by doing a title search.
- Join a few Facebook groups to inspire and be inspired! Sharing helps to get good feedback, if you ask for it.
- Have fun with it!!!!!!
How I draw in colored pencil step-by-step
This demonstration gives you an idea how I draw in colored pencil.
- Step 1-3
I work out the outlines on a sketch paper and then transfer the lines using the transfer paper. If it's a portrait, I always begin drawing the eyes first. Nothing works, if the eyes don't.
- Step 4
I mass out the hair with the darkest color I see in the model. I don't look at individual strands, rather focus on major shapes and masses.
- Step 5
I draw the shadows in the face.
- Step 6
I work on subtle shifts in color and value in the face. This is not easy to achieve, believe it or not. The trick is to overlap colors, instead of layering colors next to each other.
- Step 7
I add color to the hair and strengthen the highlights.
- Step 8
I add flowers as my background using the same color scheme I have in the model. For outlines of the flowers I use gold metallic pencil. I didn't draw the flowers first because I knew I'd smudge these light colors while drawing the hair.
I always spray my drawings with a final fixative to protect them from the UV rays and moisture.

My drawing methods shown on YouTube:
Shading: one mistake every beginner makes https://youtu.be/GaDyhypmWwY
The colored pencil demo of drawing a cherry: https://youtu.be/onvAG_TpV8o
Still life drawing: https://youtu.be/rP3pUQszhKU

Colored pencil drawing on archival board
I like to experiment with different surfaces drawing in colored pencil, searching for the most archival support for my art. Since most people find the colored pencil work inferior to oil painting and even pastel painting, finding the right, archival surface takes the fear away from your clients who wish to buy your artwork otherwise.
This slightly sanded, colored surface of the Amersand pastelbord is similar to the 800 grit Uart paper, which is great for soft pastel painting. Just like the Uart paper, the pastelbord has similar pros and cons.
Advantages:
- Ampersand offers a nice variety of colored surfaces: sand, dark green, white, gray, and other neutral colors. It takes much less time to shade on colored surface rather than on white.
- Artworks look vivid drawn on this board.
- This archival surface doesn't bend or crumble, stays flat at all times.
- It offers easy display without glass. Just make sure you fix your art beforehand with 3 layers of final fixative. Now you have neither glass reflections nor scare to transport the art!
- The Ampersand pastelbords come in standard sizes that makes it super easy to frame nicely!
Disadvantages:
- The sanded surface really limits me with a number of layers I can put on it.
- It "eats" my colored pencils. If you buy expensive, lightfast pencils, they don't last long drawing on this surface, and you'd have to replenish them quite often.
- It's best to use harder pencils on these boards like Pablos to fill in all the detail.
- The boards cost more than the average drawing paper, of course.
What do you think? Have you tried the pastelboards with colored pencils yet? Let me know in the comments below.


Basic art supplies I often use:
- Transfer paper: white transfer paper: https://amzn.to/3gAaPFo or https://amzn.to/2XMdBPg
- Panels: Ampersand pastelbord: https://amzn.to/2A99THg
- Mono eraser: https://amzn.to/3e6SHRw
- Kneaded eraser: https://amzn.to/3gaZWtH
- Colored Pencils: Prismacolor 36: https://amzn.to/2LUheNS | Pablo 30: https://amzn.to/2A2UhFk | Polychromos: https://www.kqzyfj.com/click-9265447-13717235?url=https%3A%2F%2Fwww.dickblick.com%2Fproducts%2Ffaber-castell-polychromos-pencils%2F%3FclickTracking%3Dtrue%26wmcp%3Dpla%26wmcid%3Ditems%26wmckw%3D20561-0369&cjsku=20561-0369
- Drawing paper: Colored paper. You must pick the SMOOTH SIDE to draw on this one: https://amzn.to/2yr59wf and https://amzn.to/2Xn0pAr | On Amazon Canson colorline, clementine hue: https://amzn.to/3bUkUJP , On Amazon Canson colorline, turquoise: https://amzn.to/3d0MQwU | At Dick Blick Canson colorline (a wide selection): https://www.tkqlhce.com/click-9265447-13717235?url=https%3A%2F%2Fwww.dickblick.com%2Fproducts%2Fcanson-colorline-art-papers%2F%3FclickTracking%3Dtrue%26wmcp%3Dpla%26wmcid%3Ditems%26wmckw%3D11273-5232&cjsku=11273-5232
- Spray varnish for drawings: https://amzn.to/2X0GEzL | DON'T buy krylon spray!
- Blender: https://amzn.to/2ZMvgsW
I'm an Amazon affiliate.
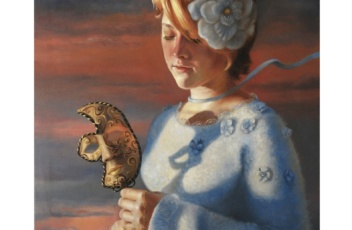
How to draw realistic highlights in pencil, colored pencil & oil paint
When we look at realist paintings, we try to figure out how artists achieve such level of realism in his or her art.
There are three elements that make drawings and paintings look three-dimensional on a flat surface:
- Accurate shapes or perfect drawing of objects
- Clear understanding how the light turns the form
- Correct placement of highlights on objects, fabric and people.
In this post I cover how to see and place highlights, using various media.
What is a highlight and how do you find it?
Highlights are the lightest lights or the whitest spots you find on your objects. Always analyze the light direction and the light source. Is it coming from the left or right, top or bottom? You'd find the lightest areas on all objects being the closest to that light source.
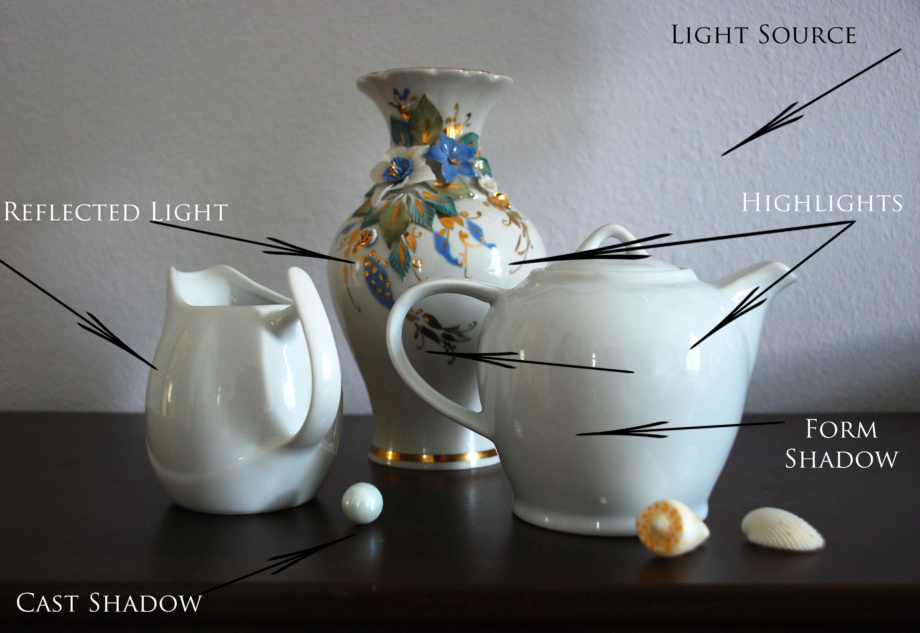
The placement of highlights on your object is logical. Analyze the light direction. If it comes from the left, then your highlights would be on the object's left hand side. If the light comes from above, then the highlights accumulate on the object's top.
If it's a vase, a cup or a bottle directional highlights would appear on the object's surface where the object usually curves or changes direction.
You may seesecondary lights in your set up as well. Usually they're light but not as strong as the highlights. Make sure they remain secondary and don't "compete" with your major few highlights. This way you create the hierarchy of light and shadow.
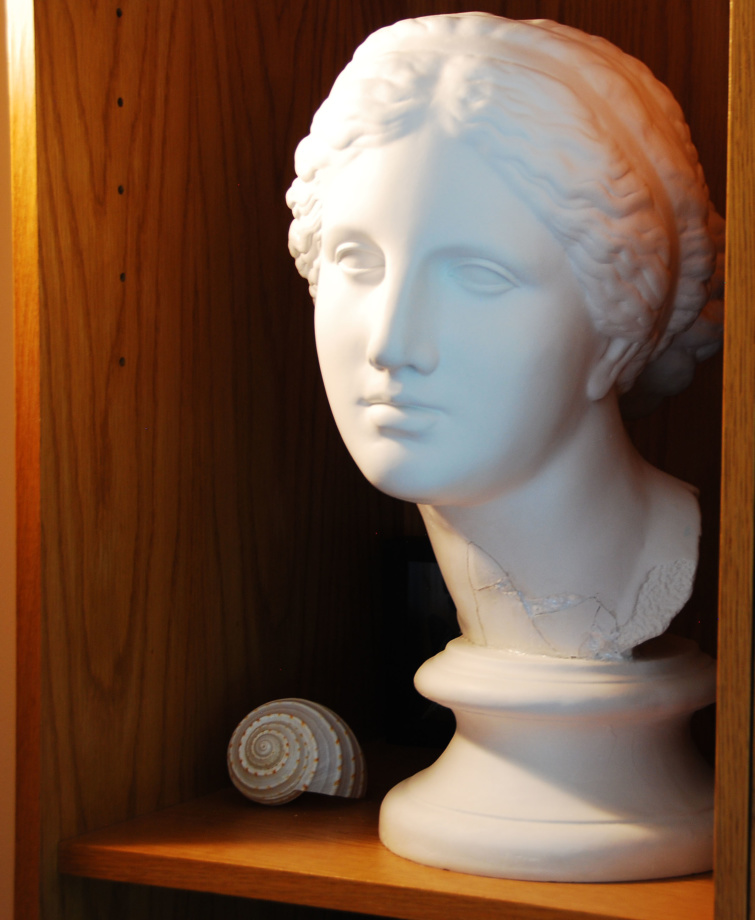
Basic art supplies I often use:
- Transfer paper: white transfer paper: https://amzn.to/3gAaPFo or https://amzn.to/2XMdBPg
- Panels: Ampersand pastelbord: https://amzn.to/2A99THg
- Mono eraser: https://amzn.to/3e6SHRw
- Kneaded eraser: https://amzn.to/3gaZWtH
- Colored Pencils: Prismacolor 36: https://amzn.to/2LUheNS | Pablo 30: https://amzn.to/2A2UhFk | Polychromos: https://www.kqzyfj.com/click-9265447-13717235?url=https%3A%2F%2Fwww.dickblick.com%2Fproducts%2Ffaber-castell-polychromos-pencils%2F%3FclickTracking%3Dtrue%26wmcp%3Dpla%26wmcid%3Ditems%26wmckw%3D20561-0369&cjsku=20561-0369
- Drawing paper: Colored paper. You must pick the SMOOTH SIDE to draw on this one: https://amzn.to/2yr59wf and https://amzn.to/2Xn0pAr | On Amazon Canson colorline, clementine hue: https://amzn.to/3bUkUJP , On Amazon Canson colorline, turquoise: https://amzn.to/3d0MQwU | At Dick Blick Canson colorline (a wide selection): https://www.tkqlhce.com/click-9265447-13717235?url=https%3A%2F%2Fwww.dickblick.com%2Fproducts%2Fcanson-colorline-art-papers%2F%3FclickTracking%3Dtrue%26wmcp%3Dpla%26wmcid%3Ditems%26wmckw%3D11273-5232&cjsku=11273-5232
- Spray varnish for drawings: https://amzn.to/2X0GEzL | DON'T buy krylon spray!
- Blender: https://amzn.to/2ZMvgsW
- I'm an Amazon affiliate.
How to place highlights in graphite drawing
To draw the highlights on your objects, reserve the brightest spots free of any shading (if possible). You can also shade the lightest area very lightly with a hard pencil (2H) and then use the kneaded eraser to pull out the highlights. This eraser doesn't leave any residue and gives a perfect soft edge around the highlights. Therefore, the highlights look natural, rather than outlined.
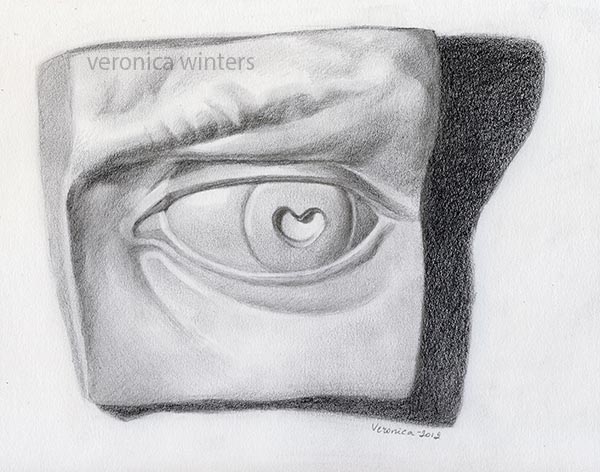
The highlights are pulled off of the page with the kneaded eraser to make the brightest areas white.
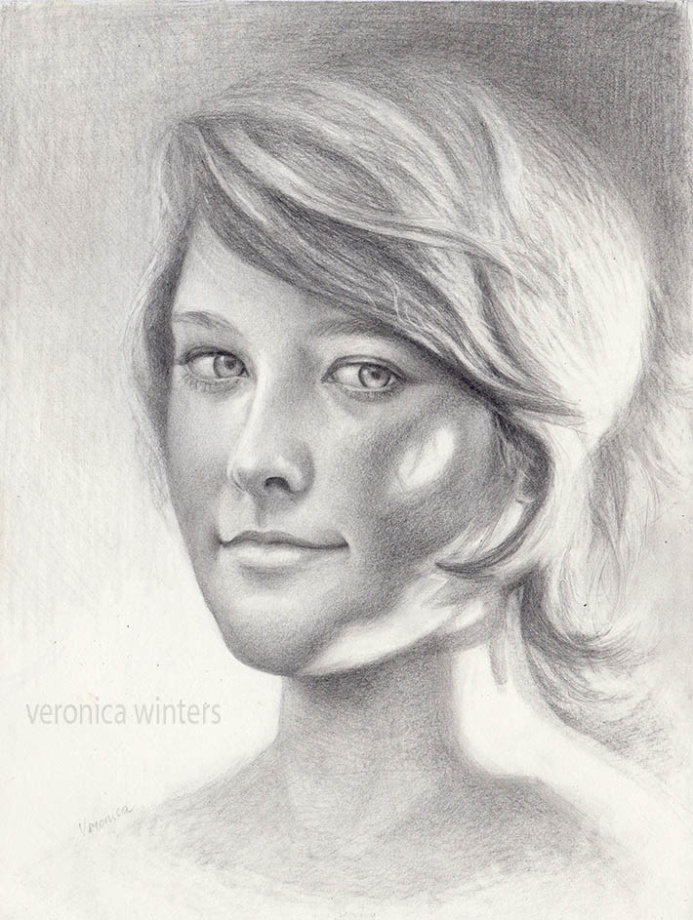

How to place highlights in colored pencil drawing
Drawing on white paper:
When I draw on white paper with colored pencils, I preserve the highlights by carefully reserving the white space around each highlight. I use the lightest colored pencils (light peach, light cream or 10% grey) to shade around these highlights. So, the whiteness of the drawing paper becomes the highlight itself.
Highlights always stay free of any shading drawing on white paper. Don't use white colored pencil to color your highlights! You will lose the luminosity. This technique is similar to watercolor painting where you paint around your highlights. However, there are times when I shade with the white colored pencil around the highlight itself to soften the edges, and to transition into the light.
Drawing on colored paper:
If I draw on colored paper, I place the highlight by mixing two colored pencils together. The first one gives me either warm or cool undertone and the second one is the white colored pencil itself. Usually I use a very heavy pencil pressure to shade over the space with white.
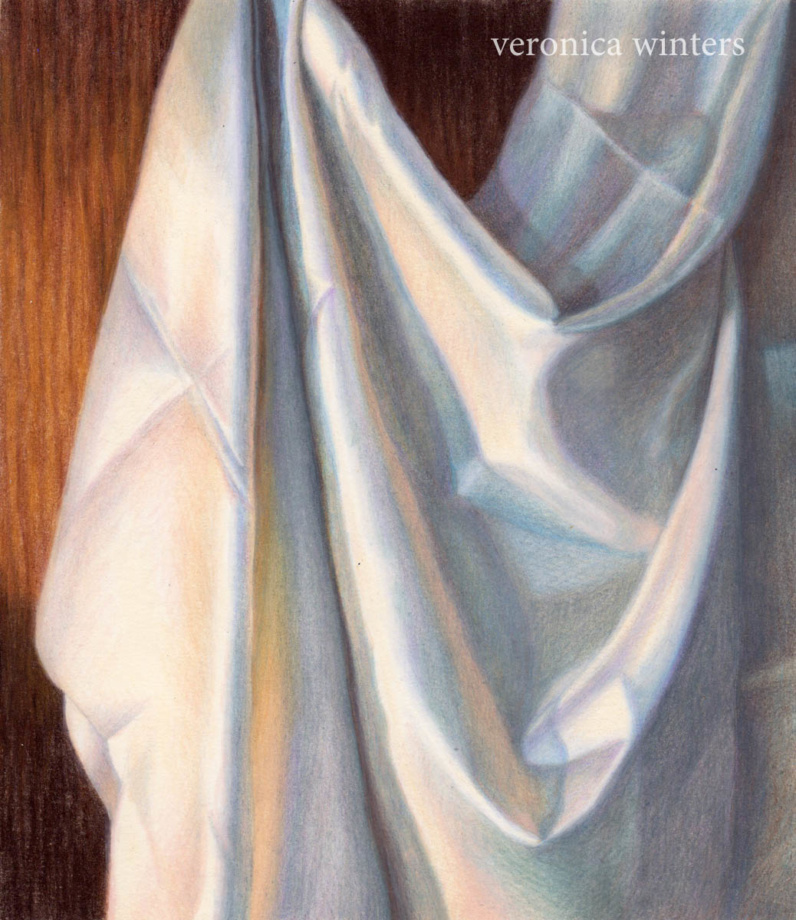
The link below shows the art supplies I usually use in my colored pencil drawing.
How to place highlights in oil or acrylic painting
Even the brightest highlights have a little bit of color in them. Analyse the light to see if they are warm (yellowish-orange) or cool (bluish-greenish), and add a touch of color to your white paint. Titanium white is a cool, dull color by itself. That's why the beginner paintings have a lot of white in them, but no sense of the light, which is created with glazes, scumbling, and layering rather than with lots of chalky, white paint.
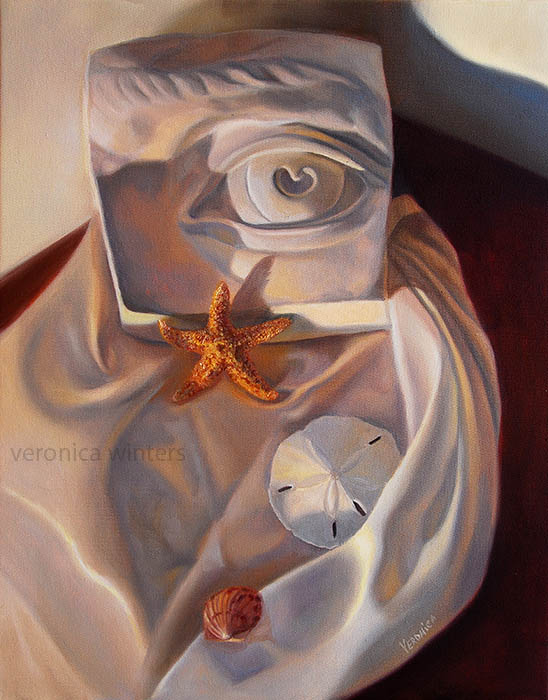
How to draw realistic shadows in colored pencil, graphite and paint
If you're interested in understanding how to draw anything realistically, you've got to understand how to see the shadows. The right placement of shadows helps artists create the three-dimensional illusion on a flat surface.
The distribution of light
To understand how to turn the form, you need to study and see how the light turns the form. This image illustrates the general idea. You always observe the light direction and try to find the highlights, form shadows, cast shadows and the reflected light. By being aware of this principle, you begin drawing and painting it on a flat surface.
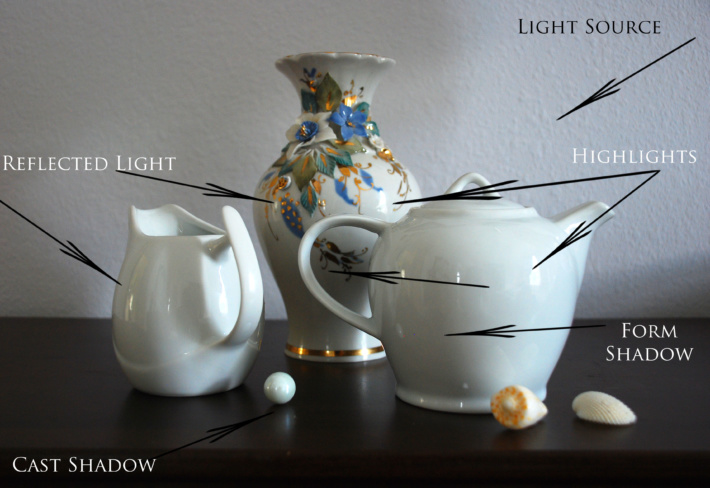
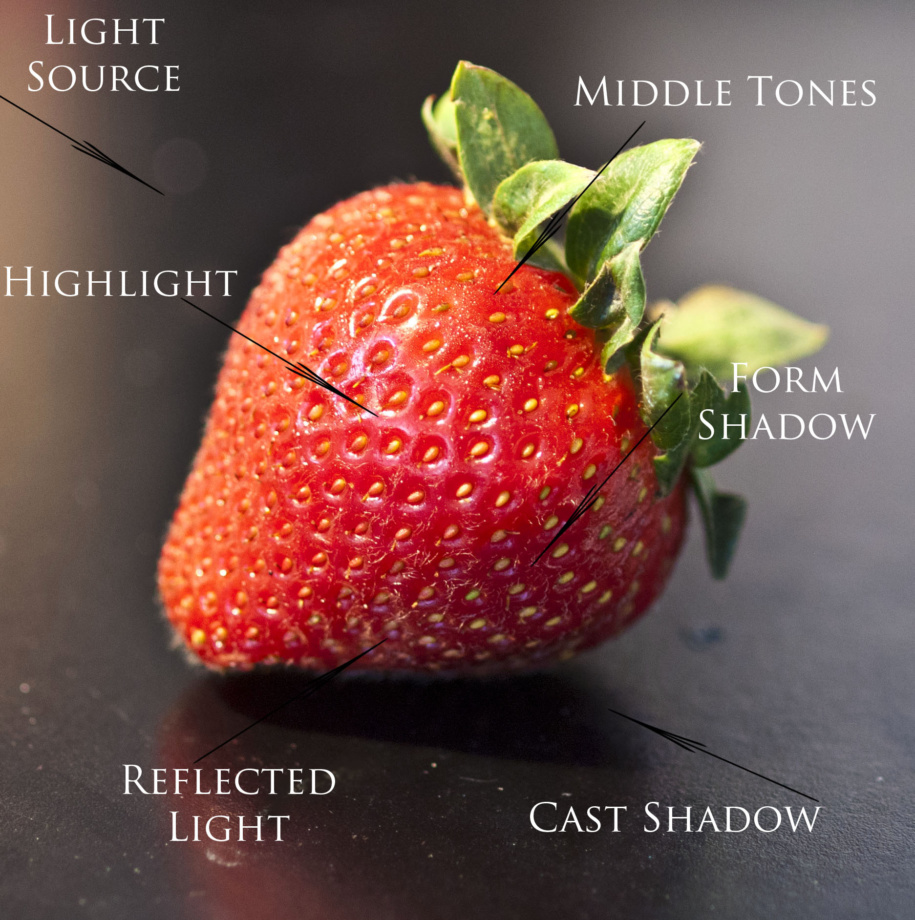
What are the shadows?
There are two types of shadows: the form (or core) shadow and the cast shadow.
The form shadow is present on the object itself, and is of the darkest value (tone). It appears where the light turns into darkness. You can see the form shadows on various objects including faces, fabric, flowers, etc. The form shadow makes the objects look three-dimensional, and if you don't see it, the objects remain flat in your artwork.
The cast shadow(s) is situated right under the object and is always attached to it.
While the form shadows give the objects the roundness or volume, cast shadows give the physical presence to objects. They "make" the object look heavy set in the environment it's in. Sometimes the cast shadows are a lot more interesting to draw than the object itself.
Some additional examples of cast shadows and form shadows:
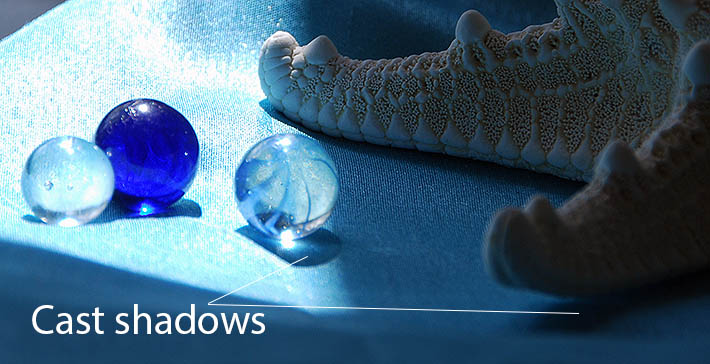
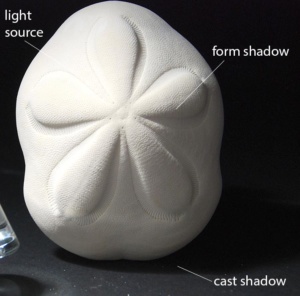
Adjusting the light
If you see no clear shadows in your still life or a photo, it's much harder to create the 3-D illusion on paper, if you're a beginner. While we usually have no problem spotting the cast shadows seen on tables or windowsills, found under the fruit or vases, we do often find it difficult to pinpoint the location of the form shadow present on the fruit/object itself. Strong, directional lighting helps to find the form shadow. Play with the light to see a variety of shadows on and under your objects.
Seeing shadows in glass:
Not every object confirms to the same formula I've described above. For instance, drawing reflective objects and glass requires a different approach to create the 3-D illusion.
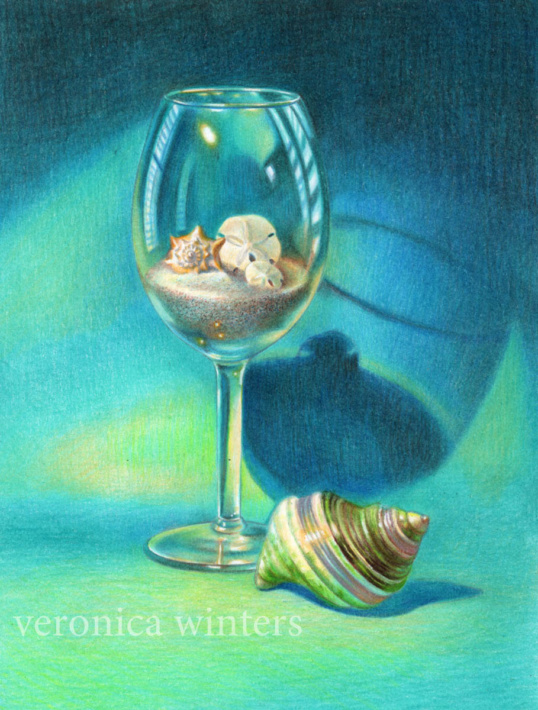
I explain how to draw a wine glass in colored pencil in this step-by-step demonstration. You can click on the image to go to the tutorials page.
How to paint glass and shadows in still life painting:
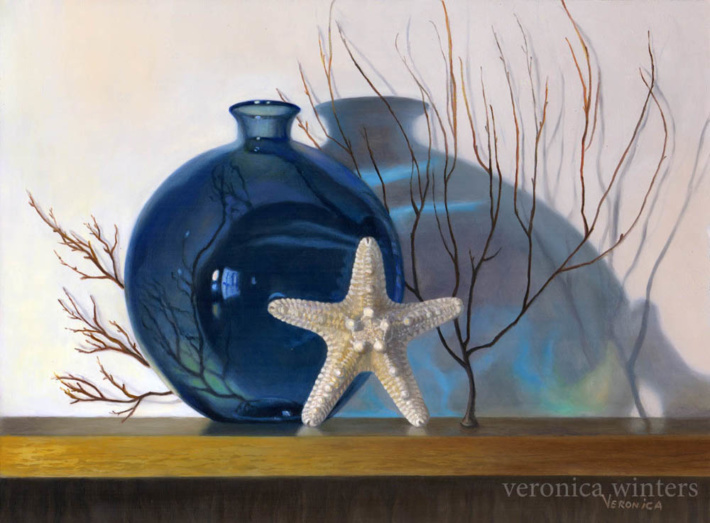

5 great art supplies to use in your drawing & painting
The following products are great tools for artists to use in their drawing and painting process. These art supplies make a big difference in my drawing and painting process due to their high quality and great features. 1. The color shaper set  These are great tools for oil painting, pastel painting and even colored pencil work (if you work on the Icarus board to blend wax-based pencils). When I paint, they help me clean the sloppy edges up. They also take the extra paint off the area I put in by accident. Moreover I can "carve into" the freshly applied paint to make a specific pattern. Made of silicone, the paint comes off their tips easily and doesn't need washing. Just wipe the color shaper off with a paper towel. Besides moving the paint around, removing or carving into it, the color shapers are great to blend the oil pastels or wax-based colored pencils (Prismacolor Premier) while heated, using the Icarus Art board. The color shaper set has several tips that you can buy separately or as a complete set. I find that I mainly use the taper point (round tip) size #2. Buy at: http://www.jerrysartarama.com/discount-art-supplies/brushes-and-palette-knives/colour-shapers/colour-shaper-sets.htm 2. Gloves in a bottle
  Thisis a truly unique product that I love! I especially use it when I paint since the lotion provides relief from a very dry skin, making a protective layer between the skin and the chemicals. A modest amount of lotion works like gloves I don't use while painting. Its unique formula bonds with the upper layer of my skin and creates the invisible protection from harmful chemicals. It's waterproof and doesn't wash off, rather it comes off naturally shredding the dead skin cells. The bottle comes in two sizes. Give it a try! http://www.jerrysartarama.com/discount-art-supplies/brush-washers-and-cleaning-supplies/brush-and-hand-cleaners/gloves-in-a-bottle.htm 3. Luminance colored pencils
  Swiss-made, Luminance colored pencils is the Cadillac of the professional colored pencils. All colors have supreme lightfastness rating. They're very durable with the soft core. The price tag is near $4 per pencil! So, guys, I've learned to create colorful pieces with very few colored pencils. You can buy them in a set or separately. http://www.jerrysartarama.com/discount-art-supplies/colored-pencils/caran-dache-colored-pencils-and-sets/caran-dache-luminance-6901-lightfast-pencils.htm and in sets http://www.jerrysartarama.com/discount-art-supplies/colored-pencils/caran-dache-colored-pencils-and-sets/caran-dache-luminance-6901-lightfast-pencil-sets.htm
4. Panels for oil and acrylic painting  These are durable, archival and acid-free surfaces that are great for painting. Remember, paintings of the old masters have survived through the centuries because they were painted on panels, not canvases. If you paint professionally and want your art to last, paint on panels. The cradled gessobords provide much greater support against humidity, so the panels warp the least. Toned, neutral gray surface of Richeson panels is great to begin painting without any additional preliminary work needed. 5. The Grumbacher final fixative for drawings and scratchboard art
 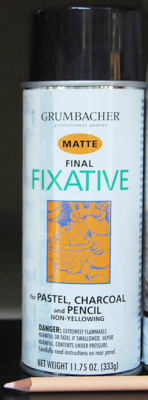 This is a truly great product that's very different from cheaper brands. It makes a very nice, even sheen, eliminating the surface's unevenness, finger prints, and other imperfections in scratchboard. Colors look nice and bright. It works great on paper too. Like other sprays, the final fixative protects your artwork from the UV-rays, moisture, smudges, and humidity. Spray it in a well-ventilated area or outside. *A disclaimer: no product was given to me by the companies mentioned here in exchange for my review.
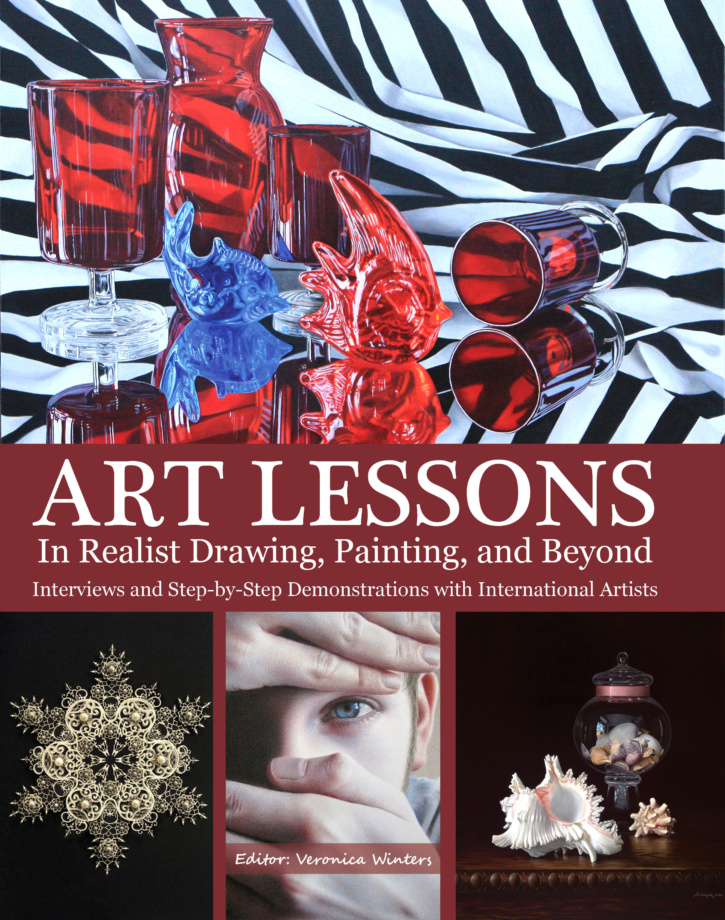
Artists share their painting and drawing secrets in the Art Lessons book available in print, on Kindle and as a digital download (pdf file) from www.VeronicasArt.com.
Basic art supplies I often use:
- Transfer paper: white transfer paper: https://amzn.to/3gAaPFo or https://amzn.to/2XMdBPg
- Panels: Ampersand pastelbord: https://amzn.to/2A99THg
- Mono eraser: https://amzn.to/3e6SHRw
- Kneaded eraser: https://amzn.to/3gaZWtH
- Colored Pencils: Prismacolor 36: https://amzn.to/2LUheNS | Pablo 30: https://amzn.to/2A2UhFk | Polychromos: https://www.kqzyfj.com/click-9265447-13717235?url=https%3A%2F%2Fwww.dickblick.com%2Fproducts%2Ffaber-castell-polychromos-pencils%2F%3FclickTracking%3Dtrue%26wmcp%3Dpla%26wmcid%3Ditems%26wmckw%3D20561-0369&cjsku=20561-0369
- Drawing paper: Colored paper. You must pick the SMOOTH SIDE to draw on this one: https://amzn.to/2yr59wf and https://amzn.to/2Xn0pAr | On Amazon Canson colorline, clementine hue: https://amzn.to/3bUkUJP , On Amazon Canson colorline, turquoise: https://amzn.to/3d0MQwU | At Dick Blick Canson colorline (a wide selection): https://www.tkqlhce.com/click-9265447-13717235?url=https%3A%2F%2Fwww.dickblick.com%2Fproducts%2Fcanson-colorline-art-papers%2F%3FclickTracking%3Dtrue%26wmcp%3Dpla%26wmcid%3Ditems%26wmckw%3D11273-5232&cjsku=11273-5232
- Spray varnish for drawings: https://amzn.to/2X0GEzL | DON'T buy krylon spray!
- Blender: https://amzn.to/2ZMvgsW
- This drawing was done on bristol vellum white paper where the highlights remained uncolored.
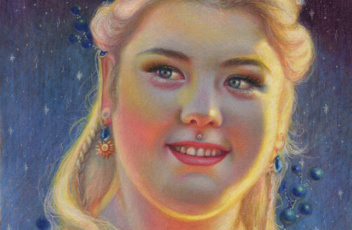
Colored pencil drawing on UART Paper: pros and cons
As I like to experiment with new art supplies once in a while, recently I gave it a try to the UART premium sanded pastel paper. It comes in various grits, feels like real sandpaper, and it's finest grit is 800, which is advertised as a perfect surface for colored pencil work. All the drawings you see below were done on paper that's tan in hue. This paper is mostly used in pastel painting and the 800 grit is designed for colored pencil drawing. But is it really that perfect? Many artists say it's their absolute favorite, but I found several challenges working on it. Here is why.
Challenges:
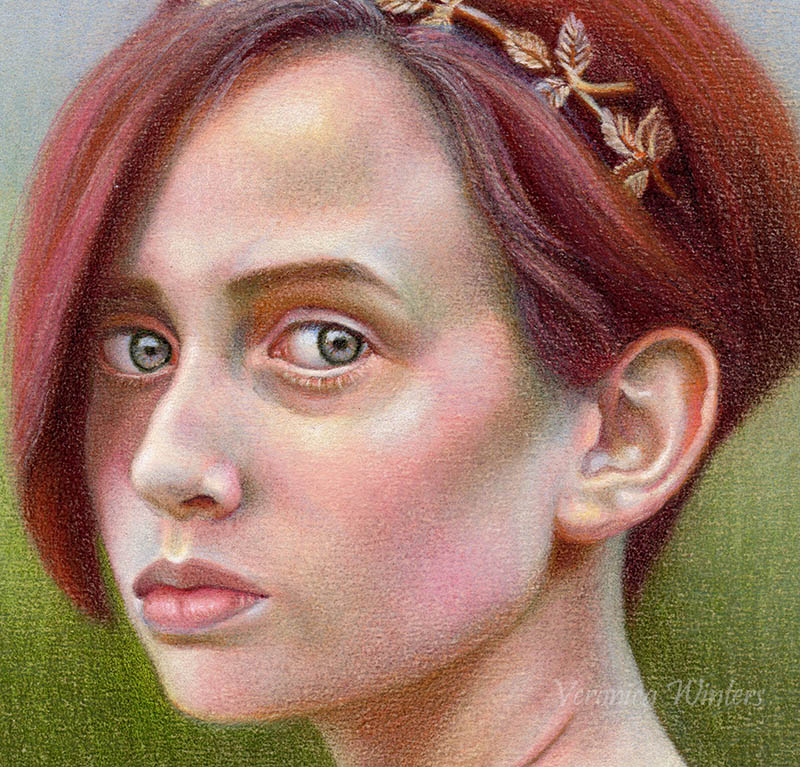
- Not smooth enough for colored pencil work, not even close. The 800 grit makes the strokes look very textural, even when pencil's point is super sharp.
The solution isn't using a paper stump for blending, rather applying Gamsol. It really "calms down" the surface and makes it a lot easier to shade with colored pencils after that. Gamsol melts the wax in pencils, spreads it around, and gives a painterly effect to my first layer. - Warning: if you are a beginner, you might be seriously frustrated with the result, because Gamsol creates loose edges on this paper, and its hard to keep the outlines intact with such approach.
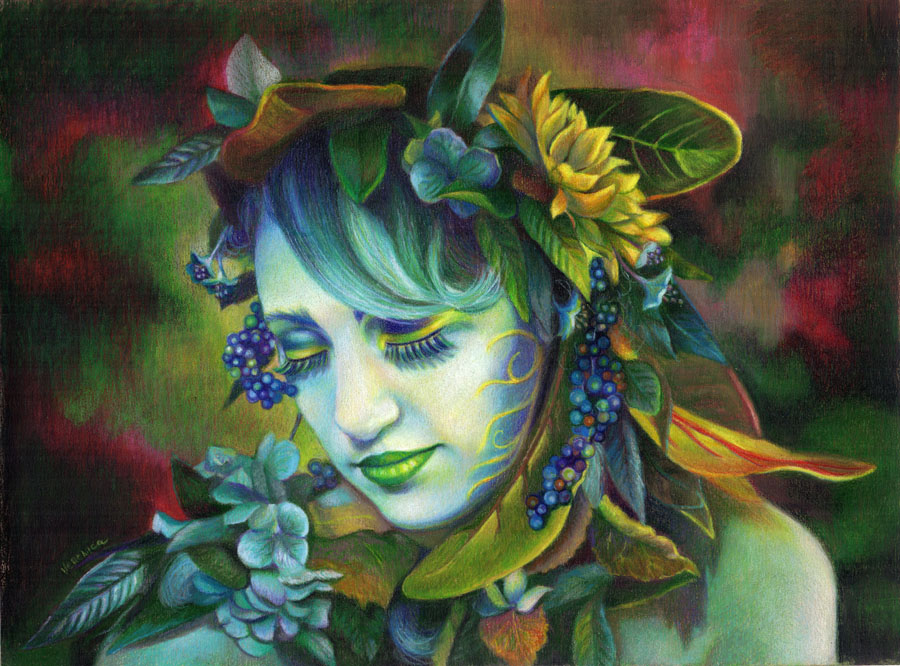
So the second solution is to use a soft, clean brush and blend the entire surface with it. Fix this layer, wait till it dries and continue working on it.
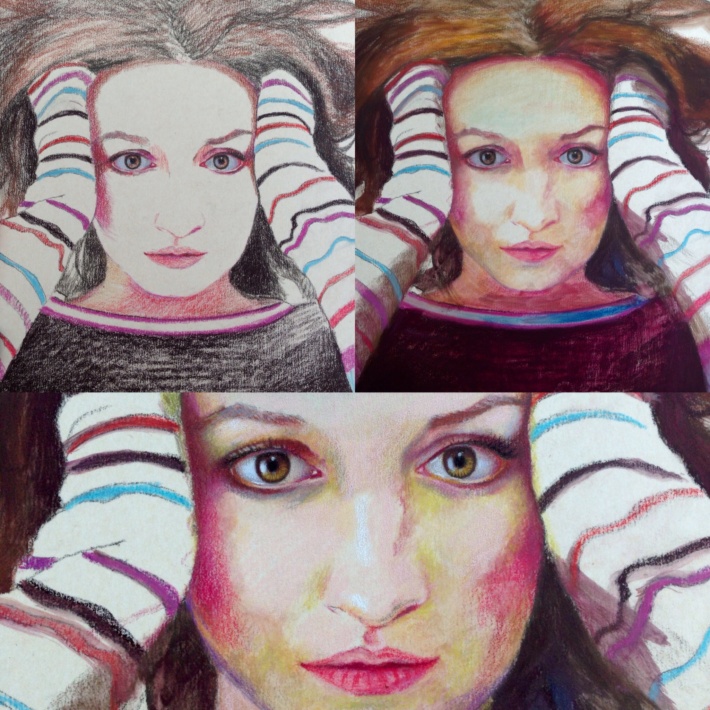
- It's easy to make and to spread dirt on paper. This is the case when you begin shading in colored pencil, especially if you use dark colors. The solution: Use the kneaded eraser to pick up the smudges and put a piece of paper underneath the palm of your hand.
- UArt paper "eats" up your pencils because the sanded surface is textural. The solution: test your colored pencils to see which ones respond better to this paper. I find that Prismacolors and Pablos work well. You can blend them with a solvent, and continue shading with soft colored pencils over this layer. Another option is to work with Polychromos because they blend and behave like soft pastels. They're quite hard, so they last longer shading on uart paper.
- Details. After the paper dries (if you use solvents), it's much easier to shade, but if you have small details like very small eyes or finger nails, etc., it requires focus to fill those details well. I use polychromos for details.
The solution: draw larger. In this post you see several drawings done on this paper. With my third drawing on this paper titled the "Colorful dreams," it became much easier to shade because I increased the scale of the portrait. The eyes are not as small in this artwork as in my previous attempts. Still, it was taking a lot more time to fight with the surface's roughness as opposed to working on smooth Stonehenge. - Pretty pricey. Selling at nearly $29 for 10-9×12 sheets per pack, you really can't allow yourself to screw up at all.
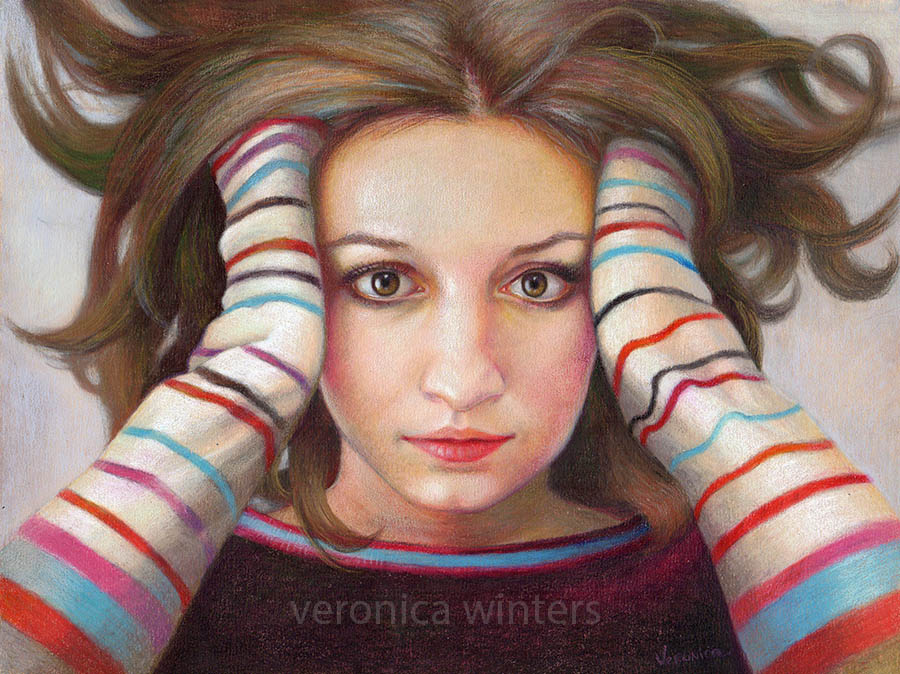
UArt paper on Amazon.
Advantages:
- The more I work on it, the more I like it. It accepts many layers of pigment, and it's really great for soft pastel painting! I used to work with soft pastels but switched to colored pencil art because I find it more fun and archival.
- UART durable surface is much stronger than a regular 80 lb. or even 100 lb. paper. It stays flat at all times.
- Colors look much brighter on this paper in comparison to drawing on white paper. Overall, colors pop.
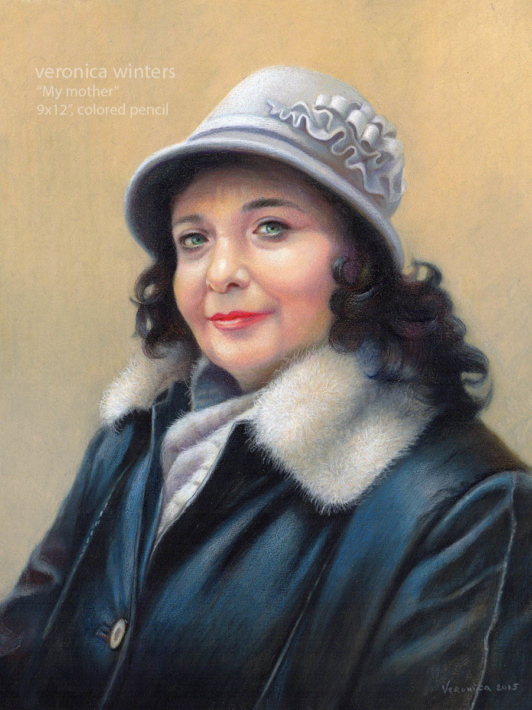
- You can make a painterly underpainting with the colored pencils and Gamsol, or use the watercolors or watercolor pencils like Neocolor underneath your work as this surface accepts various media. In my drawing titled "My mother" the painterly effect on her leather coat was a happy accident. Once I used Gamsol on dark colors, it melted with the blues I used for the highlights and created the leather coat effect.
- The paper is at its best when you work large. I discovered that 9×12″ is just too small to work on subjects with tiny details, like the boy's face here where I had a hard time keeping up with the anatomic accuracy.
- Because this paper is for pastels, the colored pencil technique where you apply layers of color should follow the pastel painting technique. What do I mean by that? Draw from dark to light. Shade with darker pencils first. Fix the layer. Continue shading with lighter colors over it. You'll see the effect it's producing. Quite awesome and so different from regular colored pencil drawing on white paper!!
Hopefully these pros and cons will let you make an informative decision buying the uart paper. 🙂

Other artists working on this paper:
Linda Lucas Hardy & Lisa Ober
If you'd like to take your colored pencil drawing to the next level, check out free previews from my video courses. Click on the image above to learn more!
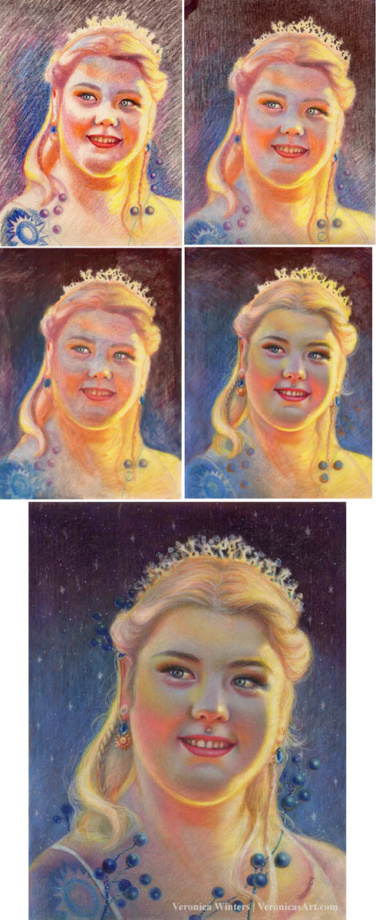
Here you can see another example of me drawing in steps on uart, 800 grit paper. In the first step I applied major lights and darks very loosely. In the second step I blended everything with a soft brush. You can see a very dark left corner there. This is how I tested the solvent on it. In the third step I applied Gamsol over the entire drawing, letting it dry. This is an underpainting. In the forth step I began layering more color aggressively. What I love about this paper that the colors looks super vibrant and I love working from dark to light on it. (I apply much darker colors on purpose to lighten them up in subsequent layers). UArt paper accepts many layers of color. In the final image I use a touch of oil-based paint pen by craftsmart to draw those tiny blue dots. This marker has a pearlescent quality that's subtle and beautiful.

How painting from life is different from drawing from a picture
Many artists draw from pictures today or at least use them as a reference material once in a while. I use them a lot in the creation of my artwork, especially when working in colored pencil. Both good and bad comes out of it. Being aware of the advantages and the limitations using photography, makes you a better artist because you learn to adjust this tool to make it more suitable for your practice. So here I list a few major advantages and drawbacks using the pictures in painting and drawing.
The good:
- The convenience of working from a picture is so tempting. We want to snap a picture of a model instead of paying her for many hours of posing.
- There are those lucky moments when the moment is just right to capture a moving subject or a facial expression.
- Fast-changing weather conditions are easy to capture in photography when I travel, and I either have no time to paint or have no capacity to carry my art supplies to the top of a mountain.
- Working from a picture in colored pencil is almost easier than drawing from life, especially when it's about capturing the reflective surfaces or real flowers. I usually keep the real object as a reference, but end up drawing from a picture.
- By taking pictures yourself in a controlled set up, it's possible to get nice images. For that I take a cardboard box used for shipping and cut two sides out, to which I glue the white tissue paper that diffuses the light. I place my object inside it and I light it up with one, two or three lights, depending on my idea. My set up is similar to this one:

This is a striking image of a cloud with the fairly balanced tones between the sky and the ocean. Yet, the color is really off here, too blue and too dark to paint a large painting well without having a sketch made from life that captures the real colors I saw taking the picture.
The bad:
- The sky is washed out, the land is too dark. This happens a lot in the pictures of the amateur photographers. You need to learn to compensate for the colorless sky by either adjusting your camera settings by 1-2 stops, or taking more pictures of the sky itself separate from the land. Many phones have the HDR function in them, when they automatically snap several pictures and combine them into one, giving the right light balance between the land and the sky.
- It's imperative not to draw from the copyrighted images or use the photos without the written permission of the photographer. It includes the photos made or taken as the movie stills. Years ago I lost a lucrative deal with one of the companies that wanted to feature my artwork on their product. I knew nothing about the copyright rules and drew a movie character they liked, but as you may guess, the image didn't get cleared by their legal department.
- If a picture you paint from is not yours, you can't enter your artwork into the juried shows, unless the artist has the permission from a photographer to do so. And even then, some national contests prohibit the use of someone else's photography because the artist must be the sole creator of his work.
- Although painting from pictures is convenient, it has hidden difficulties. Even if the quality of your camera is good enough to capture reality, it misses out on a lot of information artists put back into their drawings or paintings. In other words, the camera filters through some information that the artist responds to when he paints directly from life.
- Cameras distort reality. Colors, shapes, and shadows never look the same as we see them with the naked eye. Most lenses distort the linear perspective to such a degree that I never use a printed picture as my map to transfer the image. I have a nice Nikon D80 that gives me a wonderful range of hues. I can also change lenses on it that gives me additional advantage in painting with the relative accuracy. Yet, I still use my pictures selectively, and I don't buy into everything I see in them.
- The distortion in color and perspective also changes your perception. Camera makes a choice instead of the artist making it. As artists we make decisions what to see and what to leave out in images. For instance, you see a thin horizon line and a single tree in the wind. You feel the air's blowing coolness; you see a wide range of greens in that tree. You notice a huge cloud looming over it. Snap a picture. What do you see? The sky in the picture registers too bright in comparison to the dark, green land and the shape of that enigmatic cloud is now too light and incomplete. You lose the subtle shifts in color of the sky's along with its incomplete cloud shape. In the picture, the tree also misses your real perception of it. The range of greens that you see with your eyes doesn't look the same in the photo. Finally, you lose your feel of the nature, the violent and mighty power it exhibits while you are in the moment with its wind and the rain.
- This is especially important for artists who paint realistically in oils or acrylics. Our perception of reality is instant, and we respond to it swiftly by mixing the right colors without over-analyzing the information. When we paint from pictures, we tend to analyze the same reality a lot more, which is already adjusted by the camera for us. My paintings done from life always have this freshness and liveliness that is virtually absent in paintings done solely from pictures. Only the experienced artists can paint from pictures very well, because they have the knowledge to place or replace the elements that the camera doesn't catch or overemphasizes.
Examples of bad pictures:
- There is no sense of the directional light source here. It's hard to turn the form shading such dull objects.
- The lens' distortion makes it great to draw a cartoon, but not a fine portrait.
- Everything is uniformly gray in this picture with no clear focal point. Nevertheless, this photo can be used as a reference to understand the atmospheric condition.
- Pictures taken with a flash cut on the natural shadows and throw off the colors. Never draw from pictures taken with the flash!
- The sky is really boring here. The absence of an exciting focal point also makes it rather dull to draw.
- While the sky looks OK, the foreground is so dark it makes it impossible to use it as a reference to see the shifts in tones drawing the tree.
If you find my post helpful, please share my website with your friends!

What is positive and negative space in drawing?
In order to become a better designer of your artwork, you've got to understand the difference between the negative and positive space.
Definition
Look at this picture. What do you see here a black vase or two white profiles? If it's the black vase, you're looking at the positive space. If it's the profiles, you're seeing the negative space. Usually the positive space is the object(s) you draw, and the negative space is the background that surrounds it. Below you see a colored pencil drawing of the flower. The flower itself is the positive space, and the white background around it is the negative space.

Why it's important
The negative space can be an effective tool to define your center of interest. How? Every element in your picture with its edges and shapes is affected by tones and colors placed right next to or around it. So the negative space can balance out your composition visually with a specific tone, shape or a shadow. For instance, in this picture the flower stands out more set against the white background (the negative space). If it were the same value, the flower could have been lost.
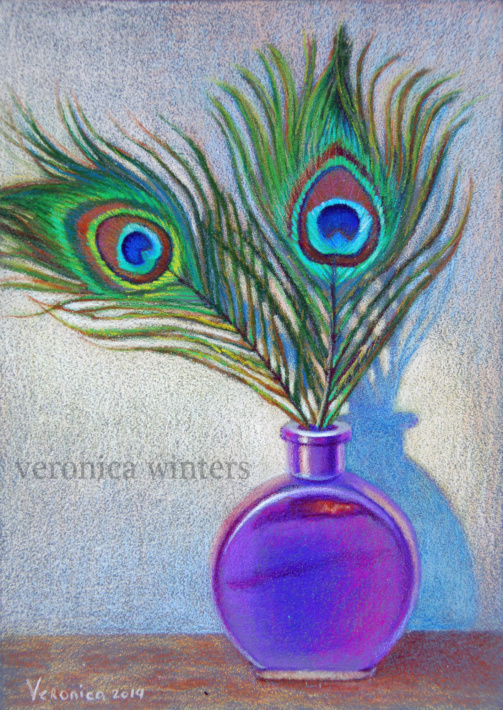
One of the most common mistakes beginning artists make, they forget to include their background space into the equation, and ask me what to do with it much later when they are almost done shading the object itself. In my mind I compose the image before I begin drawing. I consider everything: composition, values, textures, and colors not only in the object, but also in the negative space.
1. You can create contrast
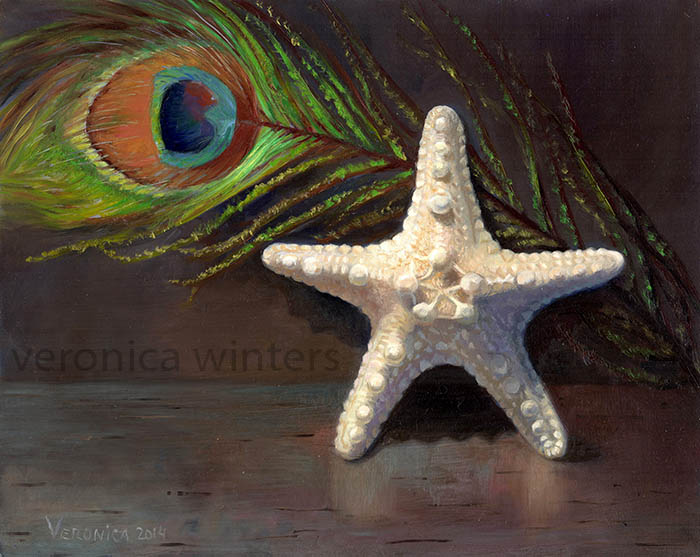 As a beginner in art, it's easy to start designing your images around the concept of contrast that occurs between the negative and positive space. If your still life is dark, set up the light background. If the object is light, it would look brighter set against the dark negative space.
2. You can measure and check distances
When you make the outline drawing of your object, you tend to focus on the curving line itself. As a result, the shape might be too long or lopsided, or foreshortened the wrong way. Instead of focusing on the object's curve itself, look at the space between those curves. Artists visually measure distances between the lines, shapes or objects by looking at the negative spaces between them to make the most accurate drawings.
3. Improves drawing accuracy
By focusing on negative shapes that look very abstract to our mind, you can see and copy them with accuracy. It improves the overall accuracy of your drawing. Check out my step-by-step tutorials here: step by step tutorials page.
Basic art supplies I often use:
- Transfer paper: white transfer paper: https://amzn.to/3gAaPFo or https://amzn.to/2XMdBPg
- Panels: Ampersand pastelbord: https://amzn.to/2A99THg
- Mono eraser: https://amzn.to/3e6SHRw
- Kneaded eraser: https://amzn.to/3gaZWtH
- Colored Pencils: Prismacolor 36: https://amzn.to/2LUheNS | Pablo 30: https://amzn.to/2A2UhFk | Polychromos: https://www.kqzyfj.com/click-9265447-13717235?url=https%3A%2F%2Fwww.dickblick.com%2Fproducts%2Ffaber-castell-polychromos-pencils%2F%3FclickTracking%3Dtrue%26wmcp%3Dpla%26wmcid%3Ditems%26wmckw%3D20561-0369&cjsku=20561-0369
- Drawing paper: Colored paper. You must pick the SMOOTH SIDE to draw on this one: https://amzn.to/2yr59wf and https://amzn.to/2Xn0pAr | On Amazon Canson colorline, clementine hue: https://amzn.to/3bUkUJP , On Amazon Canson colorline, turquoise: https://amzn.to/3d0MQwU | At Dick Blick Canson colorline (a wide selection): https://www.tkqlhce.com/click-9265447-13717235?url=https%3A%2F%2Fwww.dickblick.com%2Fproducts%2Fcanson-colorline-art-papers%2F%3FclickTracking%3Dtrue%26wmcp%3Dpla%26wmcid%3Ditems%26wmckw%3D11273-5232&cjsku=11273-5232
- Spray varnish for drawings: https://amzn.to/2X0GEzL | DON'T buy krylon spray!
- Blender: https://amzn.to/2ZMvgsW
I'm an Amazon affiliate.
Colored pencil painting made easy: the best drawing paper for your art
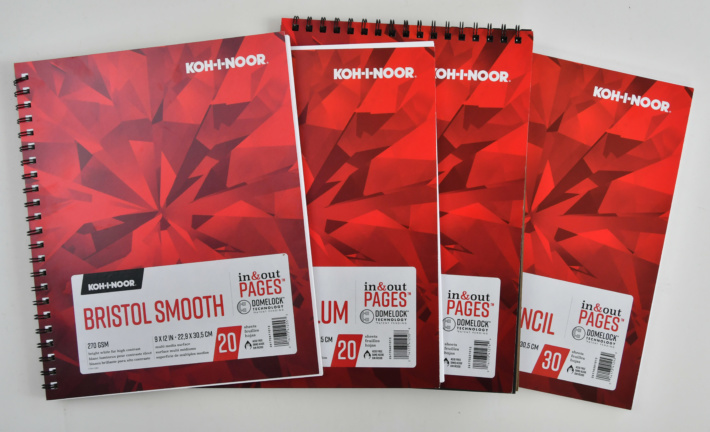
I'm often asked what paper I use for my colored pencil work. So here I list a few of my favorite drawing papers that are inexpensive and suitable for drawing in various dry media.
In general, the drawing paper has three properties that affect the quality of artist's artwork:
- the paper's tooth or texture
- the paper's weight or page thickness
- the color
Let's look at each property in detail.
Texture
It's very hard to draw on textured surface in colored pencil. Blending can be a nightmare even if you blend with a solvent. Therefore, I highly recommend drawing on smooth paper. These include the Koh-I-Noor Colored Pencil Drawing paper, Strathmore Drawing paper, Bristol smooth paper or Stonehenge papers. If you are a beginner, go to a craft store like Michael's and simply touch the pages of various papers to understand the difference in texture among them.
In the "Nicaraguan boys" I did very little blending because my colored pencils blended on their own shading on smooth, printmaking paper that is very similar to Stonehenge.
Weight
The weight of the paper affects how thick your paper is. If you use a solvent for colored pencil blending, don't work on paper that weights below 80 lb. It's just too thin to withstand washes of any solvent as it crumbles. Sketch paper is too thin and shouldn't be used for fine drawing at all.
Regular drawing paper is 80 lb., but some printmaking papers and pastel papers are over 98lb.The bristol smooth drawing paper has the greatest smoothness and 100 lb. thickness. However, some artists find it hard to shade on it, because it doesn't accept as many layers of color as less smooth papers do. Some artists use mat boards to draw because of their extreme thickness and velvety smoothness.
The Stonehenge paper pads are my favorite because of their thickness and the velvety surface that is almost perfectly smooth, yet has enough tooth to layer more colors. They also come in various light colors, which is a bonus.

Color
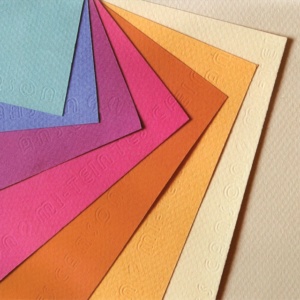
I draw on colored paper most of the time. Colored papers offer a much quicker block-in of colors, "reacting" to the colored surface in a different way. My favorite brand is Stonehenge for its surface, but I think the colors are 'weak.' To get a color punch you've got to try bright colored papers like Canson Colorline.
The color of the paper itself shouldn't be chosen based on the image's dominant color (for instance, you have an image of the blue sky and you want to pick the blue colored paper. No, to that!) Rather, pick the opposite paper color, bright orange to draw the blue sky on it.
As an example, the drawing of the Christmas bows shown here was done on the Canson Mi-Teintes pastel paper. I used a blue-gray paper color.
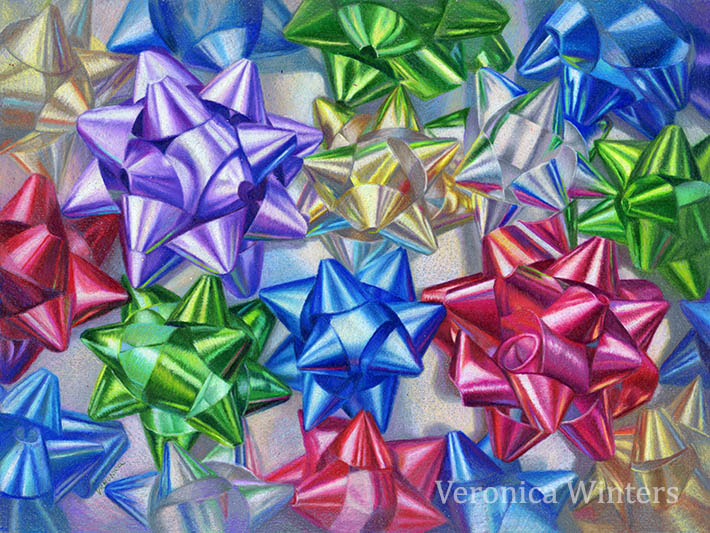
Canson Mi-Teintes drawing papers are sold in 19×25 sheets and in pads. Note that this paper is great for pastels (because of its texture), but the other (a fairly smooth) side is OK for colored pencil work as well. I must say that it's much harder to shade on this paper as opposed to the Stonehenge and thus it requires blending with a solvent most of the time.
Overall, I find that Koh-I-Noor and Stonehenge drawing papers are the best. But if I crave color, I use Canson Colorline and Strathmore Artagain papers.
Basic art supplies I often use:
- Transfer paper: white transfer paper: https://amzn.to/3gAaPFo or https://amzn.to/2XMdBPg
- Panels: Ampersand pastelbord: https://amzn.to/2A99THg
- Mono eraser: https://amzn.to/3e6SHRw
- Kneaded eraser: https://amzn.to/3gaZWtH
- Colored Pencils: Prismacolor 36: https://amzn.to/2LUheNS | Pablo 30: https://amzn.to/2A2UhFk | Polychromos: https://www.kqzyfj.com/click-9265447-13717235?url=https%3A%2F%2Fwww.dickblick.com%2Fproducts%2Ffaber-castell-polychromos-pencils%2F%3FclickTracking%3Dtrue%26wmcp%3Dpla%26wmcid%3Ditems%26wmckw%3D20561-0369&cjsku=20561-0369
- Drawing paper: Colored paper. You must pick the SMOOTH SIDE to draw on this one: https://amzn.to/2yr59wf and https://amzn.to/2Xn0pAr | On Amazon Canson colorline, clementine hue: https://amzn.to/3bUkUJP , On Amazon Canson colorline, turquoise: https://amzn.to/3d0MQwU | At Dick Blick Canson colorline (a wide selection): https://www.tkqlhce.com/click-9265447-13717235?url=https%3A%2F%2Fwww.dickblick.com%2Fproducts%2Fcanson-colorline-art-papers%2F%3FclickTracking%3Dtrue%26wmcp%3Dpla%26wmcid%3Ditems%26wmckw%3D11273-5232&cjsku=11273-5232
- Spray varnish for drawings: https://amzn.to/2X0GEzL | DON'T buy krylon spray!
- Blender: https://amzn.to/2ZMvgsW
I'm an Amazon affiliate.
Hope this information helps you in your creative endeavors. SHARE this article on social media, if you find it useful.
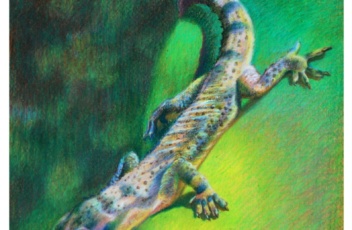
Step by step drawing in colored pencil: how to draw a gecko
In this step by step drawing demonstration you'll learn how to layer color in colored pencil on colored paper. You will also see how to use solvents to blend colored pencil. This is a fun drawing project to complete for both kids and adults alike. Materials:
- Canson's Mi-Teintes pastel paper, beige, smooth side. This paper can be replaced with a similar, professional colored paper.
- Prismacolor Premier colored pencils (colors are listed in steps); they can be replaced with other soft, colored pencils
- Turpanoid/Gamsol and a small brush for burnishing (blending)
- General's pencil sharpener
- Transfer paper, sketch paper
- Kneaded eraser
- Fixative: professional spray varnish for dry media like Grumbacher.
Basic art supplies I often use:
- Transfer paper: white transfer paper: https://amzn.to/3gAaPFo or https://amzn.to/2XMdBPg
- Panels: Ampersand pastelbord: https://amzn.to/2A99THg
- Mono eraser: https://amzn.to/3e6SHRw
- Kneaded eraser: https://amzn.to/3gaZWtH
- Colored Pencils: Prismacolor 36: https://amzn.to/2LUheNS | Pablo 30: https://amzn.to/2A2UhFk | Polychromos: https://www.kqzyfj.com/click-9265447-13717235?url=https%3A%2F%2Fwww.dickblick.com%2Fproducts%2Ffaber-castell-polychromos-pencils%2F%3FclickTracking%3Dtrue%26wmcp%3Dpla%26wmcid%3Ditems%26wmckw%3D20561-0369&cjsku=20561-0369
- Drawing paper: Colored paper. You must pick the SMOOTH SIDE to draw on this one: https://amzn.to/2yr59wf and https://amzn.to/2Xn0pAr | On Amazon Canson colorline, clementine hue: https://amzn.to/3bUkUJP , On Amazon Canson colorline, turquoise: https://amzn.to/3d0MQwU | At Dick Blick Canson colorline (a wide selection): https://www.tkqlhce.com/click-9265447-13717235?url=https%3A%2F%2Fwww.dickblick.com%2Fproducts%2Fcanson-colorline-art-papers%2F%3FclickTracking%3Dtrue%26wmcp%3Dpla%26wmcid%3Ditems%26wmckw%3D11273-5232&cjsku=11273-5232
- Spray varnish for drawings: https://amzn.to/2X0GEzL | DON'T buy krylon spray!
- Blender: https://amzn.to/2ZMvgsW
I'm an Amazon Affiliate.
Step-by-step drawing demonstration
Step 1 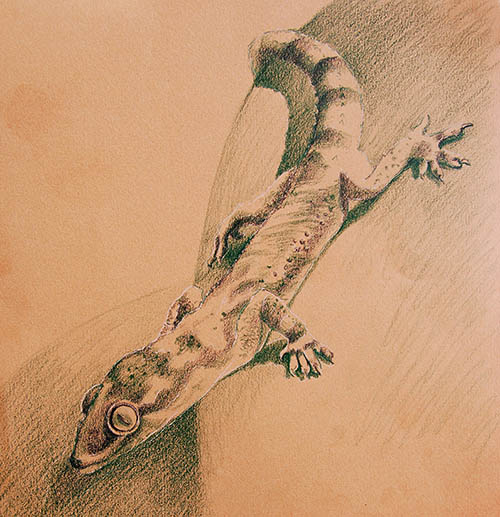 Work on the basic outlines of gecko on sketch paper. Then transfer these outlines onto your colored paper. Keep the fine drawing paper clean of any residue at all times. I usually transfer the outlines using white transfer paper manufactured by Loew-Cornell. This paper lasts for years, and the lines are very easy to erase with the kneaded eraser. MAKE SURE YOU USE THE SMOOTH SIDE OF YOUR DRAWING PAPER! When you have transferred the outline, strengthen some lines in colored pencil to separate between the shapes. The color of my colored pencil depends on the subject's basic tone. If the subject is light, I use cream colored pencil to strengthen the outlines, if the subject is dark, I use dark brown to outline some shapes. Use dark brown like raw umber and dark green to map out the dark spots and the cast shadow on the lizard's skin. Step 2
 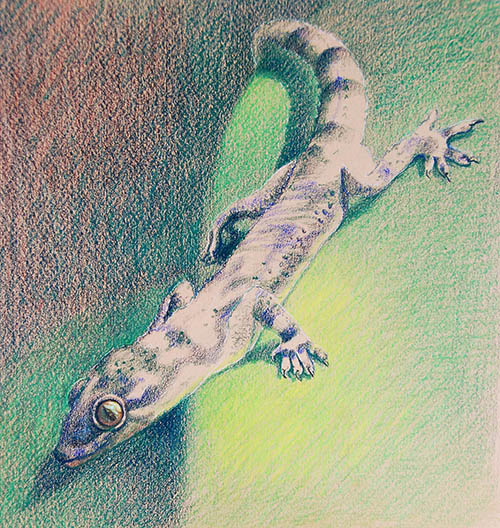 Block in the background with indigo blue and the same dark brown you've used before. (A combination of any dark colors would work well here). Add grass green and apple green in the background's middle tone. Then add spring green in the light. To strengthen the pattern on the skin, shade with a combination of violet, indigo blue, and dark green. For the eye, use a sharp point of indigo blue and dark brown to outline the circle and to draw the iris. Shade the darker values (tones) on the left side of the eye, while deliberately using lighter tones on the right. Notice that all colors look a lot more vibrant on colored paper as opposed to shading on white paper.
Step 3 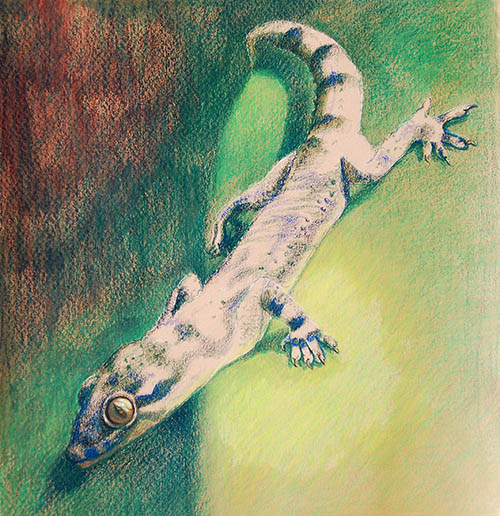 When you've completed shading in the background, use a solvent (like turpenoid or Gamsol) to blend the background and a few spots found on the gecko's skin. Let it dry completely! Make sure you use a small brush to blend the image with solvents that is not used for anything else. Solvents melt wax in the wax-based colored pencils making the surface smoother and darker. Step 4
 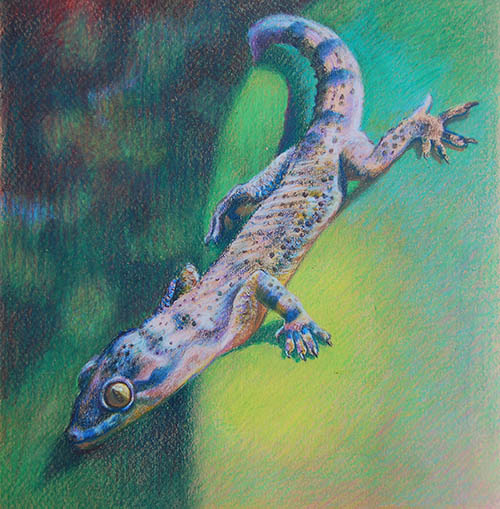 When it's dry, layer the same colors in the background and add a few more over the entire background space. The colors are poppy red, aquamarine, light aqua, and limepeel. OVERLAP COLORS! Now let's draw the body. You can shade the light values found on the skin with parma violet and cloud blue, using a very heavy pencil pressure. It's important to see how the skin pattern curves around its body. Don't create straight lines and repetitive shapes. Create volume and dimension by curving the uneven lines around its arms and feet. Step 5
 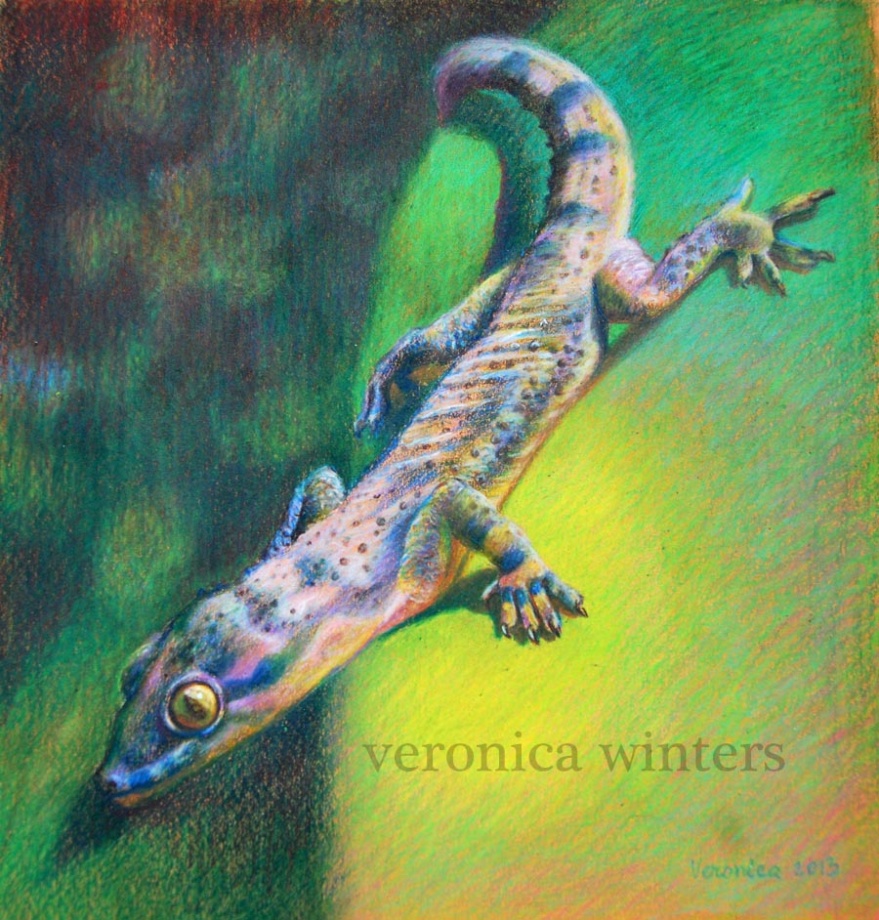 Use a touch of canary yellow and light pink to shade the reflected light on the body's bottom. Step back to look at it from the distance and check your drawing for contrast, color and shapes. If needed, re-apply the background colors once again with heavy pencil pressure. Step back. Check values and edges. Outline a few edges in its head with sharp pencils for additional crispness and focus. Browse through complete demonstrations and art books below.
This is the excerpt for your very first post.

This is the excerpt for your very first post.
How to Draw White Pencil on Black Paper
Source: https://veronicasart.com/category/art-blog/colored-pencil-techniques/
0 Response to "How to Draw White Pencil on Black Paper"
Publicar un comentario